StreamYard regularly ranks highly in our Best Live Streaming Software roundups and has recently had some awesome new updates.
It has a ton of great features and is an incredibly powerful live streaming app while still being really easy-to-use. StreamYard allows you to stream to all the major platforms including Facebook Live, YouTube Live, LinkedIn Live, and Twitch!
Some of the top features include support for multiple guests, custom overlays and streaming from the mobile StreamYard app AND desktop. It’s no wonder we get asked so frequently for StreamYard vs OBS, Zoom or BeLive comparison videos.
In this updated StreamYard tutorial, we’ll show you exactly how to use StreamYard. We’ll cover everything from the basics to more advanced features that will make your livestreams look more professional and help you grow your YouTube channel.
Here’s what we’ll cover:
- StreamYard Interface
- How To Set Up A Live Stream In StreamYard
- How To Customize A Live Stream In StreamYard
- How To Invite Guests In StreamYard
- How To Go Live On StreamYard
- How To Use StreamYard’s Giveaway Tool
StreamYard works really well on both computer and mobile. We’ll run through this tutorial on desktop, but the process is pretty much exactly the same on mobile.
Let’s get started.
StreamYard Interface
In the top right corner hit Get Started if you don’t have an account or press Login if you do.
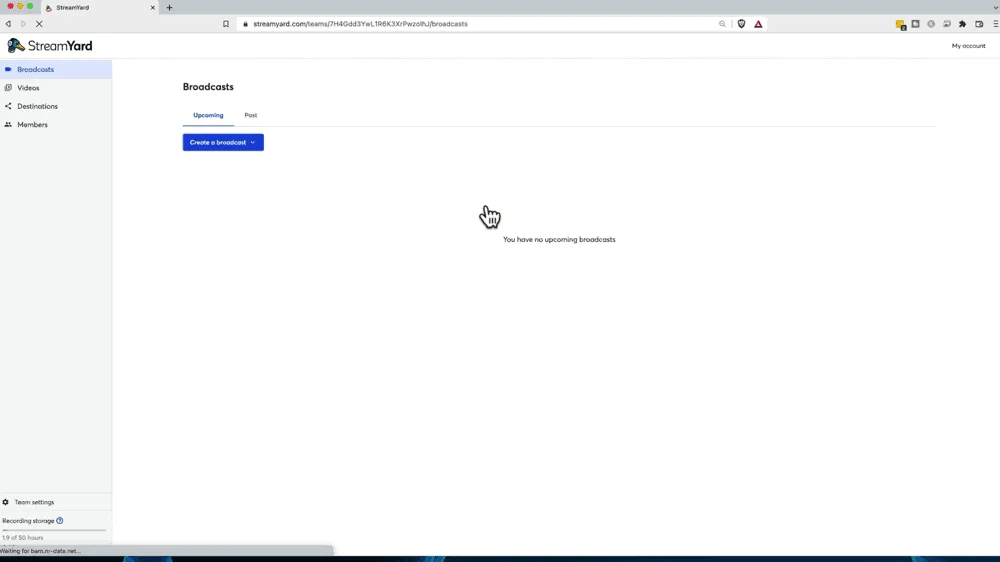
Once you’re logged in, here’s a quick rundown of what you’ll see:
- My account: Where you can access billing, referrals, account settings, and the help center
- Broadcasts: You’ll see any upcoming or past livestreams, this is also where you can create a broadcast (livestreams are called broadcasts inside StreamYard)
- Videos: All your recorded videos are stored here
- Destinations: This is where you can set up all the social media platforms you want to go live on (to add new platforms simply press the Add a destination button and it will authorize access for that platform)
- Members: Where you can give access to your team members
How To Set Up A Live Stream
Go to Broadcasts and hit Create a broadcast. You’ll have two options here: New broadcast or Use pre-recorded video. We’ll run through how to set up a new broadcast.
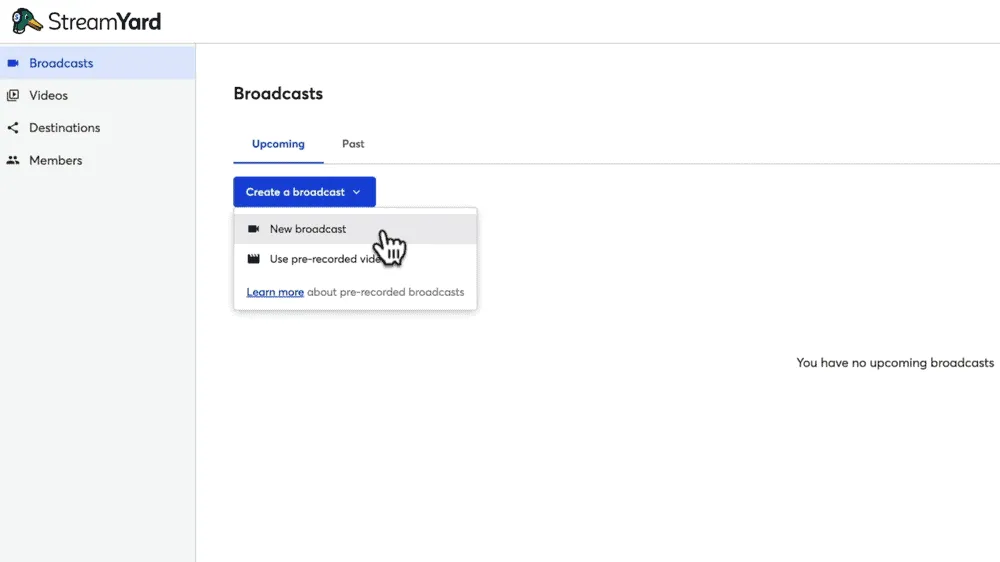
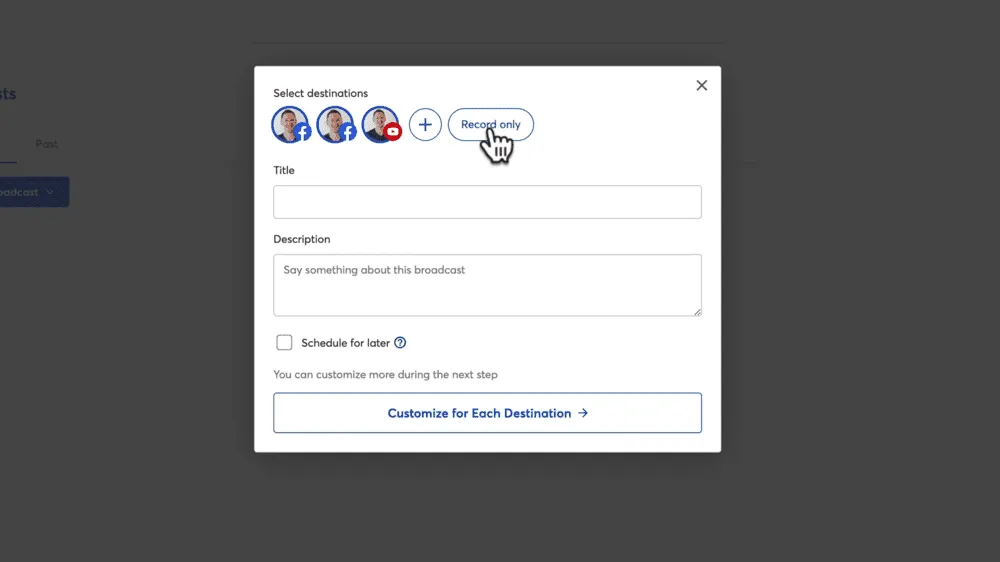
Then you can select the destinations you want to go live to. There’s also the option to Record only which means you can use StreamYard for creating regular videos as well.
One of the best features inside StreamYard is that you can select multiple destinations for your livestream.
For each of the destinations (social media platforms) you can enter a title and description. For YouTube you can also choose whether the live stream will be private, public or unlisted.
The title and descriptions don’t need to be the same for all destinations. If you select Customize for Each Destination you can customize those fields to suit each particular platform.
If you don’t want to go live right away you can schedule the live stream for later by ticking the Schedule for later box and selecting a start time.
Lastly you can also upload a thumbnail image.
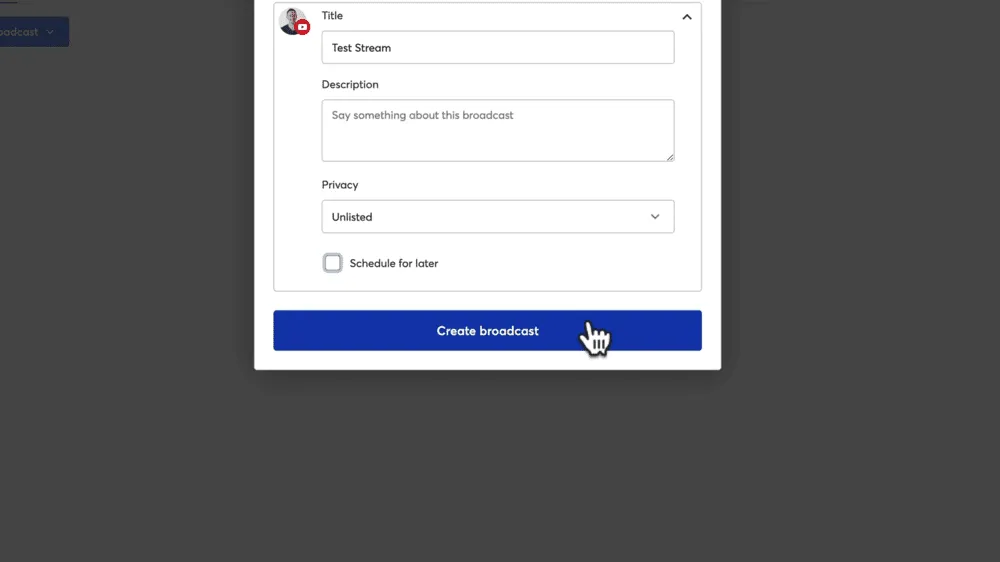
Then you’re ready to hit Create broadcast.
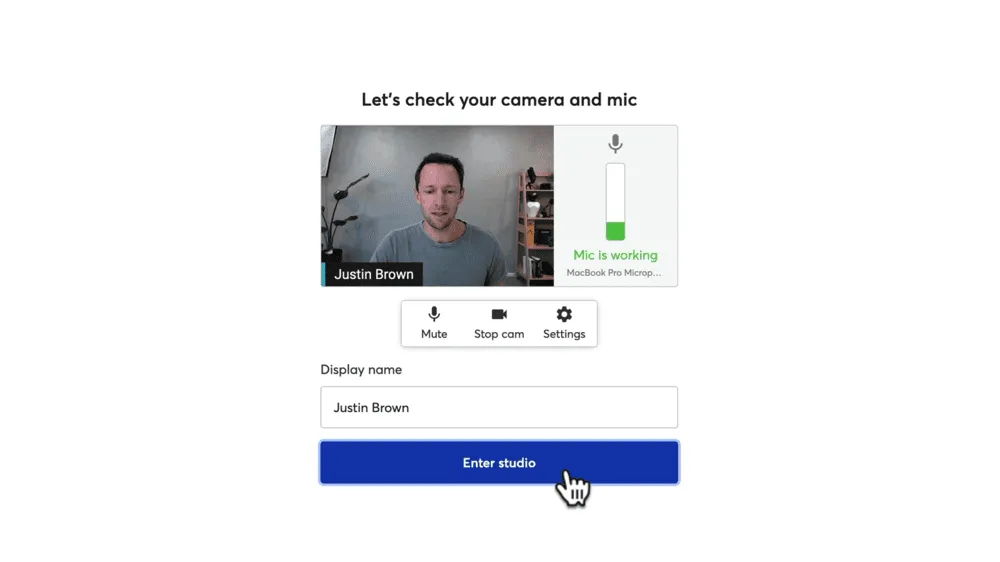
Next you’ll be prompted to allow the web browser access to your camera and microphone.
Then you’ll see a preview of your webcam along with microphone levels and your display name.

StreamYard Settings
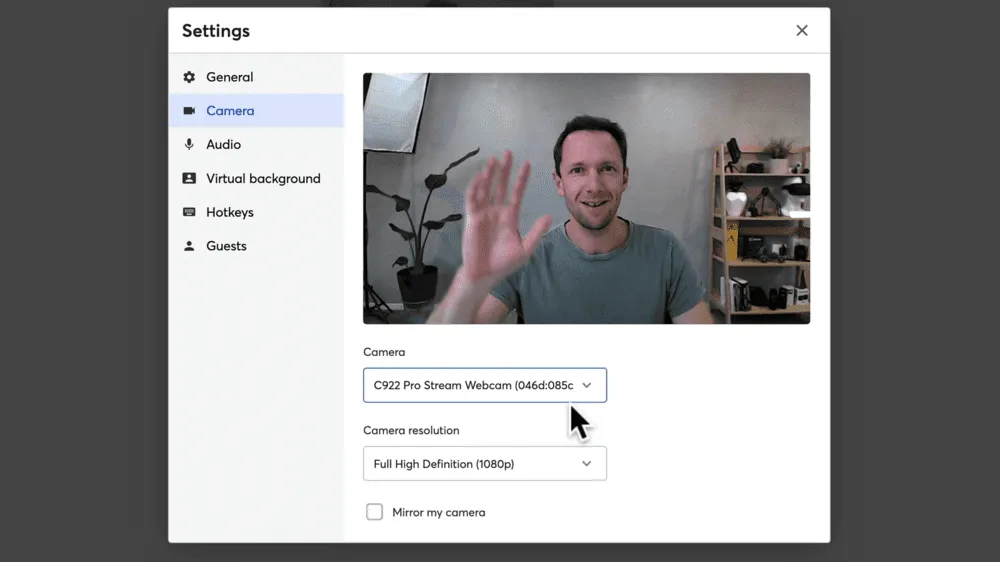
In the Settings, you can customize a bunch of things such as:
- Your broadcast quality (this quality you have access to will depend on which StreamYard plan you’re on)
- The ability to record separate audio files for each guest
- The camera you want to use for your livestream
- The microphone you want to use for your livestream
- Your background using either a blur effect, virtual backgrounds or a green screen
- Hotkeys which allows you to set up keyboard shortcuts to trigger different things while you’re live
PRO TIP: If you’re looking to create a more professional live stream, using a switching device like the Elgato Stream Deck with the Hotkeys feature will allow you to streamline your processes while live. You can learn more inside our Elgato Stream Deck review.
Once you’re happy with the settings simply close out of the Settings window.
Now you’re ready to press Enter studio.
Inside the StreamYard Studio
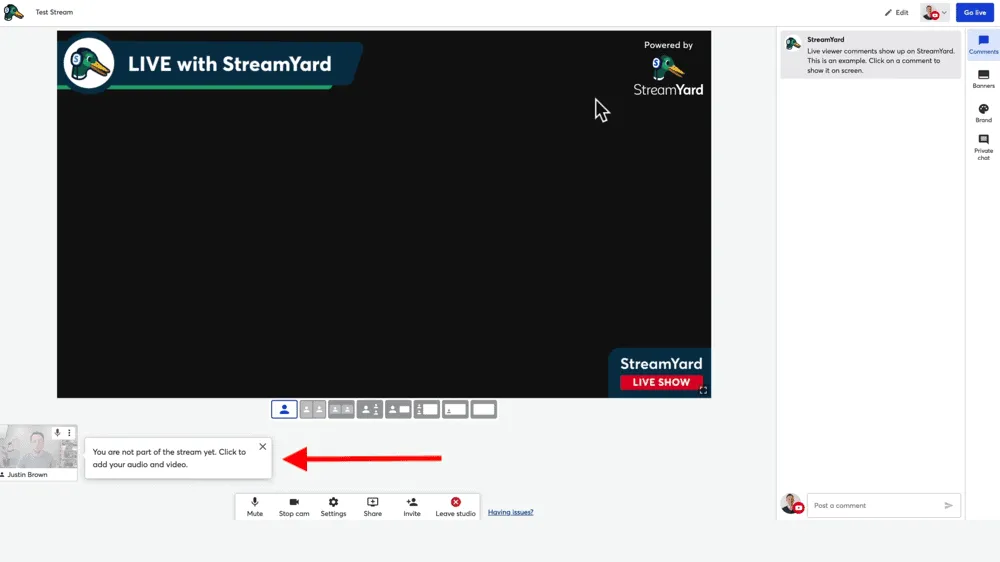
Then you will see the default StreamYard broadcast interface. You’ll notice a little box down the bottom that says ‘You are not a part of the stream yet. Click to add your audio and video.’
Hover over that little preview, press Add to stream and you’ll be brought up into the stream.
Along the bottom menu you can:
- Mute your microphone
- Stop your camera
- Access settings
- Share your screen, share a video file and bring in slides
- Invite guests
- Leave the studio
PRO TIP: If you’re using slides in your livestream, keep in mind that StreamYard supports Google slides, PowerPoint, PDF files and there’s a workaround for KeyNote as well.
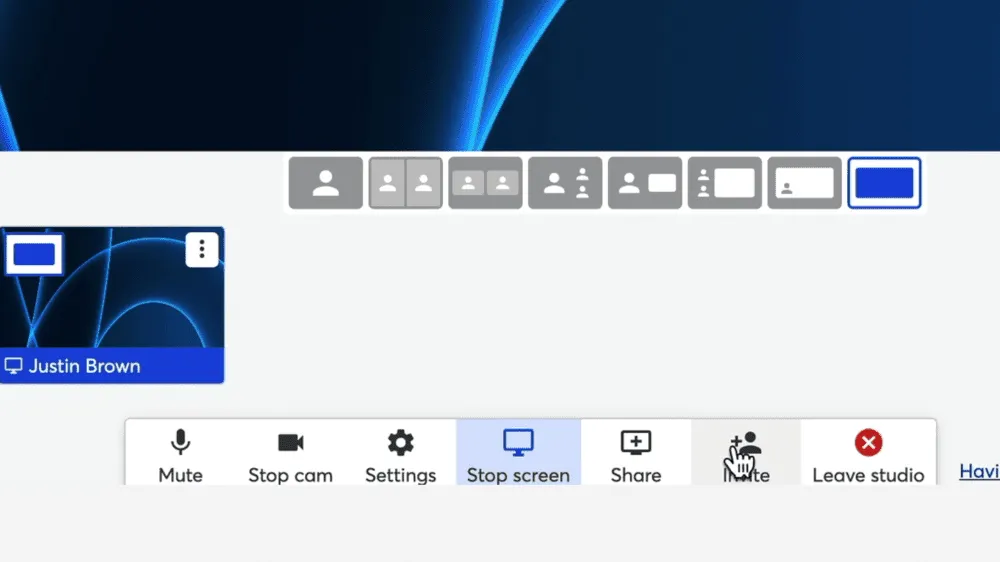
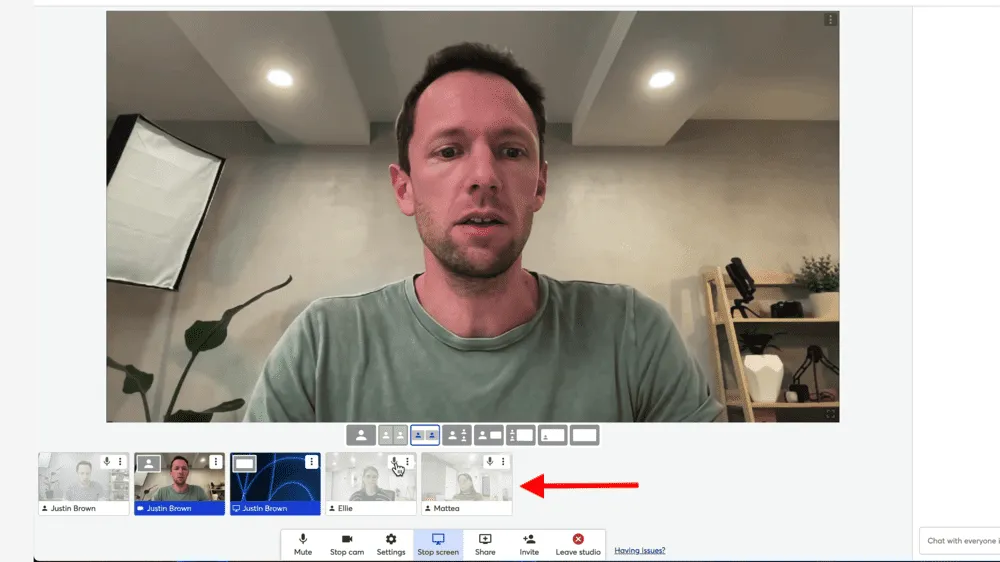
Another great feature is that you can bring in multiple camera angles. Press Share in the bottom menu and then Extra camera. Select the camera you want to use and hit Share.
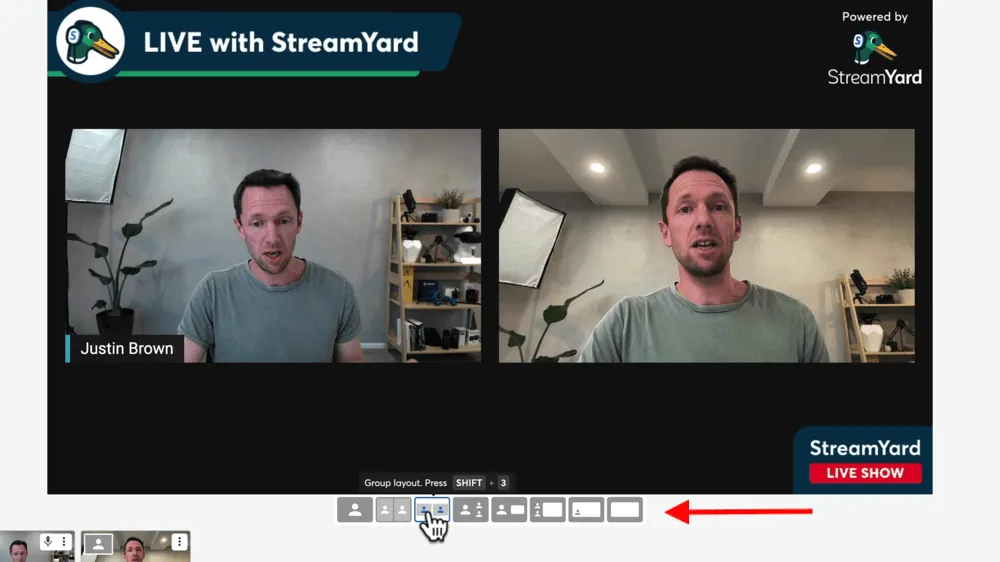
Then you’ll have the two different camera angles in your stream. Using the layout buttons underneath the stream, you can decide how you’d like this to look.
If at any point you want to remove one of the cameras, just hover over the little preview and press Remove. Then it will be pushed back to the waiting room, so to speak. You can bring it back in at any point by clicking on it again.
How To Customize Your Live Stream
There’s so much you can customize inside StreamYard. A lot of these things can be customized before you go live but you can also trigger things on and off during your live.
Let’s start with brand customization.
Brand
In the right menu bar, select Brand. This is where you can create brands or different groups of assets such as colors, templates and logos to use in your live stream.
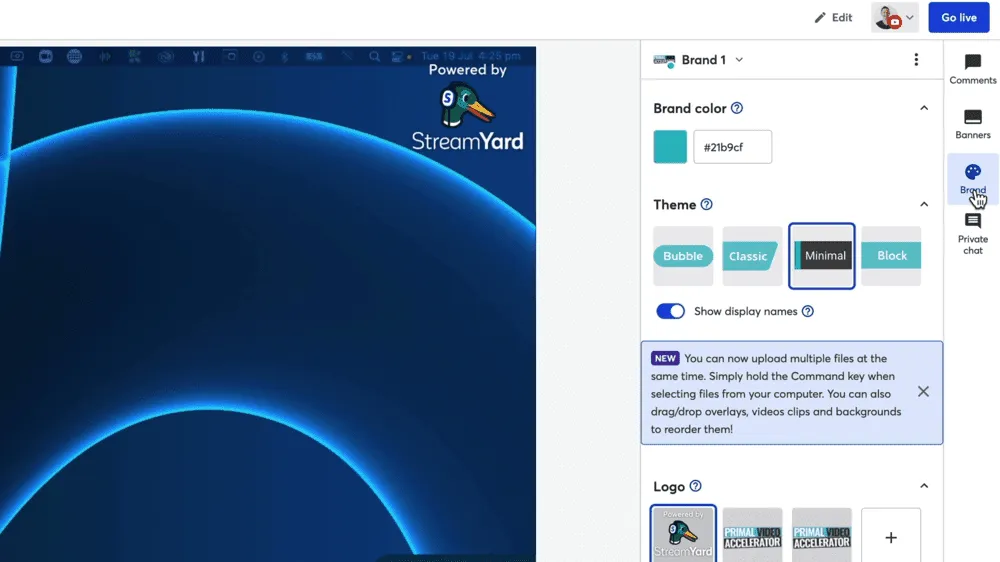
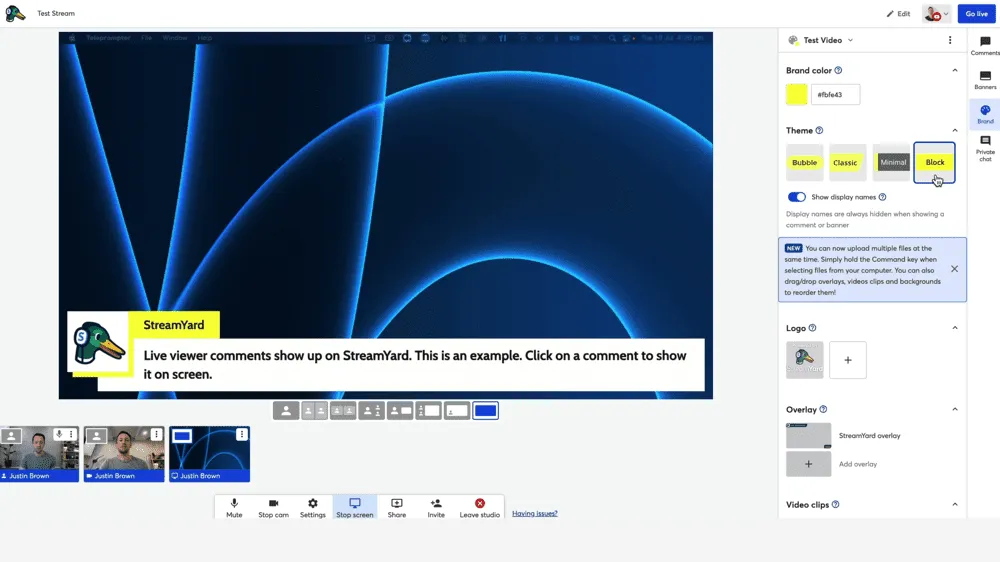
In the Brand section, you can:
- Customize brand color
- Select a theme (this is the layout of your titles)
- Toggle display names on or off
- Add a logo
- Add an overlay
- Add videos or countdown timers to play in your stream
- Change background image (only visible when your stream isn’t in full screen)
- Add background music
PRO TIP: To test how your theme looks on-screen, go to Comments in the right menu and press Show on the test comment. Go back to Brand and you can see how the different themes look.
You don’t need to use the StreamYard overlay and logo templates. Instead you can upload your own content. If you already have something created you can upload that.
Otherwise you could use a service like StreamerTemplates which has a bunch of templates you can customize to suit your brand.
Now let’s take a look at banners.
Banners
Go to Banners in the right menu bar. This is where you can configure any text or titles you want to use in your stream.
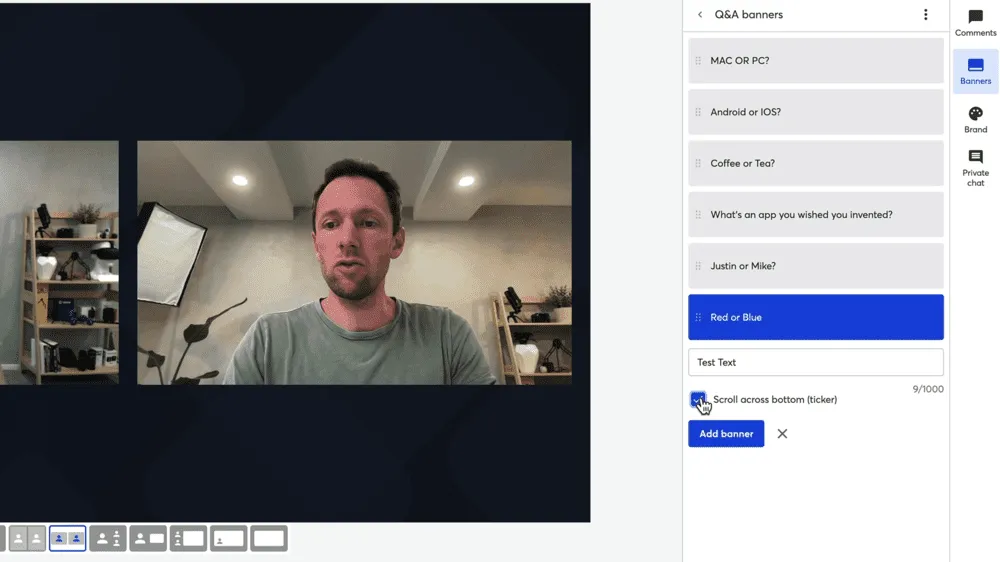
Once again you can create these before your live and then just select them during your live to make them appear on-screen. Or you create them during your livestream. To make them disappear, simply tap on them in the menu.
You can categorize the banners into different folders. This is a great way to keep text and titles stored for similar or recurring livestreams.
Comments
This is where you’ll see all of the livestream comments from all of the platforms you’re broadcasting to. They’re all aggregated in this tab.
You can feature comments really easily just by selecting them. To hide a comment, just click on it again.
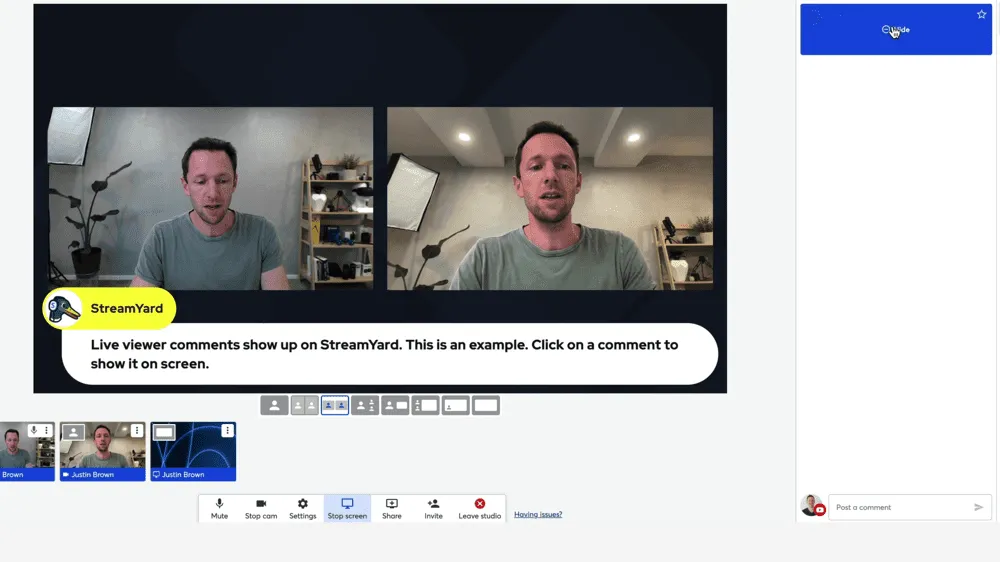
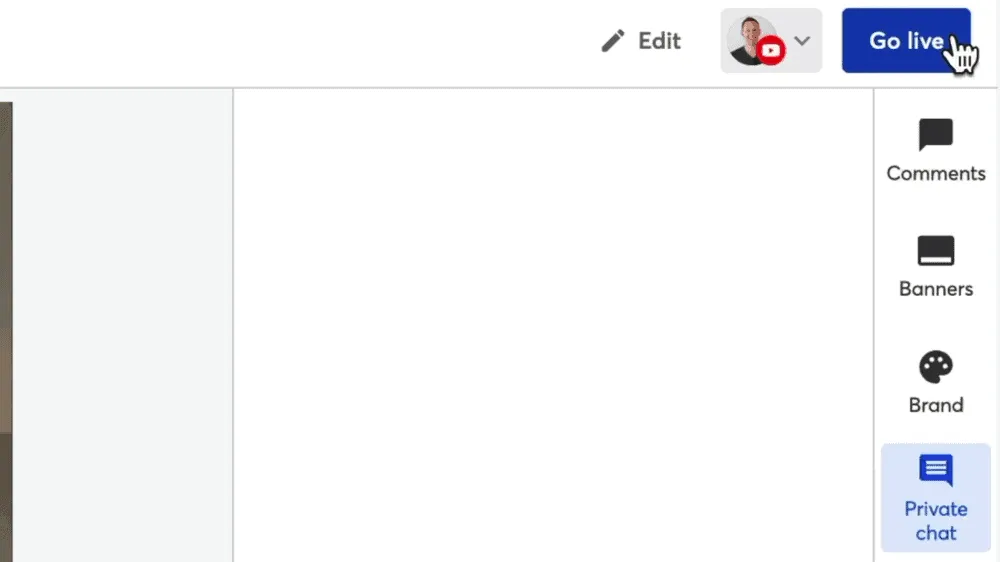
You’re able to interact with your viewers in the chat by posting comments in the comment section. If you want to chat with just your guests, select the Private chat button in the right menu.
Now that our stream is all set up and customized, let’s go through how to invite a guest.
How to Invite Guests in StreamYard
Select Invite in the bottom menu and you’ll see a private URL. You can have up to 10 people on screen at once. Click Copy to clipboard and share that link with whoever you want to join your livestream.
Once a guest follows the link they’ll appear in your waiting room. Hover over the little preview and select Add to stream.
Just like with the different camera angles, you can make different guests come up full screen or you can use the templates across the bottom to change the layout to suit the stream.
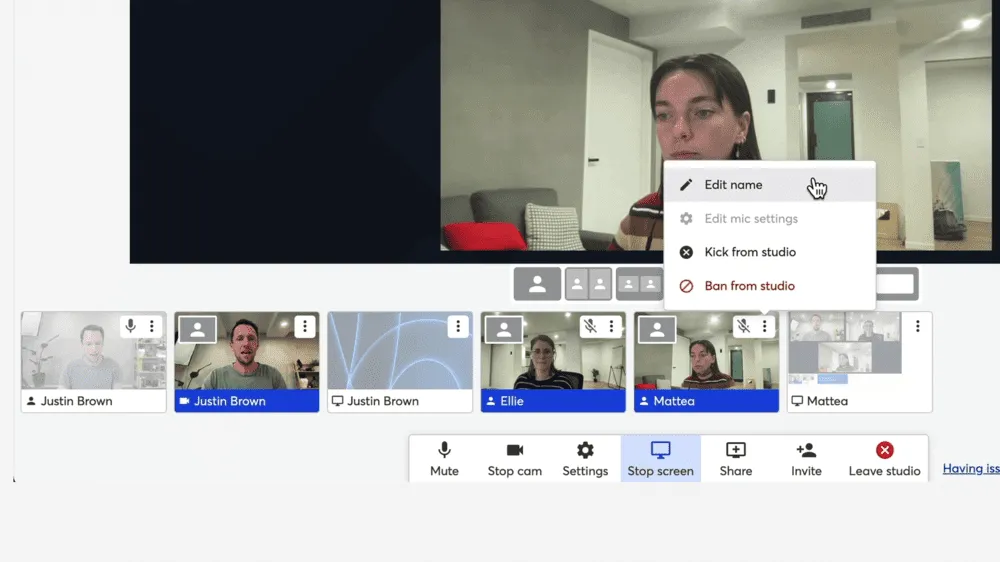
As the host, you have the ability to:
- Mute guests
- Bring up guests’ screen shares
- Edit guest names
- Remove guests
- Ban guests
Now there’s only one thing left to do and that’s go live!
How To Go Live On StreamYard
To start the livestream all you need to do is hit the Go live button in the top right corner.
But before you do, do a quick double check that everything is ready to go. Then when you’re ready hit the button and you’ll need to confirm by hitting another Go live button.
In the top left corner you’ll see a Live icon so you can know for sure that everything is working.
Now that you’re live, let’s run through an awesome tool that you can use during your livestream.
How To Use StreamYard’s Giveaway Tool
If you’re wondering how to do a social media giveaway, this is a great feature. The StreamYard giveaway tool allows you to run a giveaway directly through your livestream.
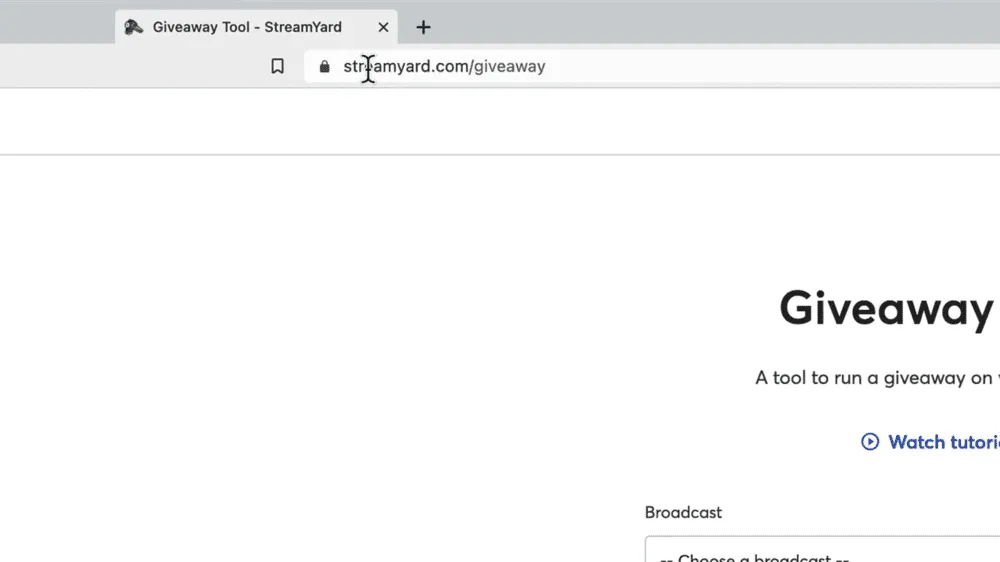
To do this, you’ll need to open a new tab and enter the website streamyard.com/giveaway. You can do this before you go live but you’ll need to have a broadcast created.
Select the broadcast you want to do the giveaway for.
There are two ways you can run the giveaway:
- Leave the Match text field empty and anyone who comments in the chat will go into the draw, or
- Enter text into the Match text field and ask your viewers to type that text into the comments, then anyone who comments that text will go into the draw
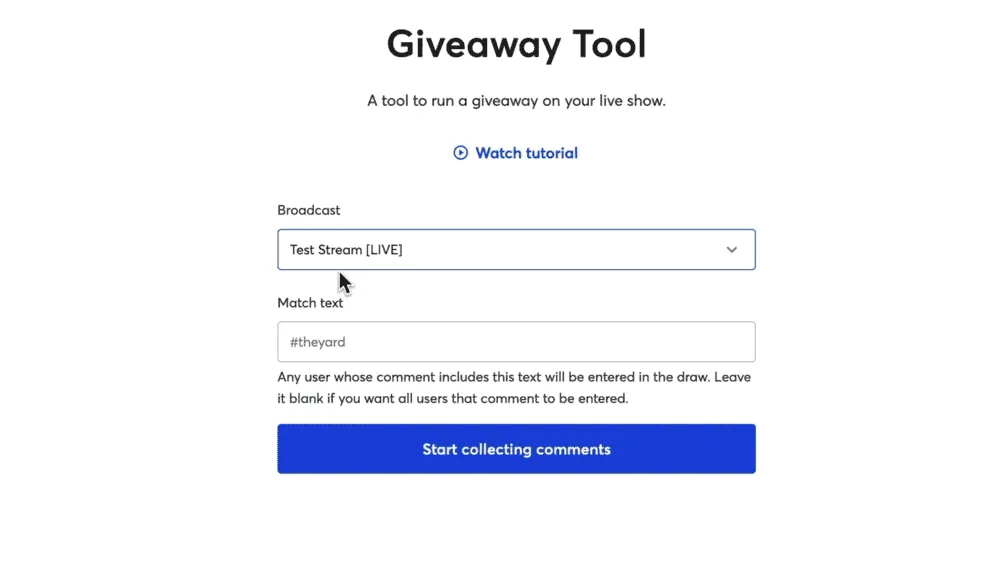
Once you’ve entered those details, select Start collecting comments. You’ll see a live count of how many people have entered the draw.
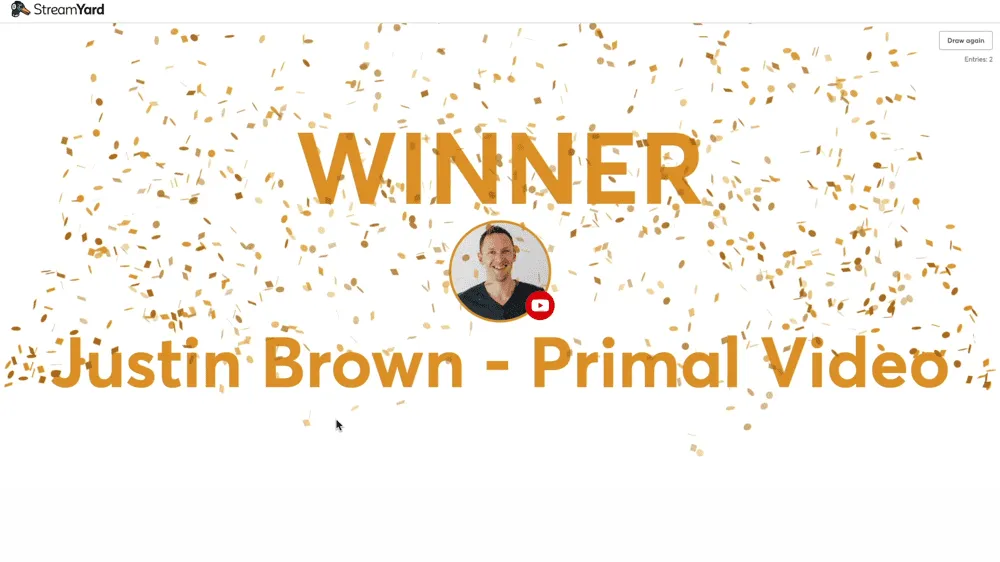
When you’re ready press the Draw button and a winner will be randomly selected.
The best part is, you can screen share that whole process and incorporate it into your livestream. This is a great way to drive deeper engagement and interaction with your followers.
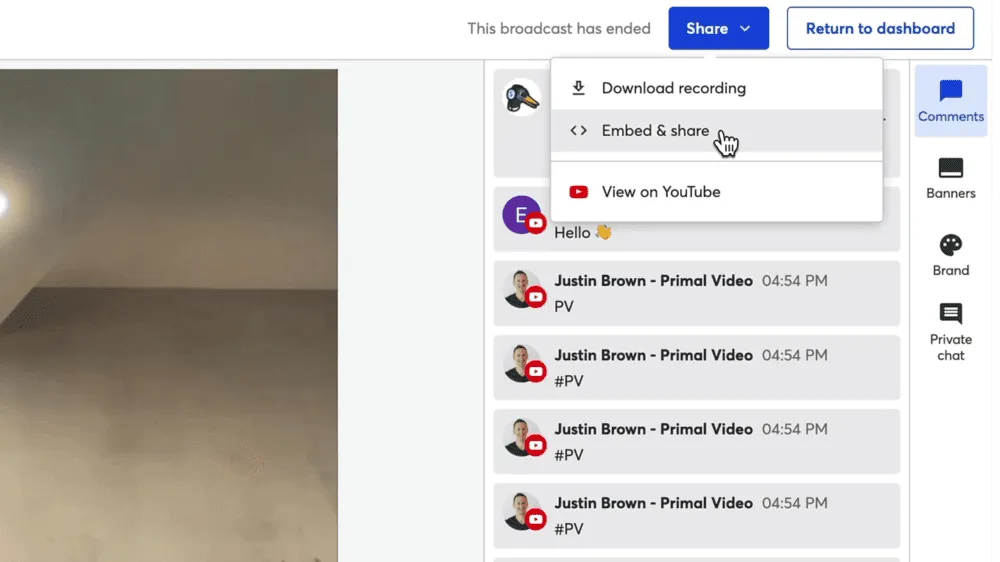
When you’re ready to finish the livestream just press the End broadcast button in the top right corner. It will ask you to confirm that you want to finish so hit End broadcast again.
After the broadcast has ended, you can download the recording, embed and share it, or view it on the platform you were live on. To do any of these things, go to the Share button in the top right corner.
StreamYard is an incredible platform. It’s not just great for live streaming but also for creating pre-recorded videos given all the tools you have access to.
If you want to check out how StreamYard compares to some of the other top live streaming apps right now, check out our roundup of the Best Live Streaming Software on Mac or the Best Live Streaming Software on PC.