We recently moved into a NEW YouTube studio and we’re super pumped to share it with you!
This is our complete studio setup including the filming equipment we use at Primal Video to create all of our YouTube videos and other video content. We’ll share our YouTube lighting setup, camera gear, sound equipment and more.
If you’re building out a YouTube home studio, this tour will offer some great home studio setup ideas. Even if you’re just starting out, you’ll see some awesome YouTube equipment that will suit beginners as well.
In this tour, you’ll get a behind the scenes look into the new Primal Video headquarters and find out exactly what Justin’s YouTube filming setup looks like.
Here’s exactly what we’ll cover:
- Primal Video Office Tour
- YouTube Studio Overview
- YouTube Filming Setup Rundown
- Camera Setup
- Teleprompter Setup
- Microphone & Audio Setup
- Computer Setup
- Screens/Monitors Setup
- Lighting Setup
- Sound Proofing
- Top Down Shots
- Webcam Setup
Feel free to jump to the section you’re most interested in!
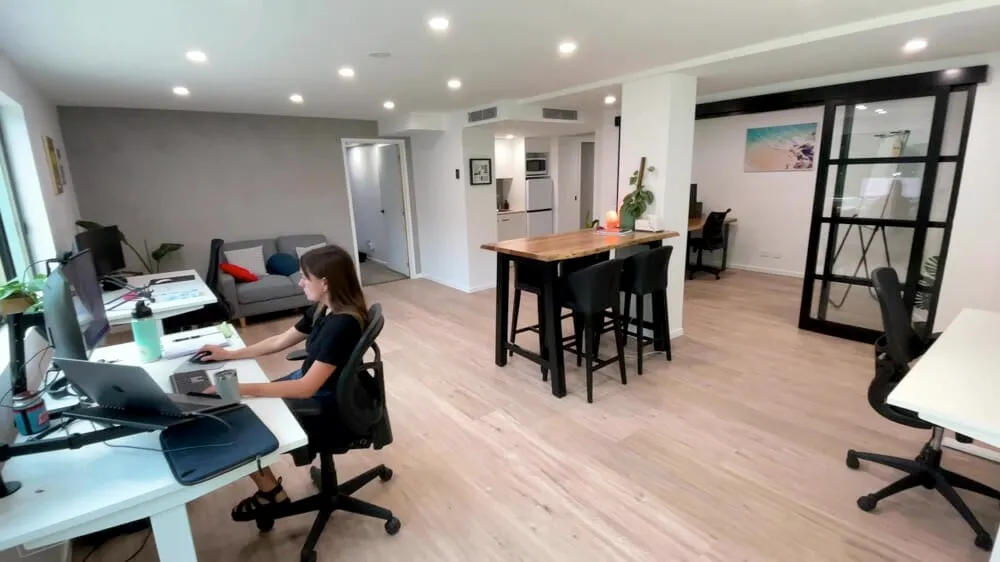
Primal Video Office Tour
Let’s do a quick run through of the office area where the Primal Video team works.
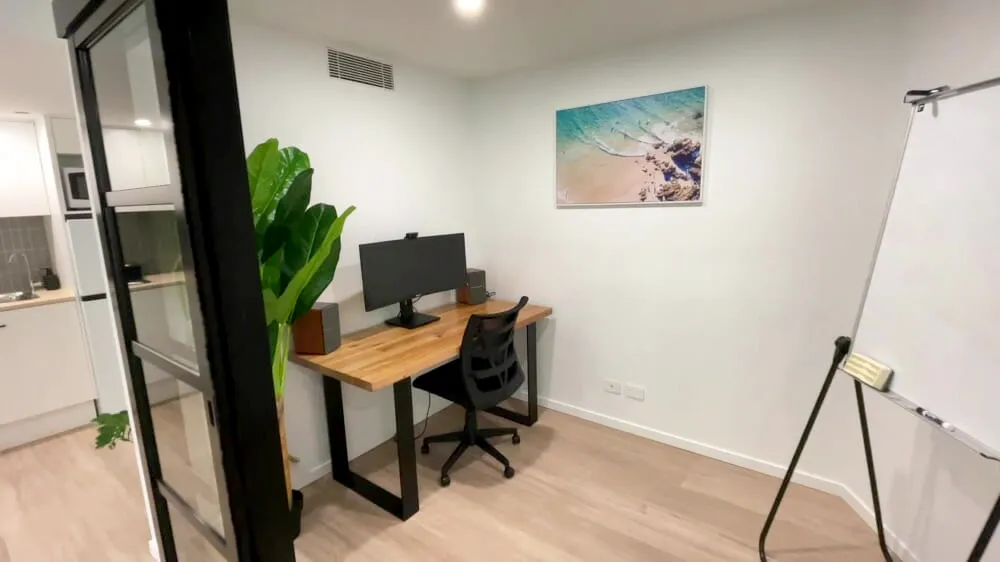
We’ve got standing desks with curved monitors by the windows.
There’s a communal work bench where we can take a break from working at desks or have lunch. Everyone has laptops so they have the ability to move around and mix it up.
There’s a designated call room so the team can work or take a call in private. This area is still a work in progress. We want to add some other equipment and audio treatment to take out the echo.
We have a small kitchen which houses one of the most important pieces of equipment in the office - the coffee machine.
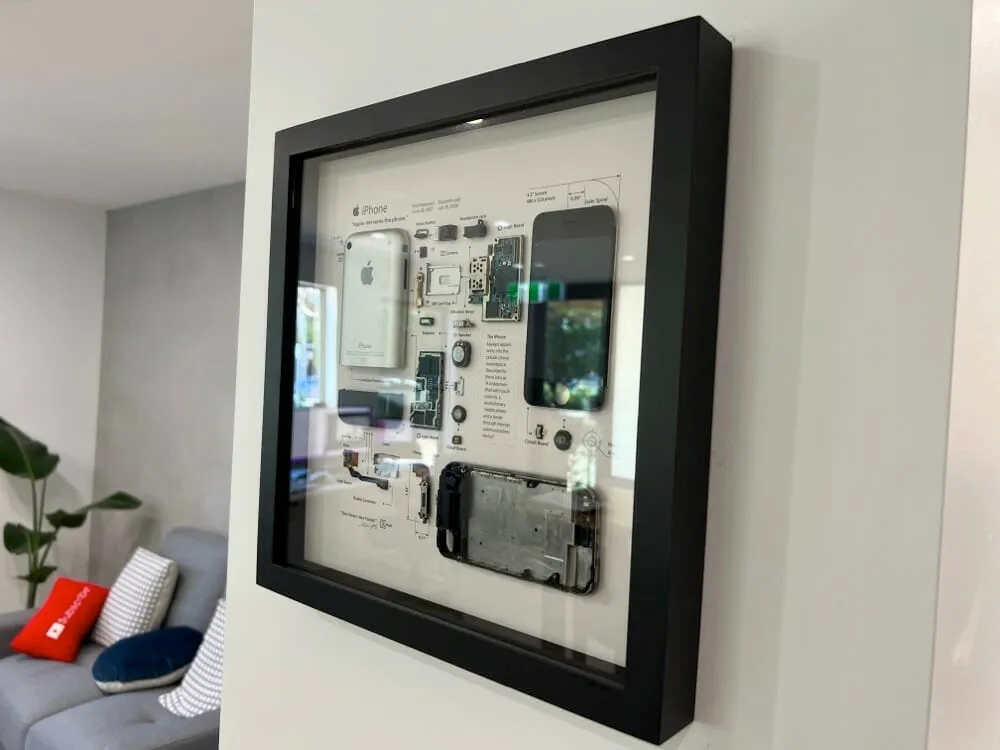
The first piece of artwork we hung was a disassembled iPhone 2G created by Xreart. All the pieces are neatly laid out inside the frame.
Justin especially loves this because as a kid he used to pull all sorts of things apart to see how they worked. The only problem was he didn’t know how to put them back together!
We’ve also got our YouTube plaques for 100,000 and 1 million subscribers hung on the wall.
There’s a small couch for relaxing with our resident Subscribe Button cushion. Which reminds us - if you haven’t already, make sure to subscribe to the Primal Video YouTube channel.
Now let’s take a look at Justin’s YouTube studio setup.

YouTube Studio Rundown
This is where the magic happens! We’ll give a quick overview of the YouTube studio and props before diving into the more technical stuff.
We’ve spent a lot of time planning out this space to make it the best filming setup it can be. But it’s still a work in progress and is by no means perfect yet.
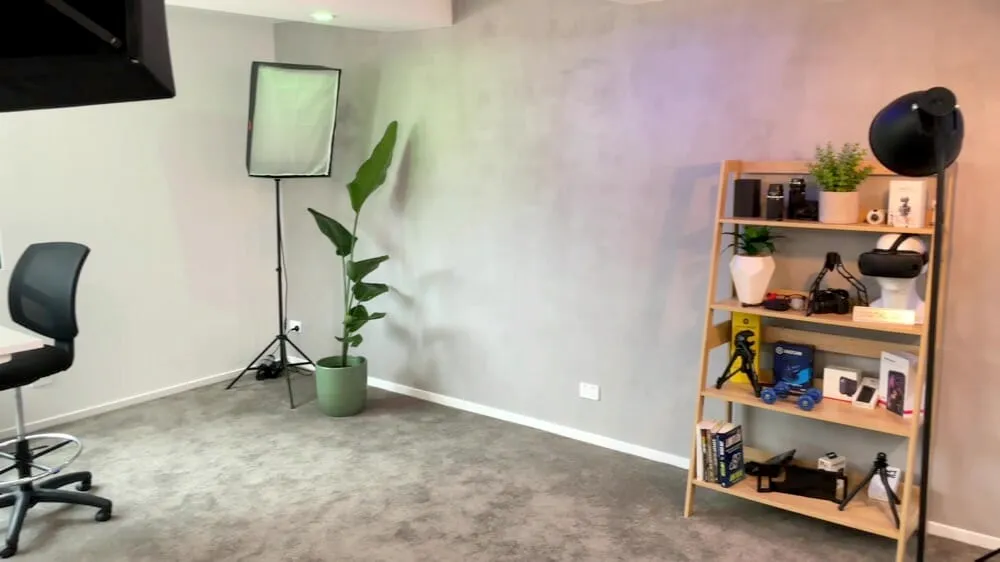
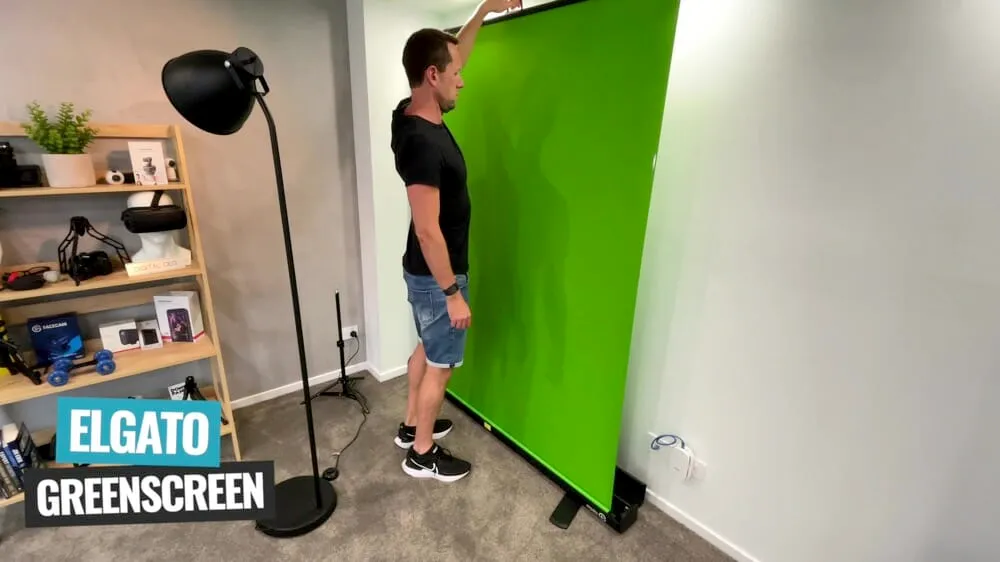
We have an Elgato Green Screen that we can pop up at any time. We use this mostly for recording those mini Justin’s you might have seen walking around the bottom of our YouTube videos.
SEE ELGATO GREEN SCREEN ON AMAZON
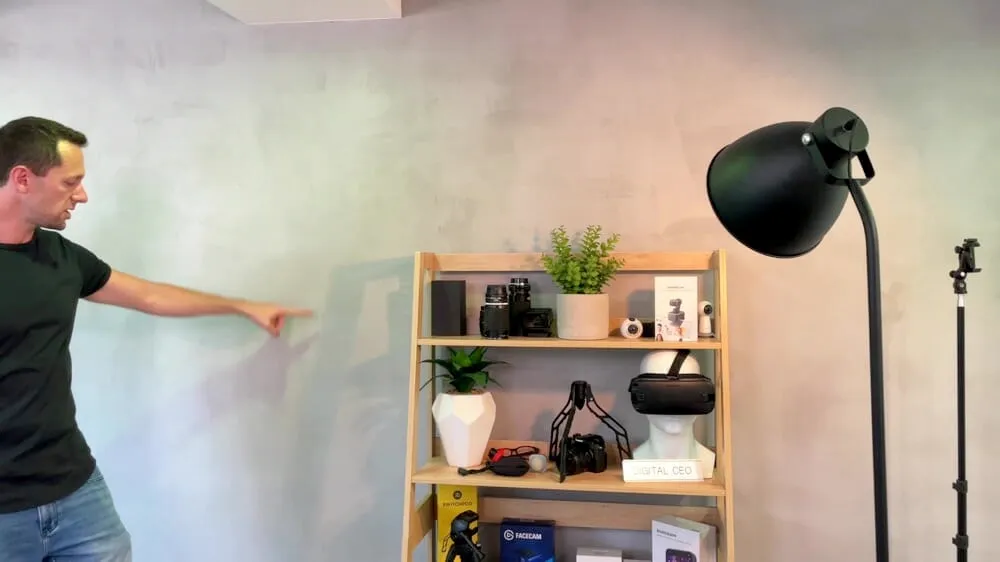
There’s a bookshelf with a bunch of random gear that’s really just to add some color into the background of our YouTube videos.
Now we really want to stress that the background for YouTube videos is not important. It’s the content that matters most. So focus on that first and worry about the background when you have the time and means.
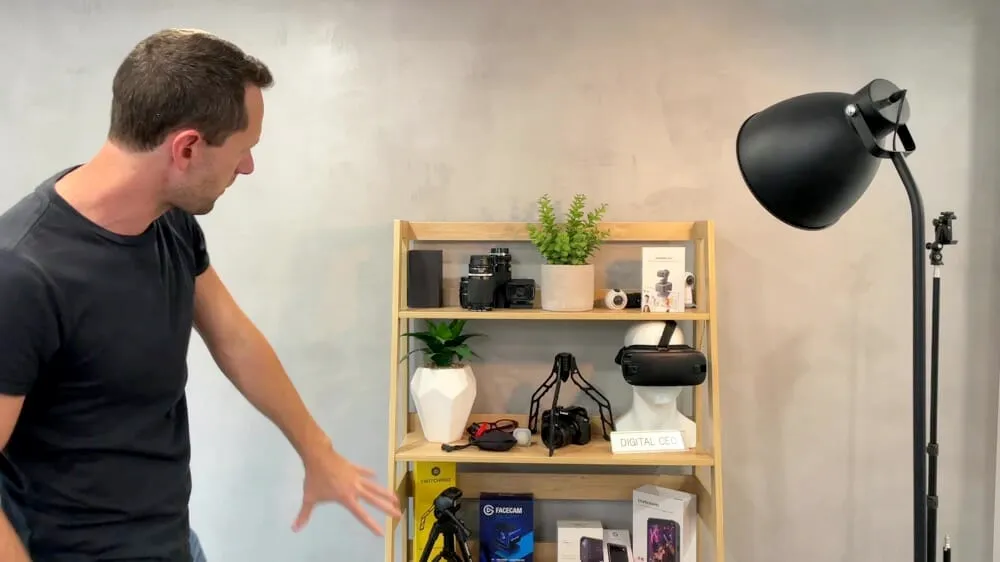
There’s a plant and a light in the corner - both of these are just props to make the background of our YouTube videos look more interesting.
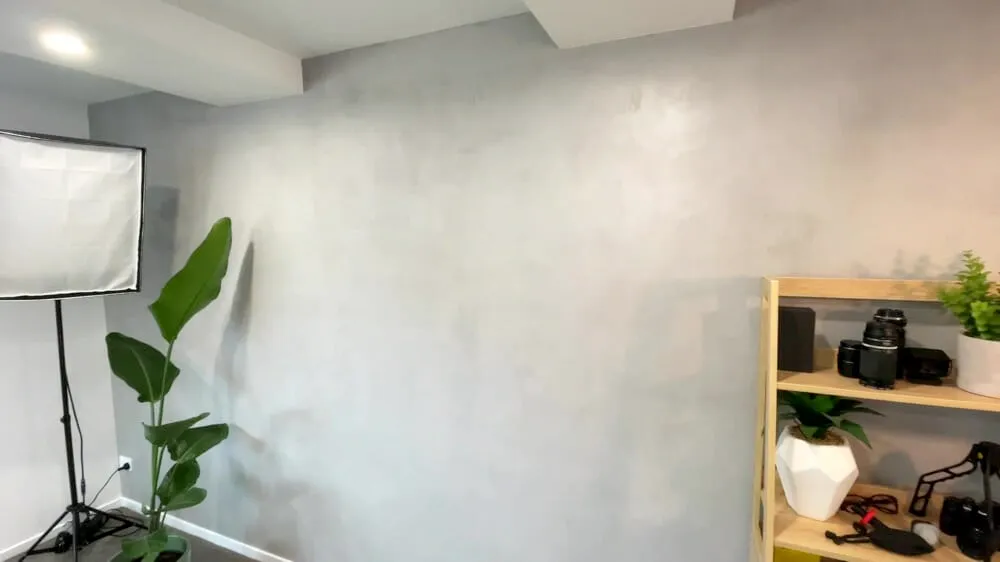
Lastly, this wall is one of Justin’s favorite things about the studio. It’s not just paint, it’s a rendered concrete wall so it has that raw concrete look. It looks awesome with the ceiling lights we had installed - more on that soon!
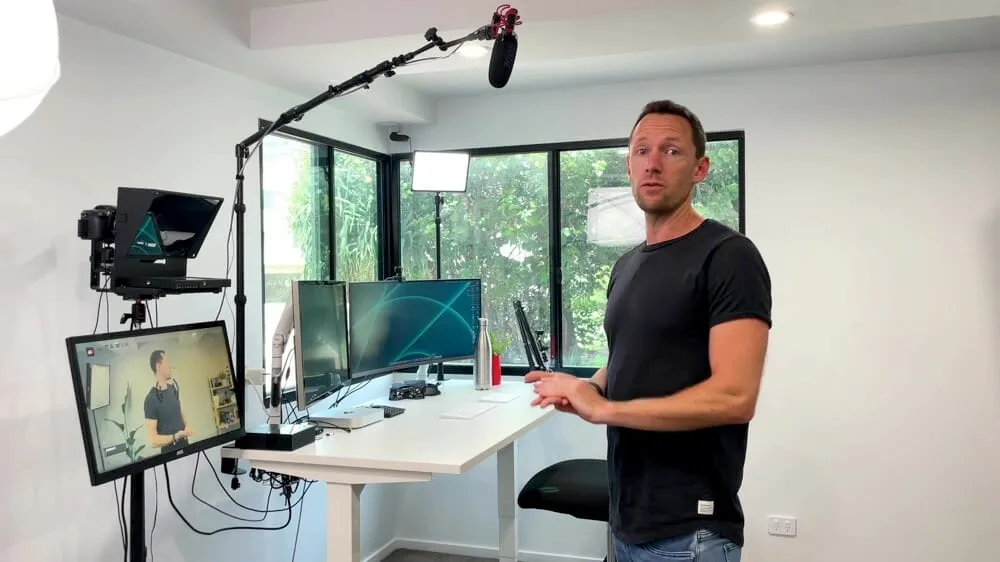
YouTube Filming Setup Overview
The best thing about this studio setup is that it’s all ready to go at any time. All Justin needs to do is press a couple of buttons and he’s ready to record.
This is important because Justin found setting up the gear was a big procrastination point for him. It became an effort to make videos.
So for him, the perfect YouTube studio location is a room where everything doesn’t need to be packed down.
Now let’s get into the gear.
Camera Setup
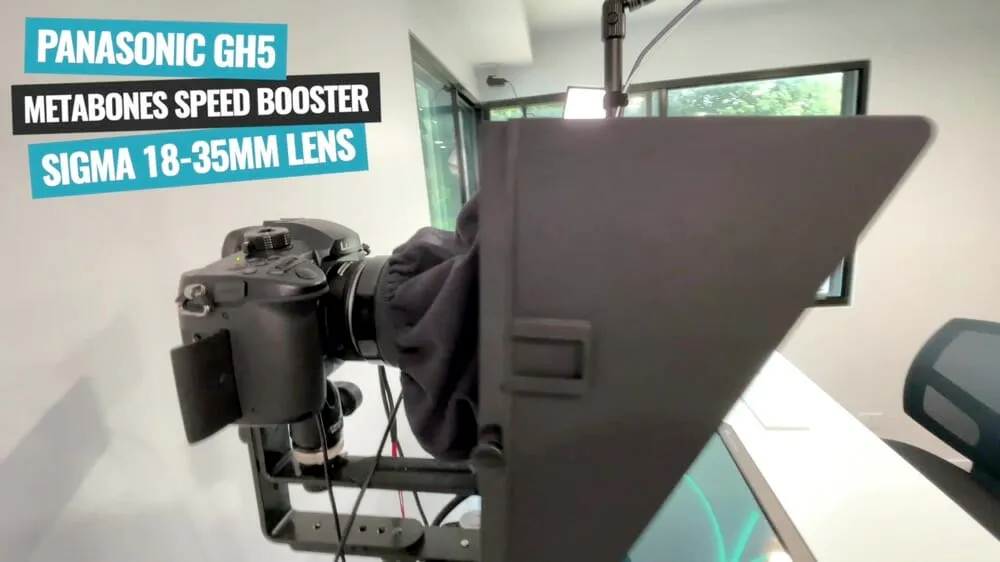
For filming YouTube videos, this is Justin’s camera setup:
- Panasonic GH5 (Check it out on Amazon)
- Metabones Speed Booster (Check it out on Amazon)
- Sigma 18-35mm Lens (Check it out on Amazon)
The Panasonic GH5 is by no means the latest or greatest camera but it’s high quality and works really well.
This whole setup is super easy to use - Justin can adjust it from the computer on his desk to make sure everything is adjusted and focused as necessary. He doesn’t need to touch the camera at all, everything can be done directly from the computer with a couple of button presses.
Below the camera setup is a confidence monitor so Justin can see what the camera is recording.
Teleprompter Setup
In front of the camera is a teleprompter for if Justin needs to read word for word off a script. This one is the Yogogo Teleprompter - it’s a cheap one, great bang for buck and works really well.
It holds the Liliput Screen which is a 4K screen. Check out the Liliput Screen on Amazon.
But we also recommend smaller teleprompters that clip onto the front of your camera lens if you’re after a less bulky or more portable setup.
Or if you’re after a larger teleprompter like the Yogogo, we’d recommend the DesView T3 Teleprompter.
See the desview teleprompter on amazon
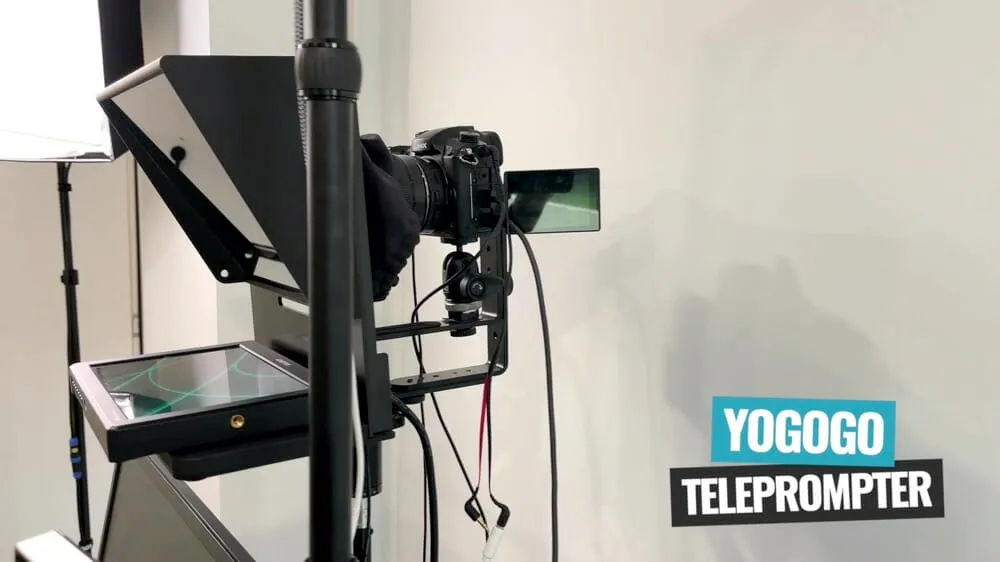
This whole setup of the camera, teleprompter and confidence monitor is actually on a light stand instead of a monitor.
This is because none of this gear needs to be moved or touched so it doesn’t require the stability of a tripod. This way Justin’s able to adjust it to the perfect height and leave it as is but it takes up hardly any space.

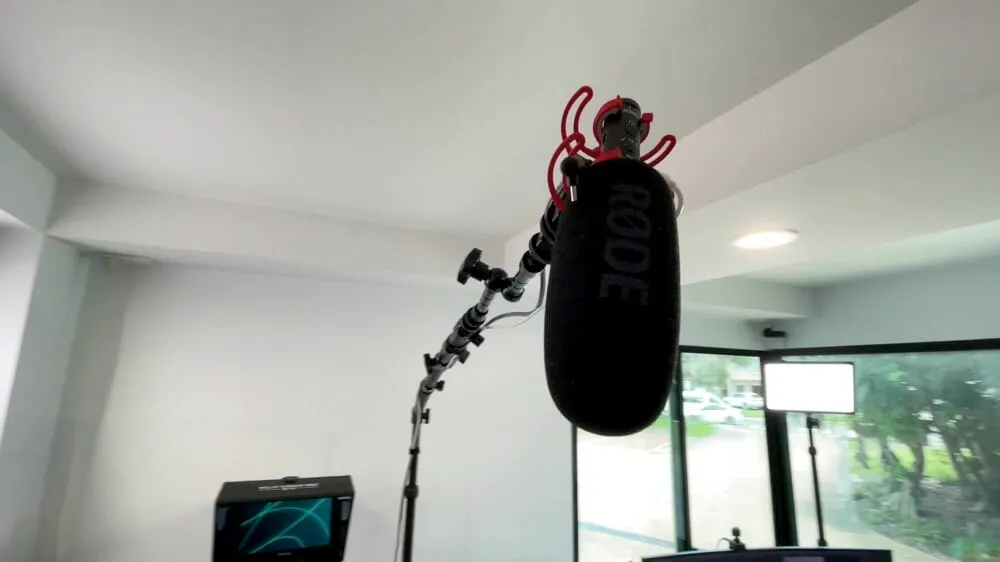
Microphone & Audio Setup
The main microphone Justin uses is the Rode NTG.
This is an awesome mic and because it’s directly connected to the camera, no extra audio mixes are needed. We always optimize for simplicity!
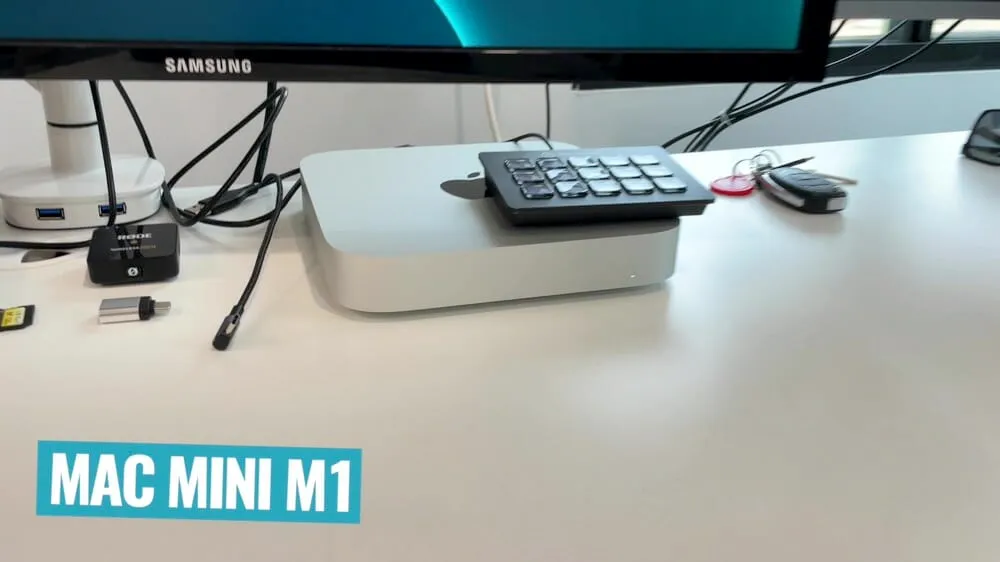
The mic is also connected to a Mac Mini M1 so Justin can use it for his audio in webinars, live streams or video calls. It can easily be spun around so he can use it in front of the camera and at his desk.
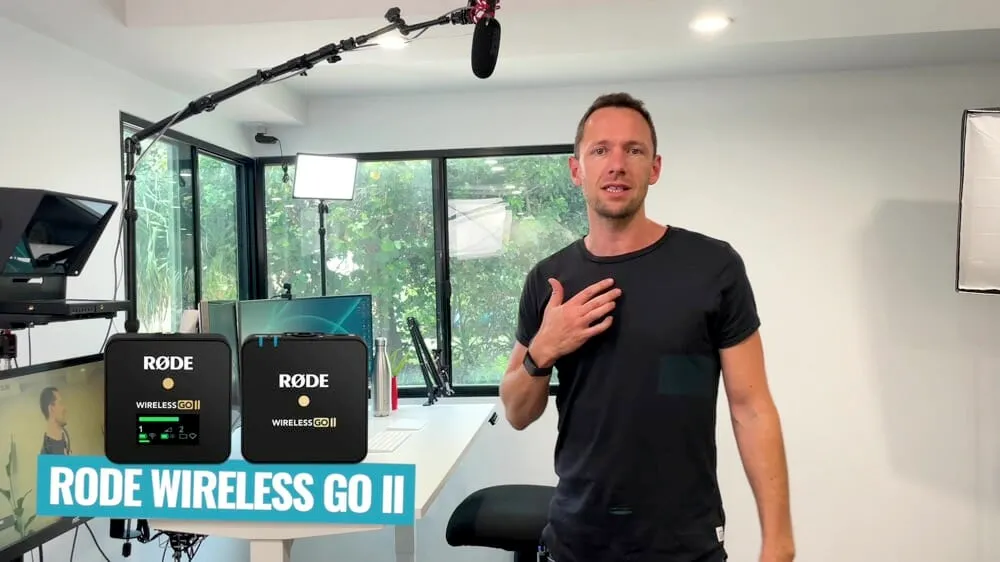
As a backup, he also always uses a Rode Wireless Go II which is a lavalier mic taped under his shirt. This is great if anything goes wrong with the primary audio.
See rode wireless mic on amazon
Computer Setup
As we mentioned earlier, Justin uses a Mac Mini M1. It’s the base model but it’s more than enough for what he needs.
Screens/Monitors Setup
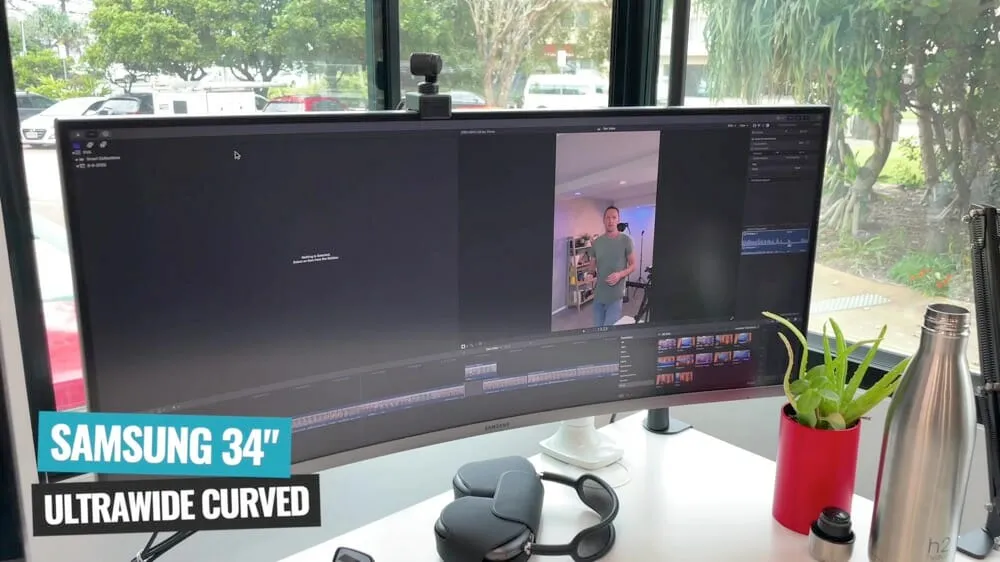
Alongside the Mac Mini M1, Justin has two screens on his desk. The first one is the Samsung 34 inch Ultra Wide curved screen. This screen is amazing! Once you start using a curved screen, you won’t be able to go back.
SEE SAMSUNG 34” SCREEN ON AMAZON
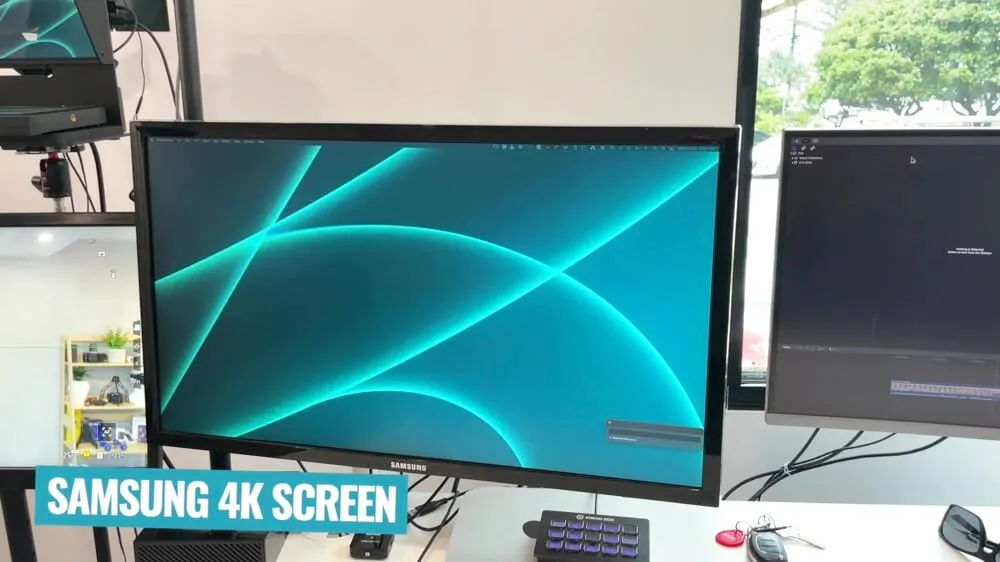
The second screen is a Samsung 4K screen. This is perfect for doing screen recordings, running webinars, sharing slides, anything like that.
Both screens are on articulating arms so they can be easily spun and moved around.
Lighting Setup
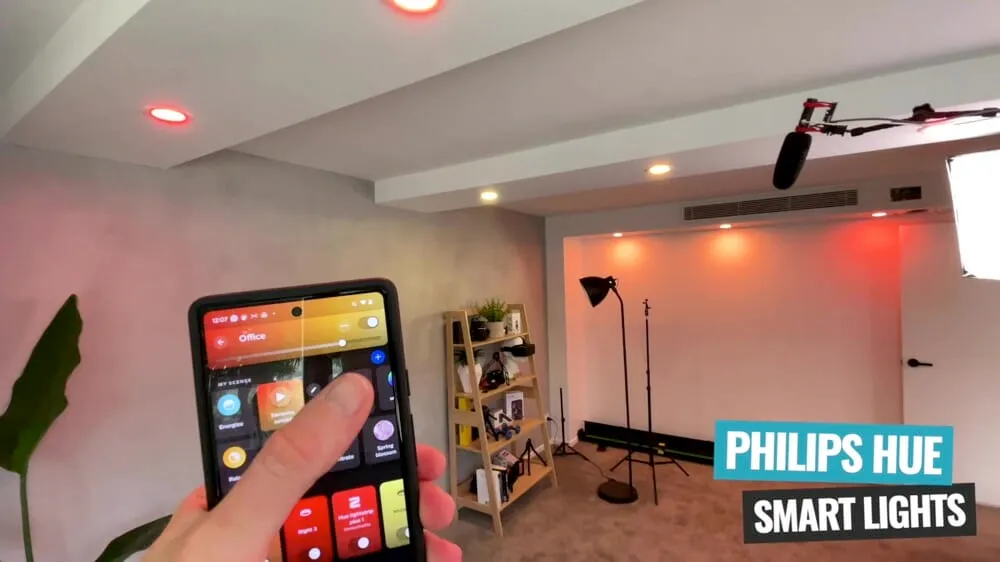
There are nine ceiling lights throughout the YouTube studio. All of these are Philips Hue Smart Lights.
These lights can be controlled individually in the app which allows Justin to really dial in the look and feel of his lighting. Depending on how he changes the color, temperature and brightness, it can look like an entirely different video!
Plus as we mentioned earlier, these lights create an awesome effect on the concrete wall.
Not only can they be controlled in the app, but also using an Elgato Stream Deck. You can check it out on Amazon here.
Using the Stream Deck, Justin has created different presets depending on what look he’s going for. He can change everything up literally with the press of a button!
see philips hue lights on amazon
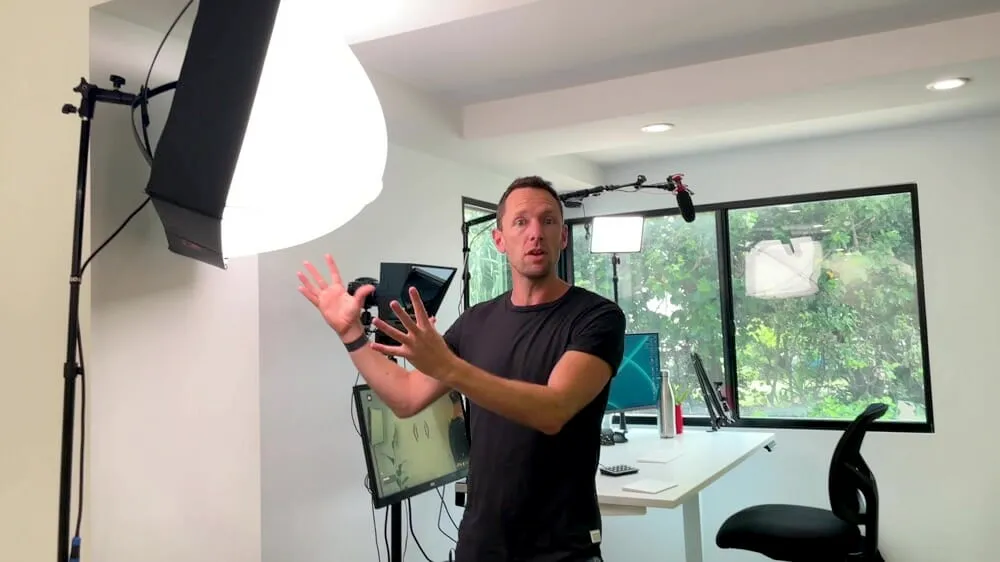
The primary light that Justin uses is a Falcon Eyes light. It’s not cheap, but it does work really well!
This light is super powerful so it only needs to be on a low power to make a big difference. The dome throws a soft light that nicely lights Justin up when he’s filming YouTube videos.
The other light source he uses is the natural light coming in from the window.
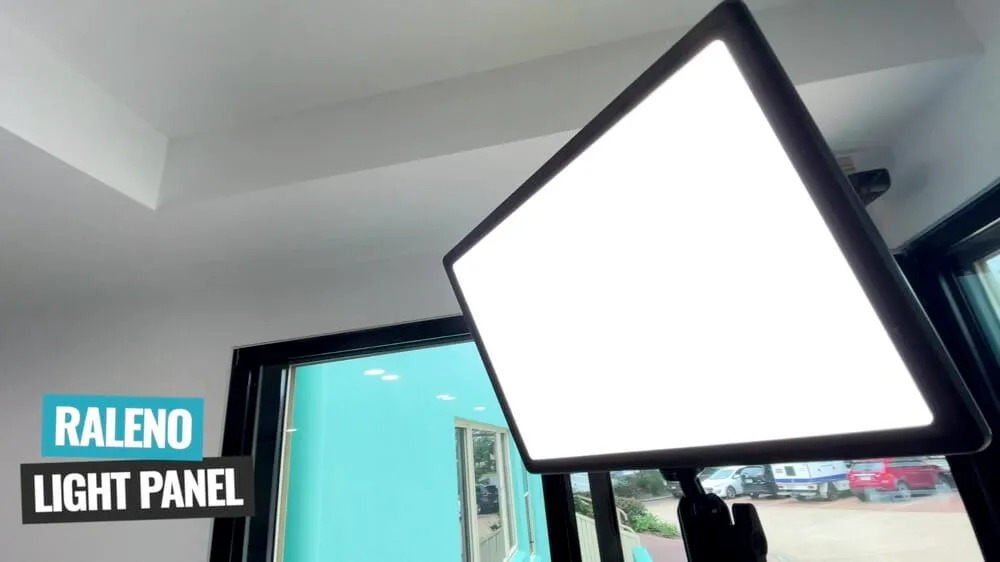
As a back up for when it’s overcast or dark, Justin has a Raleno Light Panel. As far as we’re concerned this light is the best bang for buck LED light that you can buy. It’s just on a basic light stand so it’s at a good height.
The only other light he has is just a regular lamp on a stand. It also has a Philips Hue Smart Light so the color temperature can be adjusted.
This lamp is really just used to throw a yellow/orange light onto the bookshelf. It casts a nice shadow across the wall which adds some more depth into the shot.
CHECK OUT RALENO LIGHT ON AMAZON
Sound Proofing
There’s a few things we’ve done for sound treatment to remove any echo and noises that come from outside.
- Carpet: We used special carpet that’s much thicker than regular carpet to take out some of the echo
- Plasterboard/Drywall: We used special acoustic materials to dampen the sound and make the audio generally sound better inside the room
- Double Windows: We had a second window installed to help take out some of the traffic and outside noises
- Curtains: These haven’t arrived yet but they will be big thick curtains that reach the whole way across the window to cut back the feedback that’s coming off the walls
- Door: The door is soundproof and the edges have been sealed to block out noises coming from the office

Top Down Shots
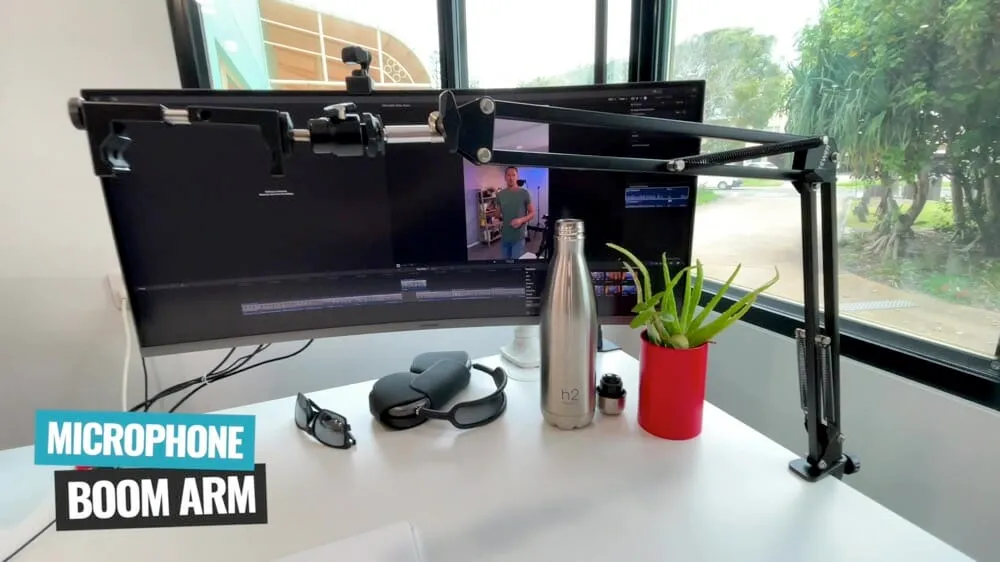
Justin usually keeps the desk pretty clear so it’s always ready for any top down shots. There’s a microphone boom arm attached to the desk which he can put his phone in, adjust the position so it’s over the desk and then just hit record.
Then all he needs to do is AirDrop the video over to his computer.
This is great for when he wants to show any products in a review or tutorial.
Webcam Setup
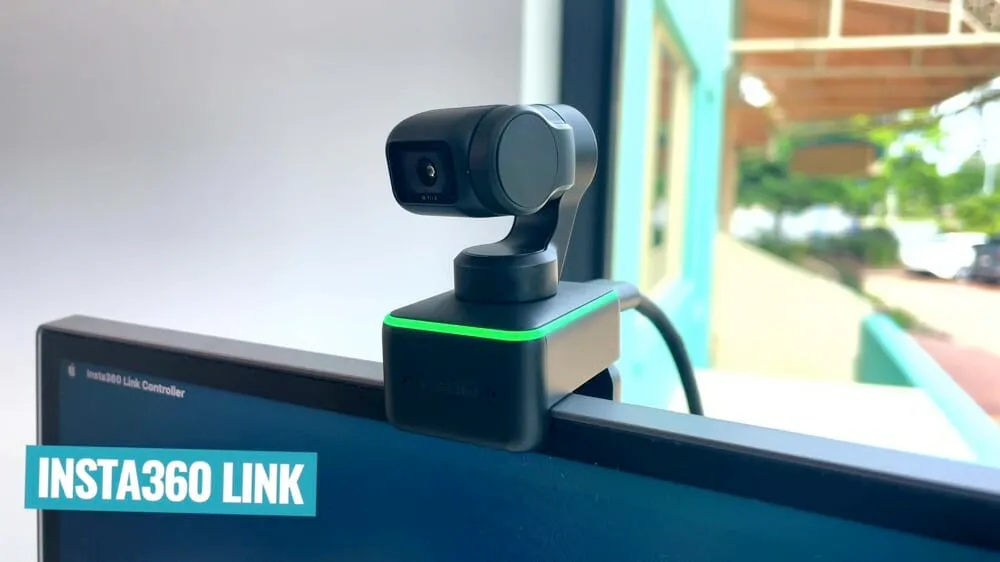
The webcam attached to one of the monitors is the Insta360 Link. It’s the coolest piece of tech right now as far as we’re concerned!
It has a tiny gimbal and some crazy AI features. It’s such high quality that Justin is using it to film a lot of content, including for our Primal Video Accelerator program.
So that’s our complete YouTube studio tour! Hopefully you got some ideas for your own home studio setup or YouTube studio setup
Remember you don’t need to worry about buying expensive gear to create high quality videos.
Keep it simple and focus on small ways you can improve your videos along the way.
Now check out our complete YouTube Video Creation Process including everything from idea right through to release.