Colors can make or break your video. The perfect hue can engage your audience, while off-color or flat profiles can send them away. This can make video color correction seem like a daunting process…
There are lots of professional tools and software out there to help you. But the good news is, you don’t need to get that complex! You can create awesome looking videos without needing to master pro level software.
Important: When available, we use affiliate links and may earn a commission!
In this guide you’ll learn exactly how to color correct video! We’ll share the best color grading tools to help with everything from basic color correction to more cinematic color grading that will elevate your videos.
There’s even some incredible AI color grading tools that can make the whole process much quicker and easier.
This color grading tutorial will help you make your videos look fantastic without a big budget or expensive software.
Here’s exactly what we’ll cover:
- Color Correction Tool #1: VN Video Editor
- Color Correction Tool #2: CapCut
- Color Correction Tool #3: Adobe Premiere Pro AI
- Color Correction Tool #4: Fylm.ai
So let’s start with the basic color correction options and then we’ll move on to the more advanced and AI options.
Color Correction Tool #1: VN Video Editor
The first example we’ll run through is in VN Video Editor. This is an awesome free video editing tool on iOS, Android and Mac.

How To Color Correct With Filters In VN Video Editor
Select the video clips you want to color grade.
Then go to the color controls by clicking the top icon in the top left menu bar.
Here you’ll find a lot of preset grades, filters or LUTs that you can apply to your video. So if you find something here that’s exactly what you’re after, this is a super quick & easy option.

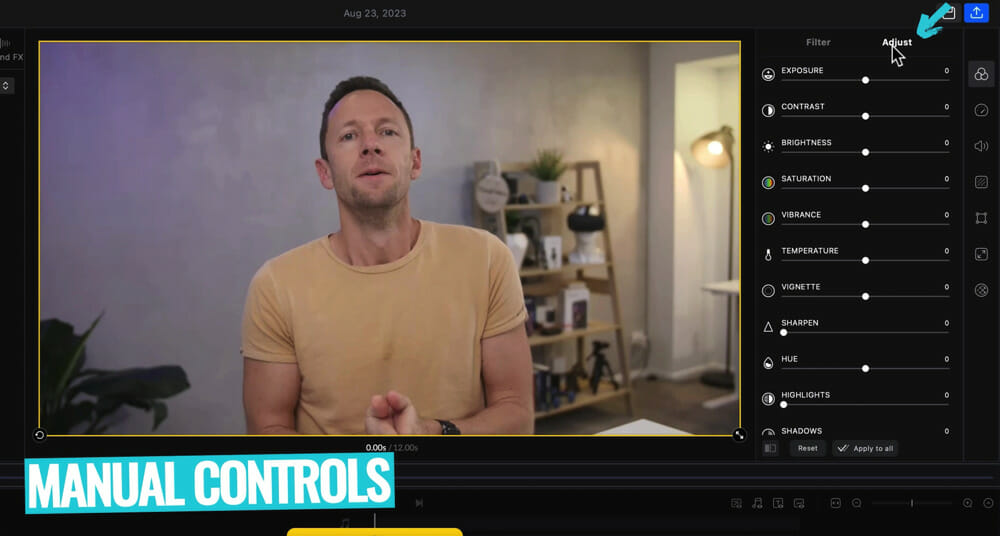
How To Manually Color Correct In VN Video Editor
If you want to get more granular, you make sure Original is selected under the Filters and then go to Adjust in the top menu.
This will open up the manual controls. In VN Video Editor, you’re given a bunch of sliders that can be used to control the different elements.
PRO TIP: Color grading and color correcting is a creative process! It’s about personal preference. So you can use any combination of these tools to dial in the look you’re after.
We’ll run through the main elements we adjust and the order that we approach them.
The first place we’ll start is with the Exposure.
If you drag the slider to the right it will brighten the shot, if you drag the slider to the left it will darken the shot. You can adjust this as needed.
Next, we’ll go to the Color Temperature.
Dragging the slider bar to the right will make your shot warmer by adding more yellow and orange. Dragging the slider bar to the left will make your shot cooler by adding a blue or green tint. Again, you can be creative with this so adjust this to achieve the look you’re going for.
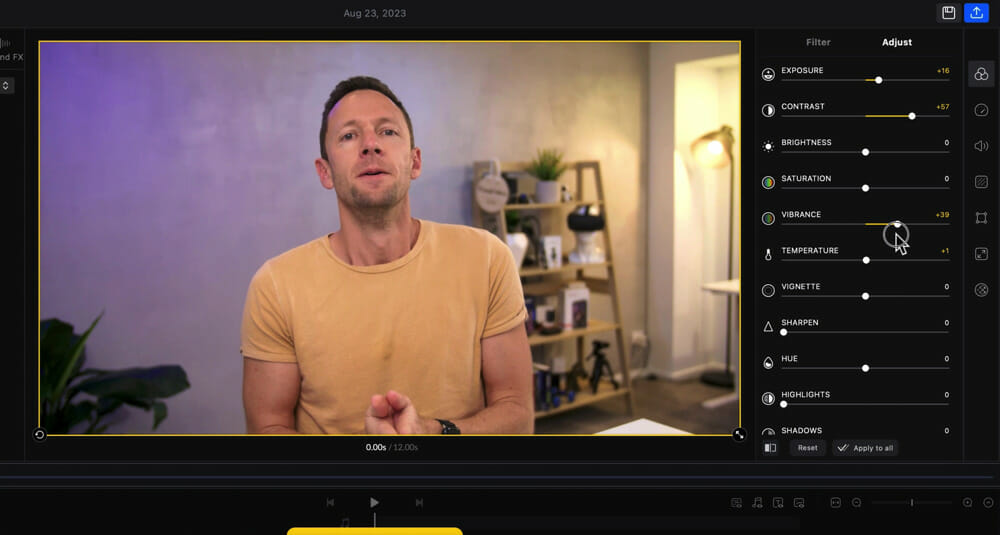
Then we’ll go to the Contrast.
When the slider is dragged to the left, your shot will become more washed out. When the slider is dragged to the right, your shot will become more contrasted with brighter highlights and darker shadows.
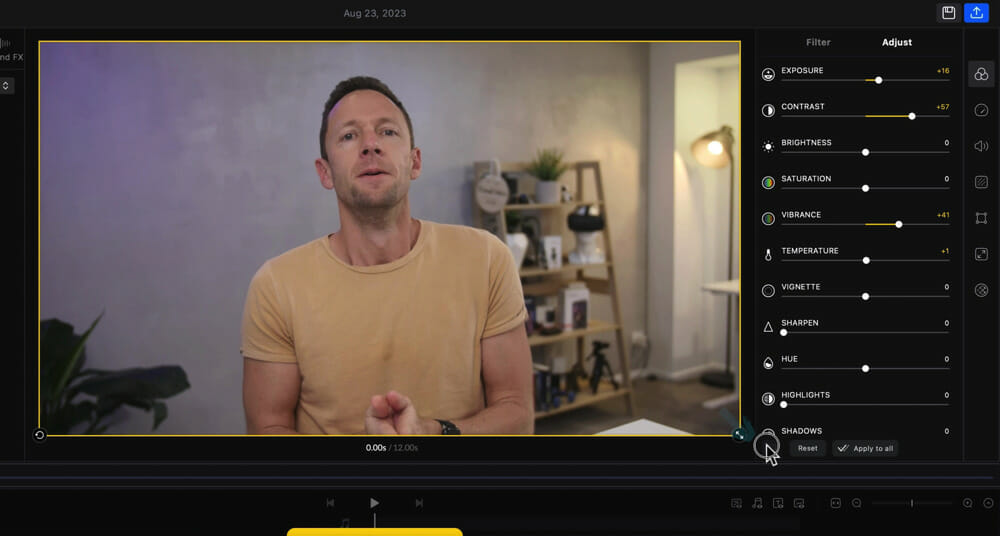
From there, we’ll look at the Vibrance Control.
This helps us adjust the intensity of colors in things like skin tones. Similar to the Contrast slider, if we move it to the left we’re taking some of the color away while if we move it to the right we’re boosting the colors.
By now your video color should be looking really good!
You can tick the box at the bottom of the controls to view the original shot.
After you’ve made the initial adjustments, you may want to go back through and make some more minor changes. This is because as you make more and more changes, some other things may need to be tweaked.
Obviously there’s tons more tools in here so feel free to have a play around and see what appeals to you. But you’ll likely find these are the main tools most people will be using.
Now let’s take a look at color grading in CapCut.
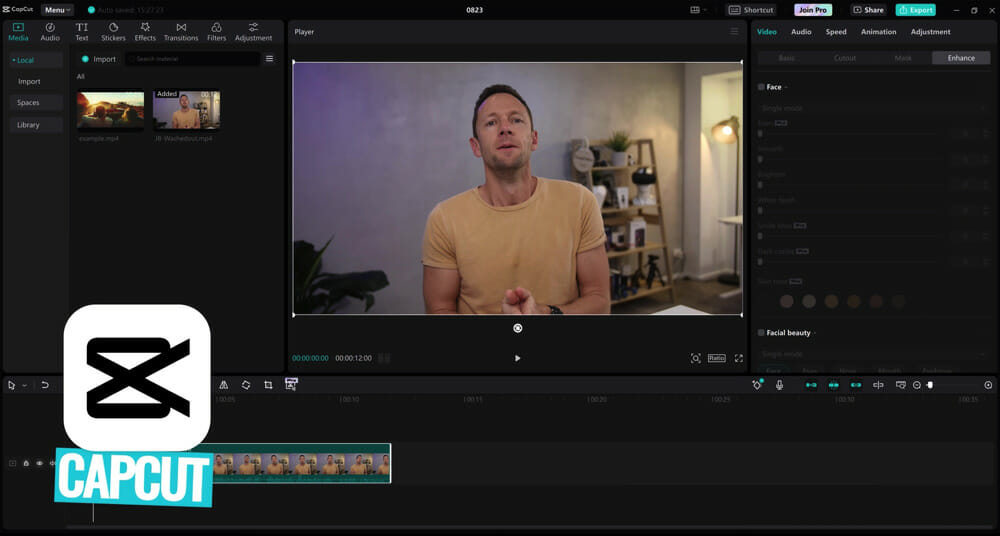
Color Correction Tool #2: CapCut
CapCut is another great video editorfor Windows, Mac, iOS and Android.
It’s got a lot of similar color controls and functionality that we saw in VN Video Editor.
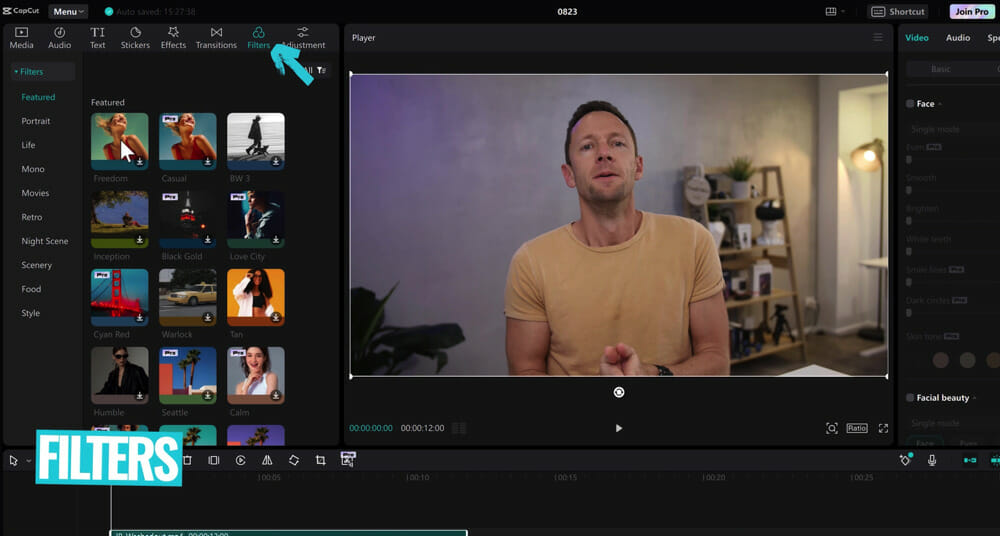
How To Color Correct In CapCut With Filters
Select your clip on the video editing timeline and go to Filters in the top left menu.
This is where you’ll find all the preset grades and filters that you can really easily apply to your video.
If you’re after basic correction that doesn’t require much playing around, these are definitely worth checking out.
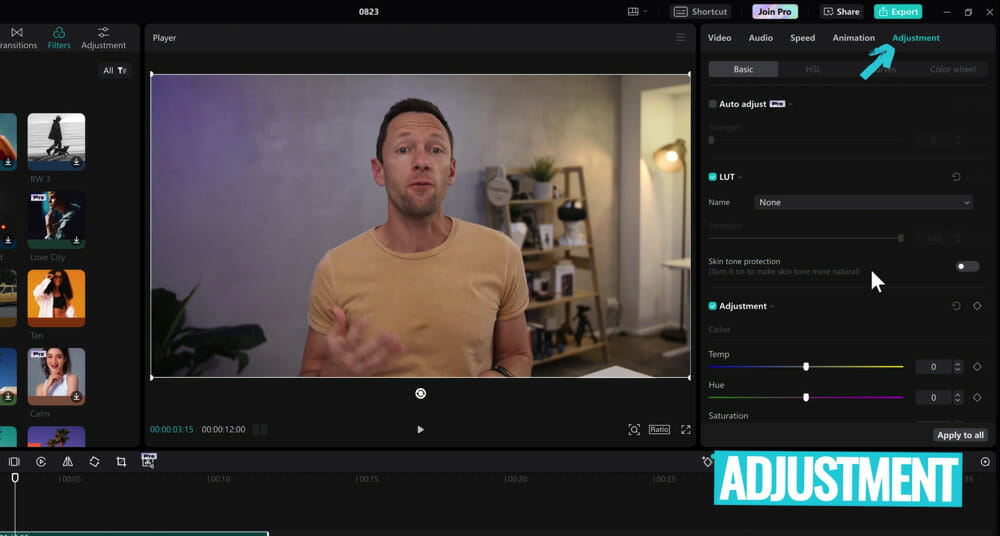
How To Manually Color Correct In CapCut
If you’d like to get more granular, again make sure your clip is selected and go to Adjustment in the top right menu.
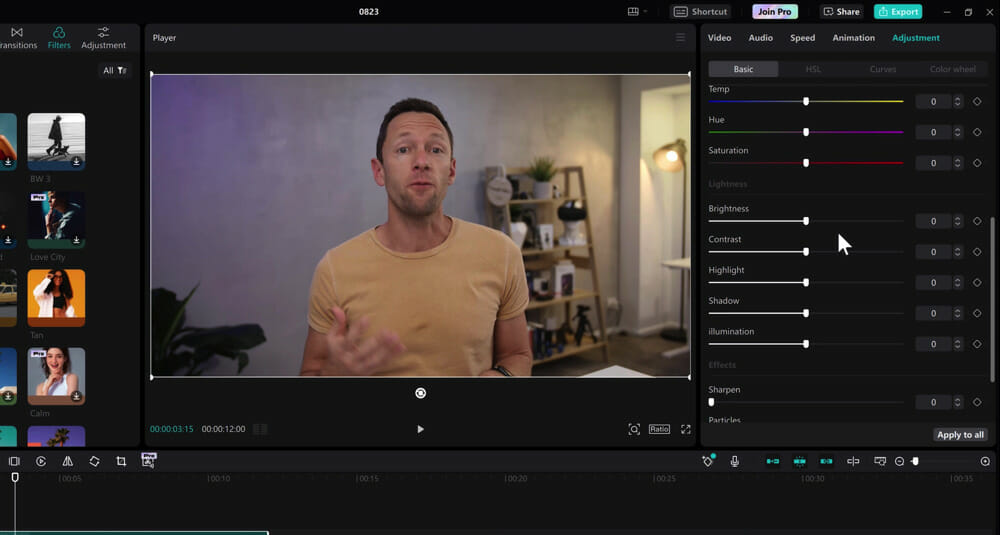
As you scroll through the tools here, you’ll notice that the functionality is really similar to a lot of tools out there.
In CapCut and most other tools, you’ll see:
- Color temperature
- Saturation
- Brightness
- Contrast
- Exposure (this is called Illumination in CapCut)
So you can use these tools to follow the same process we ran through above for color correcting your video.
How To Auto Color Grade In CapCut
At the top of CapCut’s color grading section, you’ll see an Auto adjust option.
For years now, the general rule has been to never use any built-in auto color grading tools – because they were so bad… In a lot of cases they would make the footage look worse.
But the good news is that CapCut’s Auto Adjust feature is actually pretty good!
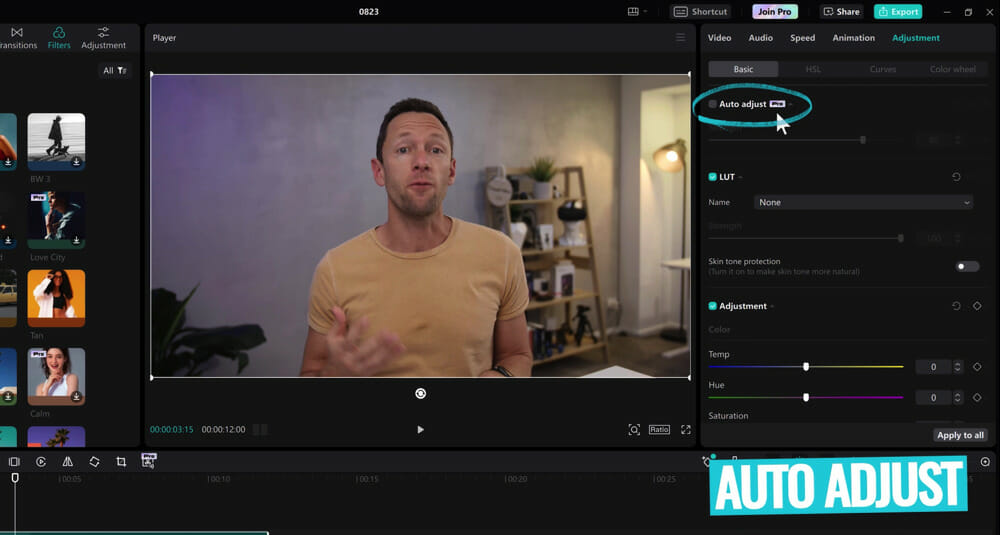
Once applied, you can adjust the strength of the automatically adjusted effects giving you a nice level of control.
Plus, you can still go through and adjust all the usual elements (e.g. temperature and tint sliders) even after the Auto Adjust feature has been applied. This makes it a great starting point while still allowing you to get granular with your adjustments.
So it’s really awesome that you don’t need to start from scratch.

CapCut has lots of AI tools built-in, but we’ve found no mention of this Auto Adjust feature being AI. So it could be AI or maybe in the future it will be AI – either way we’re really impressed with it.
Just keep in mind that this is marked as a Pro feature, so you will need to be on the paid plan to access it.
How To Color Grade In CapCut Like a Pro
A lot of video editing tools pack in a lot more advanced color correction tools too. So you definitely don’t need to, but if you want to get more advanced you have some awesome options available.
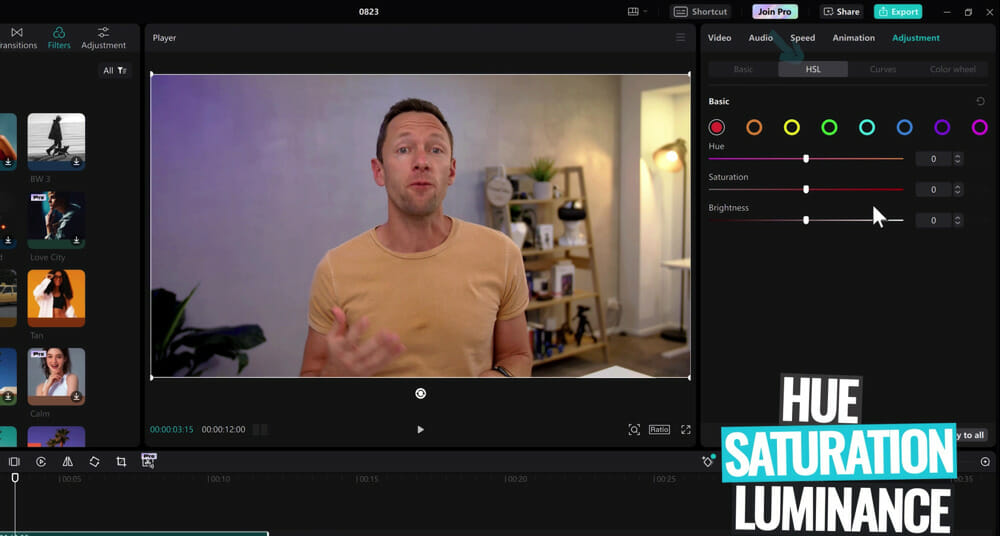
Along the top of the color correction window you’ll see menu bar with the following options: Basic, HSL, Curves, Color Wheel.
Basic is the area we were viewing tools like the Exposure, Contrast, etc.
HSL stands for hue, saturation, luminance. This allows you to make adjustments to each individual color. For example, if you select Orange and then adjust the slider bar this will adjust all the orange colors in your shot.
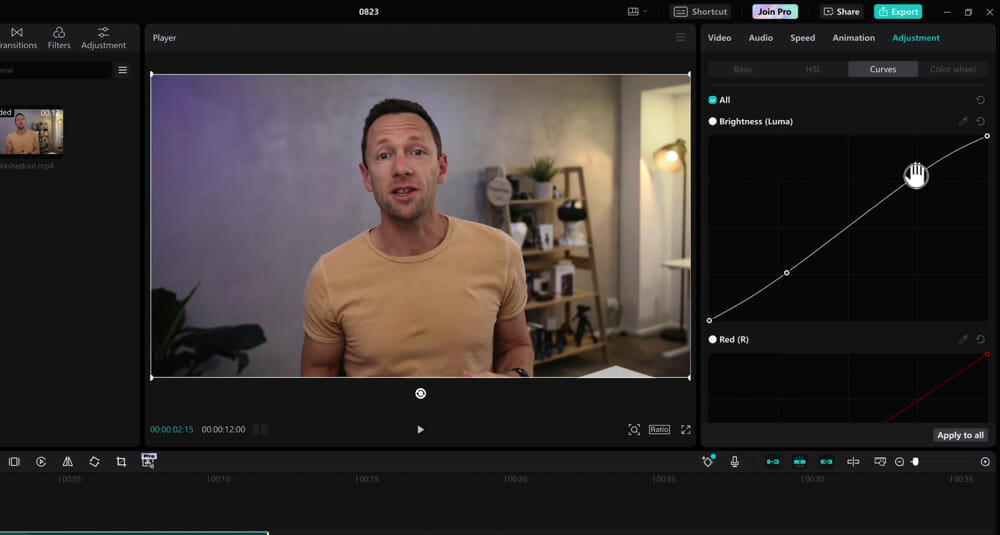
Curves allows you to adjust the different brightness areas in your shot. For example, we’ll select two points on the curve.
The bottom one will allow us to adjust the darker areas in our shot. If you drag that point up, it will brighten the dark areas. If you drag that point down, it will darken the dark areas.
Similarly, the top point will allow us to adjust the brighter areas in the shot. If you drag it up, the brighter areas will be made brighter. If you drag it down, the brighter areas will be made darker.
And you’re not just limited to two points – you can add as many points as you like along the curve to make really minor adjustments.
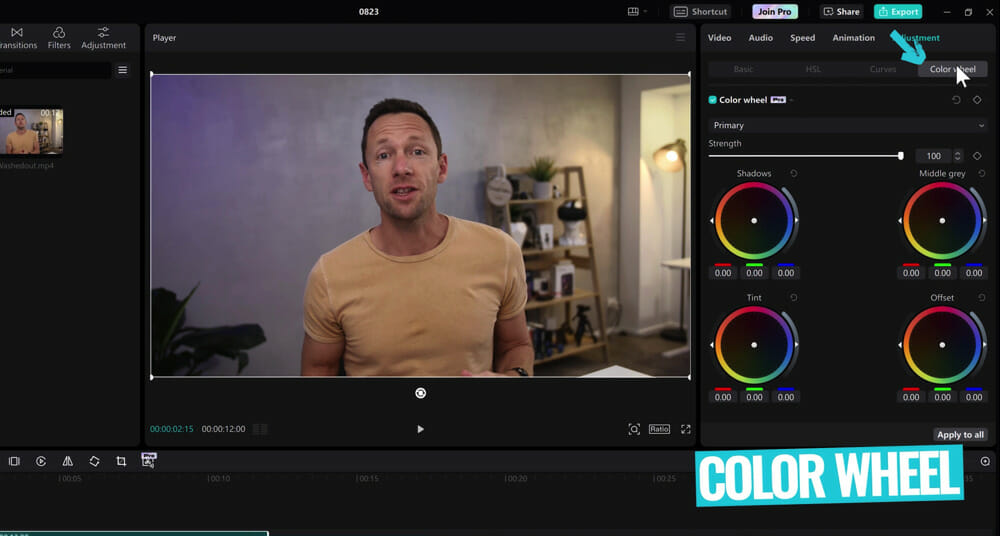
Color Wheel is a commonly used professional tool. There are four different wheels: Shadows, Middle Grey, Tint and Offset.
You can pick up and move the center mark for any of the color wheels. For example if you wanted to add more blue to the dark areas, you could go to the Shadows wheel and drag the center mark towards the blue.
There are also sliders on either side of each wheel that allow you to adjust the brightness and the saturation.
As we mentioned, if you just want to stick with basic correction tools – you definitely don’t need to get this complex but it’s awesome that you can dive in and tweak these things if you want to.
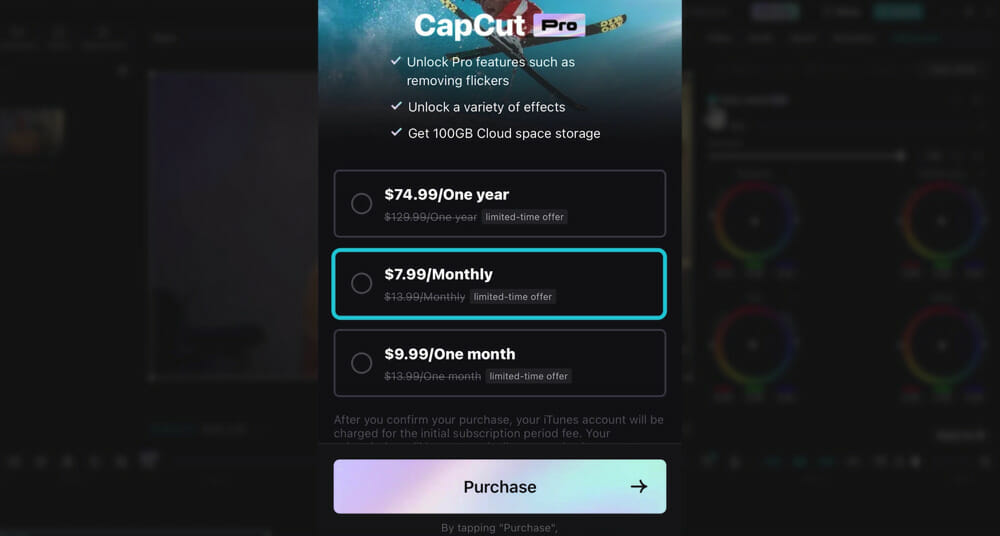
CapCut Pricing
CapCut is a free app but to unlock tools like the Auto Adjust feature, you’ll need to be on the CapCut Pro plan.
There are a few pricing options available for this:
- One year: $74.99
- One month: $9.99
- Monthly subscription: $7.99
Color Correction Tool #3: Adobe Premiere Pro AI
The next tool we want to share is an AI tool that’s built into Adobe Premiere Pro.
So you will need an Adobe Premiere subscription to access this, but we wanted to show you just how far the AI color correction tools have come!

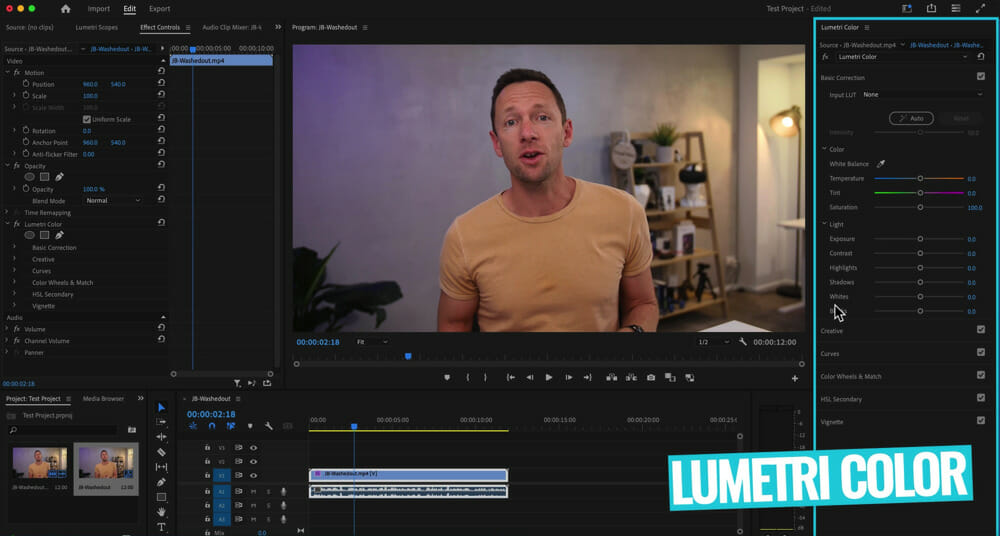
Inside Adobe Premiere, make sure you have the Lumetri Color panel enabled. If you don’t, simply go to Window in the top menu bar and select Lumetri Color.
What you’ll see here is very similar to what you’ve already seen in VN Video Editor and CapCut.
You’ve got access to basic color controls, curves, color wheels and everything in this section.
Color Grading With Premiere Pro’s AI Tool
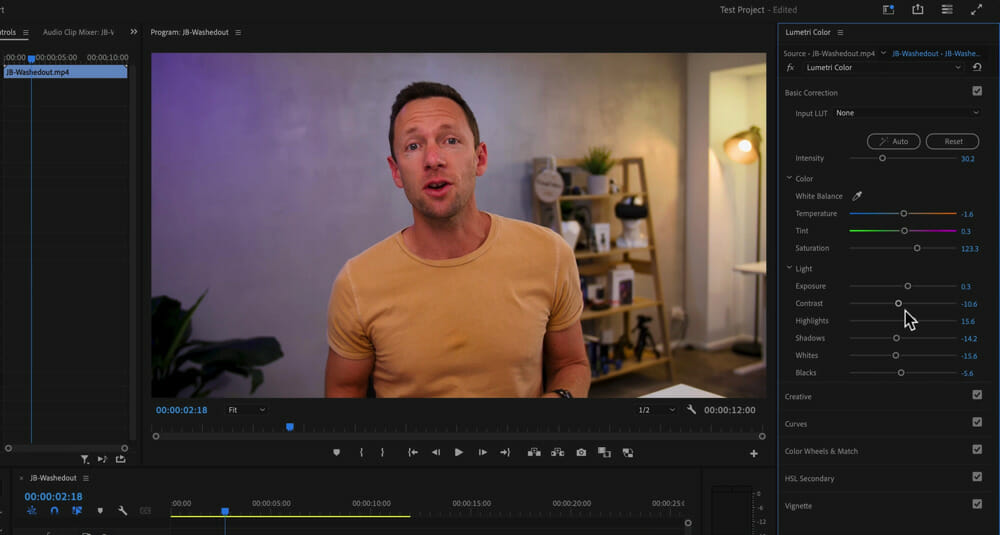
To access the AI color grading tool, go to Basic Correction and hit Auto.
It says that this feature uses their Adobe Sensei AI to make the adjustment.
And again, you’ll see that the auto adjustment is actually pretty good! In this case, the adjustment looks a little oversaturated but this is personal preference.

Plus you can really easily adjust the Intensity slider scale if you find the adjustment is a bit too much.
Another added bonus is that Adobe Premiere shows you all the adjustments that were made to the clip. So you can dial in the elements to adjust the effect, making it the exact look you’re going for.
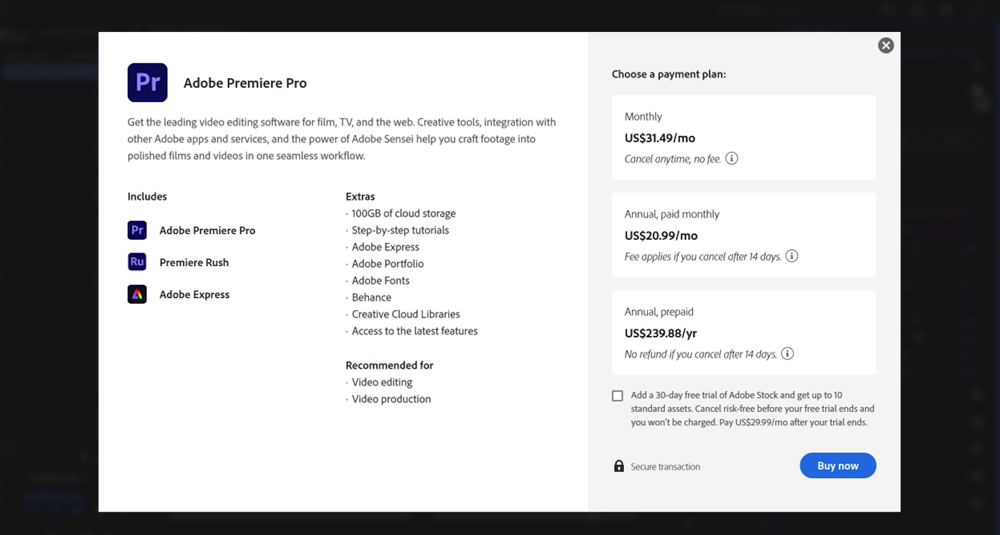
Adobe Premiere Pro Pricing
To access any of these tools in Adobe Premiere Pro, you will need an Adobe Premiere license.
Again, there are few different payment options:
- Monthly: $31.49/month
- Annual, paid monthly: $20.99/month
- Annual, prepaid: $239.88/year
Color Correction Tool #4: Fylm.ai
This is an AI color grading and color correction tool. There’s seriously so much cool stuff in here!
You’ll need to create a free account and then log in.

Once you’re signed in, you’ll be taken to the main interface. Hit the Upload icon to upload some footage.
Then select the type of footage it is or which camera it was shot on.
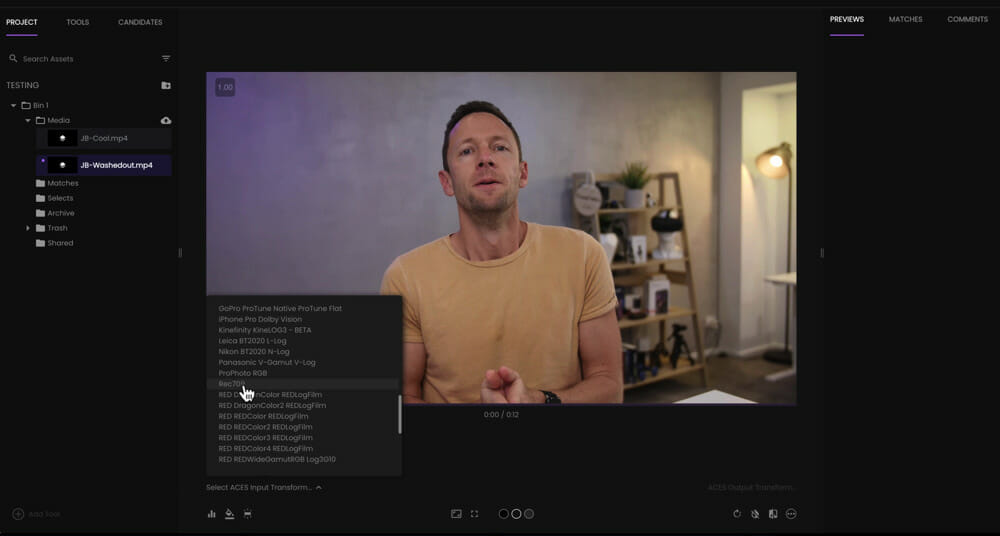
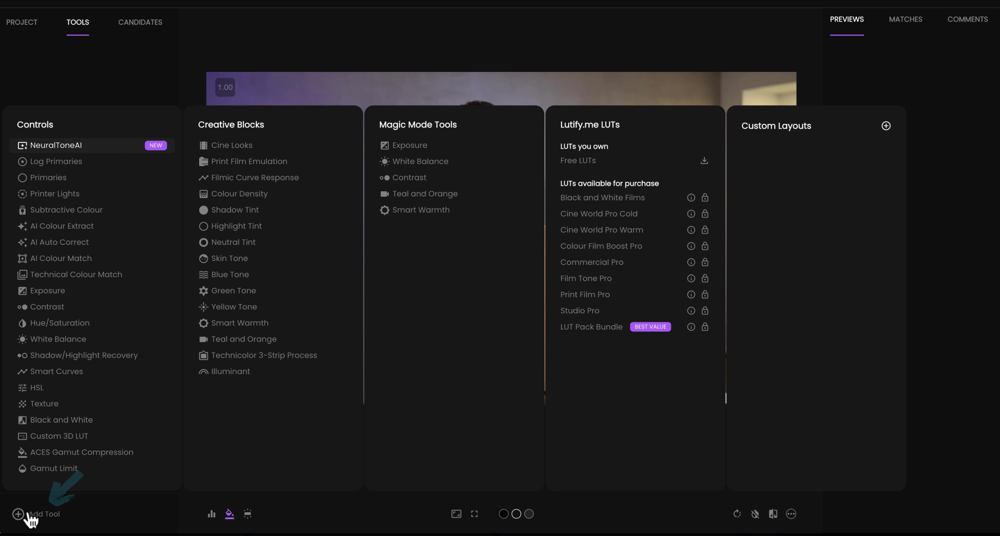
Go to Tools in the top left menu and select Add Tool in the bottom left corner.
There are tools for all sorts of things such as adjusting white balance, skin tones, exposure, plus some awesome AI tools – there are so many options available to you.
Color Correcting With Fylm.AI’s AI Tools
The AI tools you’ll find in the menu are:
- AI color match
- AI auto correct
- AI color extract
- NeuralToneAI
Let’s start with the AI Auto Correct tool. Just select it in the Tools menu and it will automatically go through, analyze the clip and make adjustments.
Below the AI Auto Correct settings, you’ll see a sub-option called Favor Context. It says this will perform a color correction but within the original context of the image.
This means if the original image is dark and cold, the AI auto correct will try to preserve that feeling. It will create a look that is dark and cold, but adjusted.

At the bottom is a slider for the Opacity which allows you to adjust the intensity of the AI color adjustment.
Now let’s try the NeuralToneAI tool. Remove the AI Auto Correct effect, go to Add Tool and select NeuralToneAI.

Then you’ll see a range of options in the right sidebar. The AI will take note of which option you choose, so it can learn which effects you like the look of. You’re giving the AI feedback and training it.
After you’ve selected an option, you can adjust the elements in the top left window. The tools you have access to here include:
- Exposure
- Contrast
- White balance
- Tint
- Opacity
You can also toggle the effect on and off to see a before and after.

Color Correcting Using Fylm.ai’s Magic Mode
There are SO many awesome features in here, we definitely can’t get through them all. But there’s one more standout that we really want to share with you.
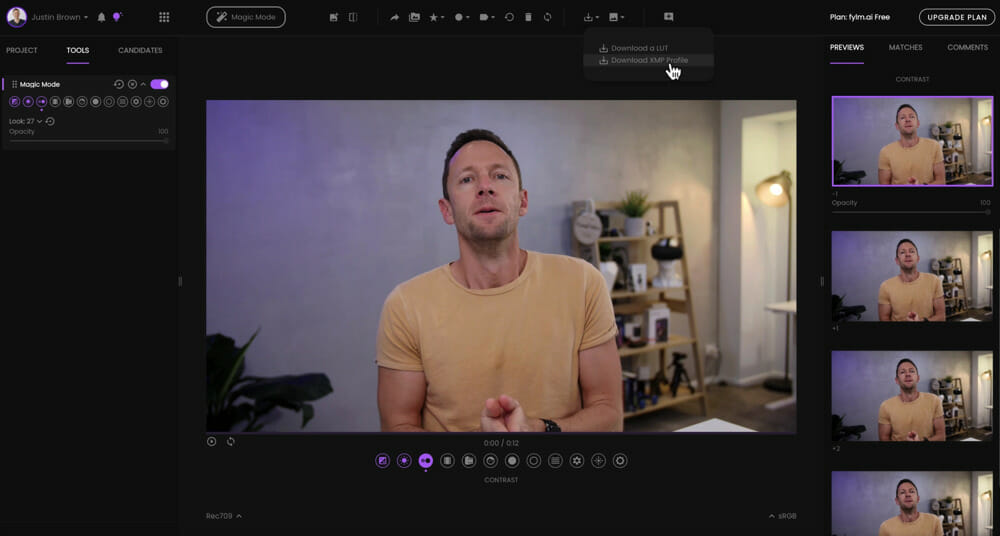
It’s called Magic Mode and it steps you through the process of building out a color grade for your video.
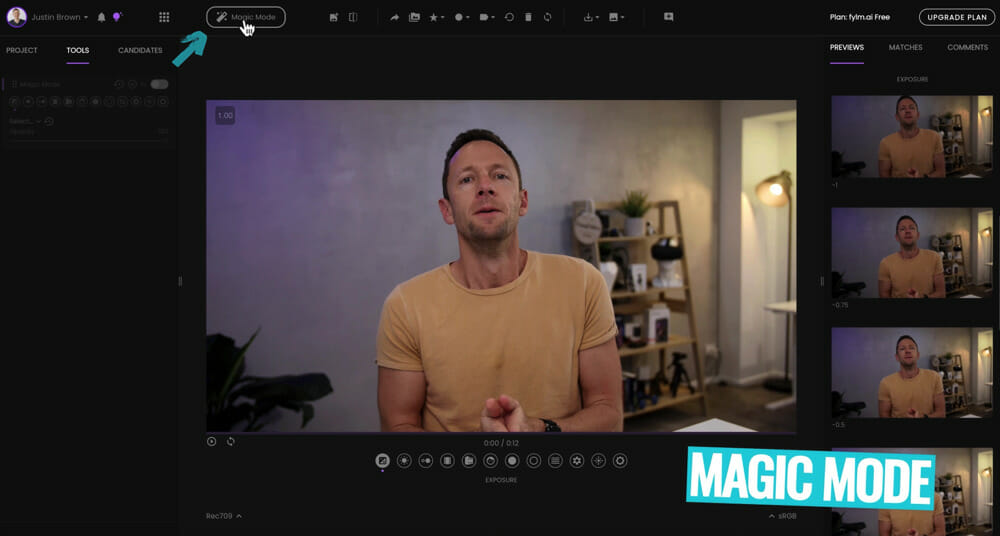
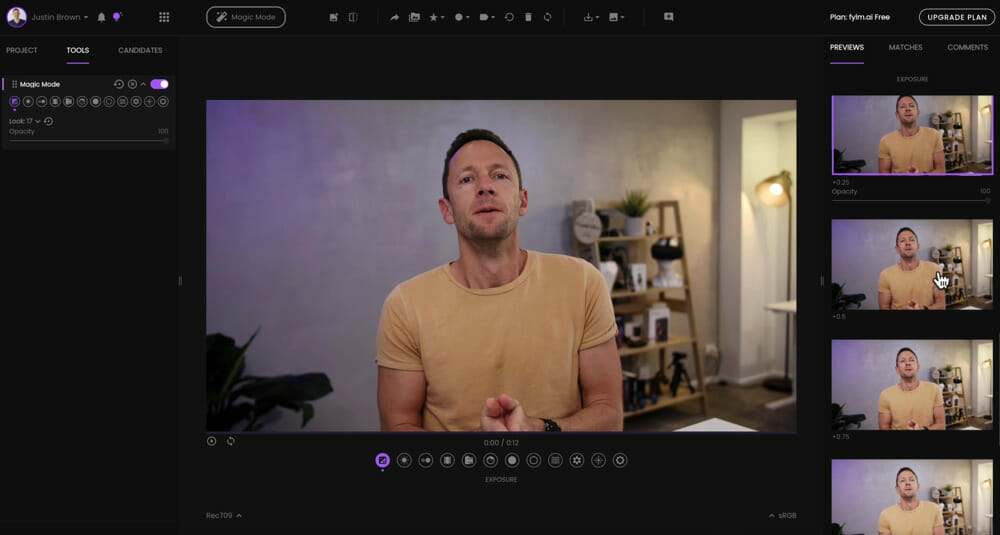
Start by selecting Magic Mode in the top menu bar. In the left window you’ll see a bunch of icons for each of the different elements you can adjust in the color grading process.
The first one is Exposure. Select the icon and in the right window there will be a list of previews, all with different exposure levels. You can select the preview that you like the look of the most and then move onto the next icon.
The next icon is White Balance. So again, select the icon and view the previews in the right window.
You can follow through, selecting and choosing previews for each of the icons.
So it helps you build out the style you’re after, quickly and easily.
How To Download LUT Files For Color Grading
Once you’re happy with the color adjustments, you can go to Download in the top menu.
From here you can download a LUT or color profile which can be imported to your video editing tool.
This means instead of applying all your effects in your video editing tool (like we did above in the previous options), you can import the LUT file that was created in Fylm.ai and apply that effect to your videos.
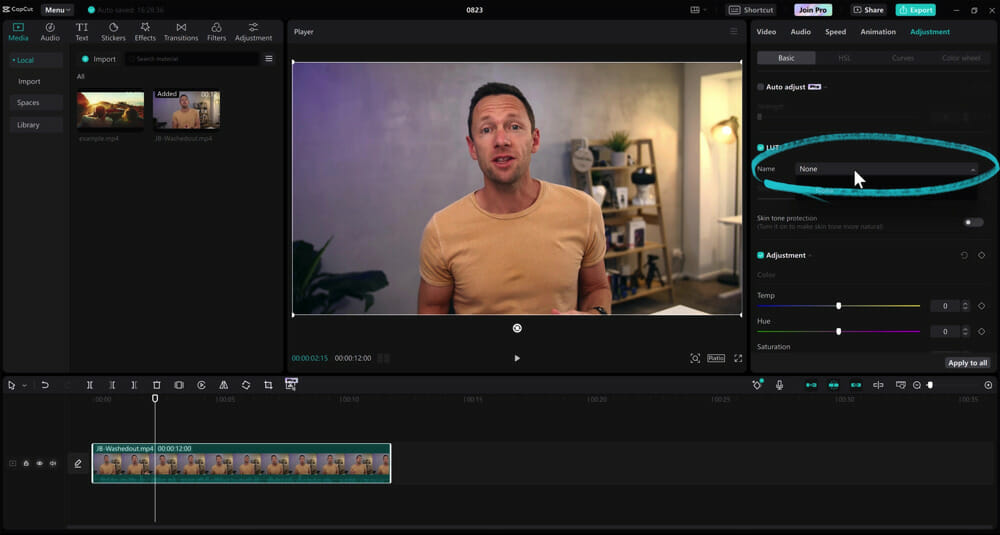
For example, you can do this in CapCut by going to the color tools in your project. Under Basic you’ll see LUT – this is where you can upload that LUT file.
So this is an awesome option that allows you to get really granular and then easily apply your effect to any video projects.
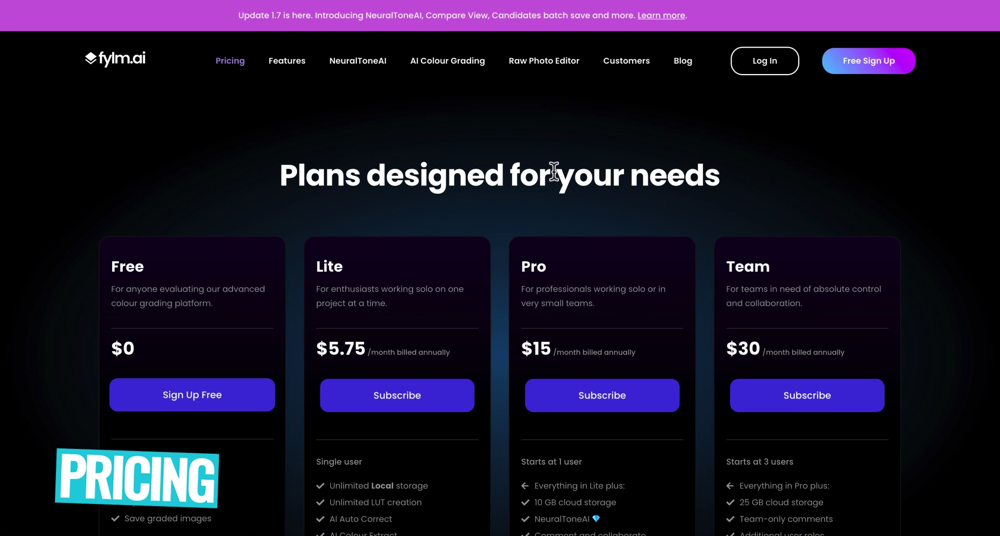
Fylm.Ai Pricing
There are number of different options when it comes to pricing:
- Free – $0/month
- Lite – $5.75/month
- Pro – $15/month
- Team – $30/month
So moving from the free plan to the Lite plan, you’ll unlock a lot of great functionality. But if you want access to the NeuralToneAI tool and a bunch more tools, you’ll need to jump on the Pro plan.
No matter how simple or advanced you want to get with your color grading, don’t forget that it’s a creative process. There’s no right or wrong. You get to make the videos so you get to decide how they look!
As you can see there are some incredible color correction options out there. We’re already really impressed with the AI tools out there which make the process so much easier.
If you want to geek out on some more AI tools, check out our complete guide on the Top 5 AI Video Editing Tools Right Now.
FAQ
How do I fix the color of a video?
Most video editing software have built-in color grading tools. We recommend following the process outlined above to help you dial in the right color for your video project.
What software to color correct video?
VN Video Editor, CapCut and Adobe Premiere Pro have great built-in color grading tools. Another option is a platform called Fylm.ai which is a tool dedicated to color correction with some incredible AI options.
Recommended Gear & Resources
Check out an up-to-date list of all the gear, software & tools we use and recommend right now at Primal Video on our resources page here!