FiLMiC Pro is our #1 pick when it comes to best iPhone camera app AND best Android camera app.
It’s packed with a ton of smartphone filming features, allowing you to unlock amazing manual control and DSLR-like settings on your Android or iPhone camera.
Important: When available, we use affiliate links and may earn a commission!
A huge new update was recently released which has taken this DSLR camera app to the next level. It has new pricing, a new interface and some really cool new features.
At first glance, this massive range of features can be overwhelming… The good news is, with even a basic understanding and a simple process you can use FiLMiC Pro to help you create awesome videos.
In this guide, you’ll get a complete step-by-step FiLMiC Pro tutorial.
Whether you’re using FiLMiC Pro Android or FiLMiC Pro iOS, this tutorial will help you capture some amazing iPhone, iPad or Android video footage.
Let’s get started.
FiLMiC Pro Interface
We’ll do a quick runthrough of the main features and user interface before diving into how to use FiLMiC Pro.

Key Settings
Along the top of the FiLMiC Pro camera app you’ll see a number of key settings:
- ISO
- Shutter speed
- Kelvin temperature
- Estimated remaining recording time
- Video codec
- Picture profile

This isn’t just information. Unlike most other camera apps, all of those settings are tappable meaning you can dive straight into the settings by tapping on any of the buttons.
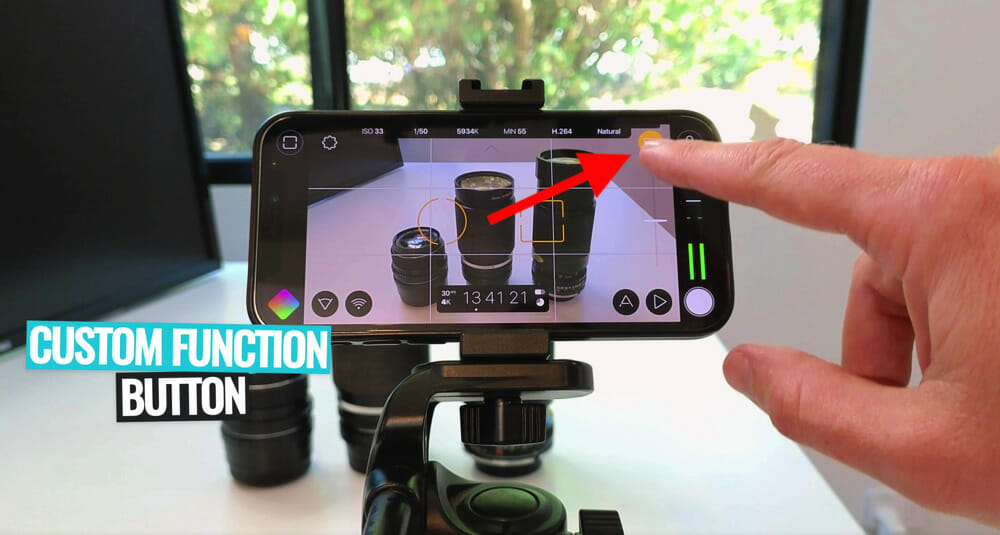
Custom Function Button
This is an incredible button – you can customize what this button does!
It’s in the top right corner for easy access and if you long-press on it, a menu will appear with the different settings you can choose from.
You can tap the Plus icon to see a complete list of all the different functions that can be assigned to that button.
So if there’s a setting or feature you’re constantly using, it’s a great idea to set that under your Custom Function button.
Audio Control
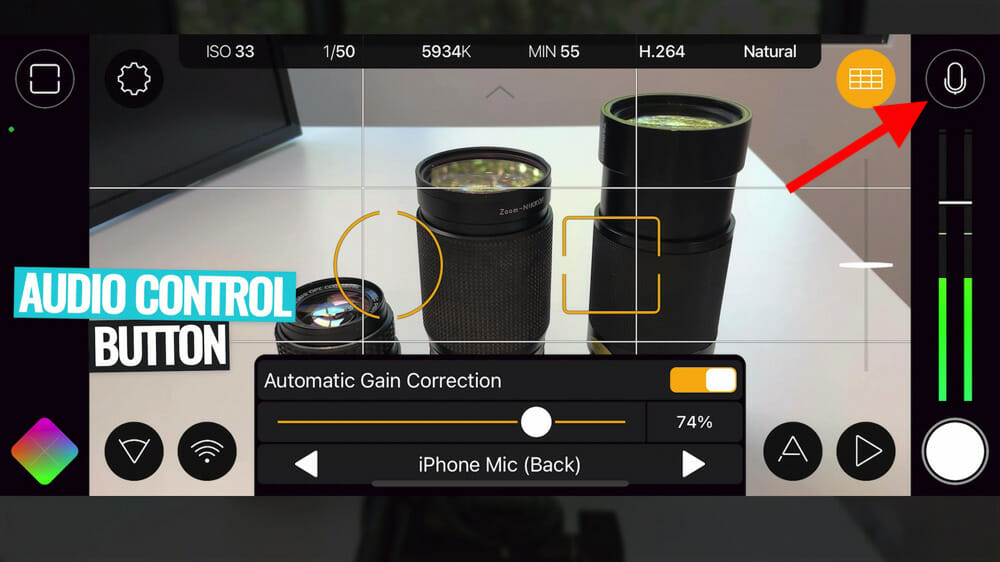
You can access the audio controls by tapping the Microphone icon in the top right corner, next to the Custom Function button.
Here you can access:
- Automatic Gain Correction
- Volume levels (these can also be adjusted in the Audio Bars on the right hand side)
- Microphone selection (tap the arrows to cycle between different microphone options)
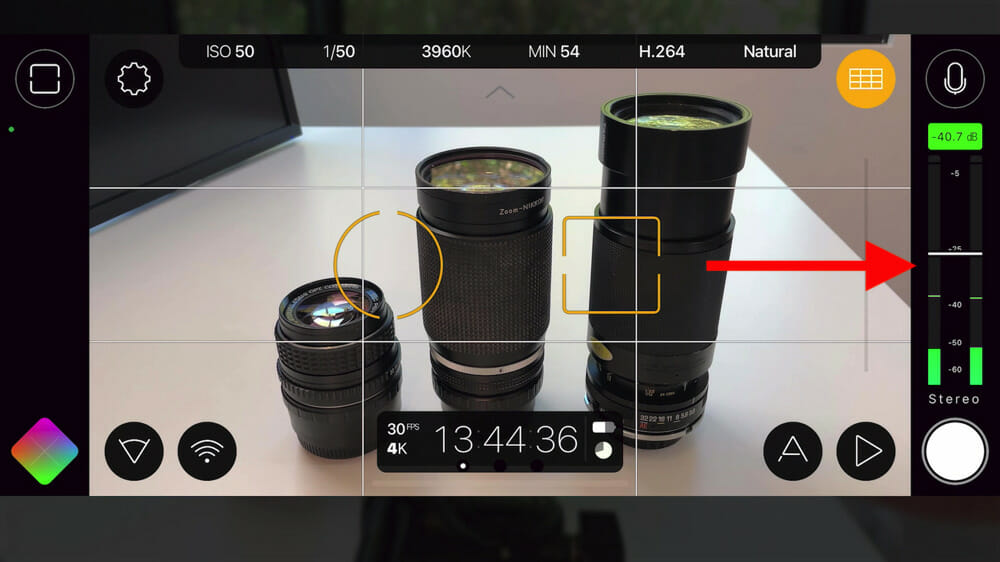
You can also adjust the volume levels by tapping and dragging the white line on the Audio Bars along the right side of the screen.
If you tap the Audio Bars you can also access some more professional audio features.
Record
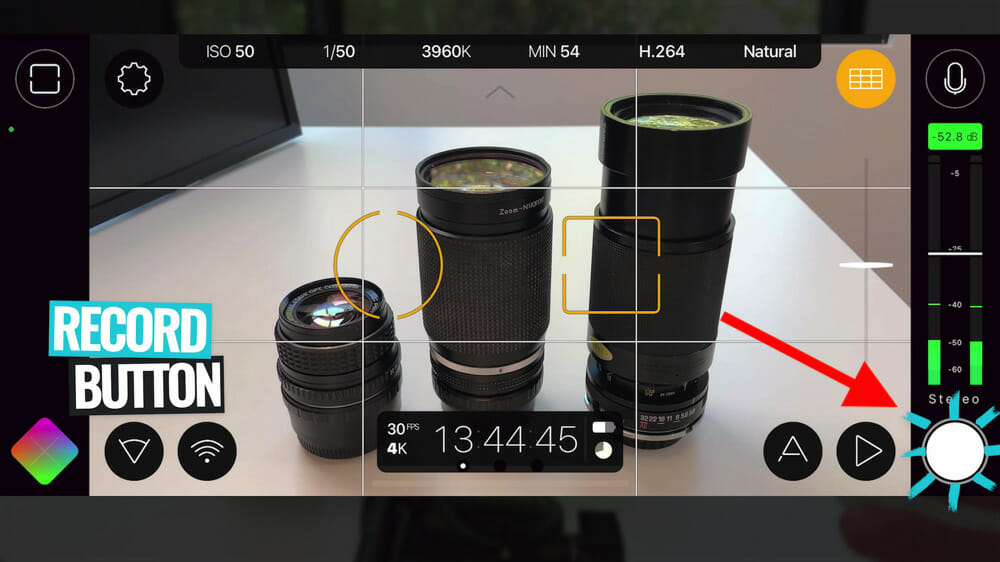
The white circular button in the bottom right is the Record button.
Once you’ve adjusted all the necessary settings and are ready to start recording, you can tap that button.
Zoom Slider
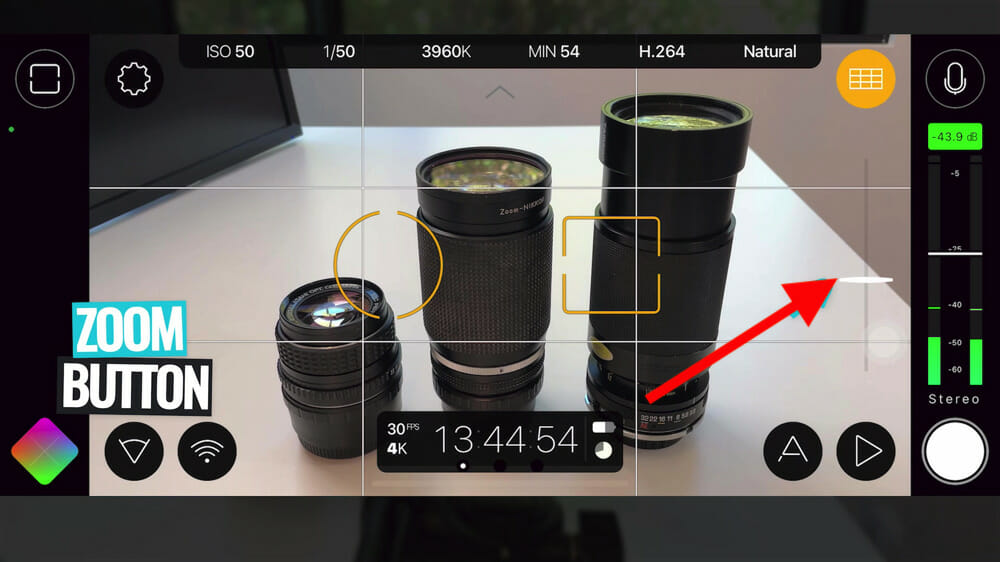
On the right side of the camera screen you’ll see a slider bar.
You can drag this up and down to zoom in and out.
Playback
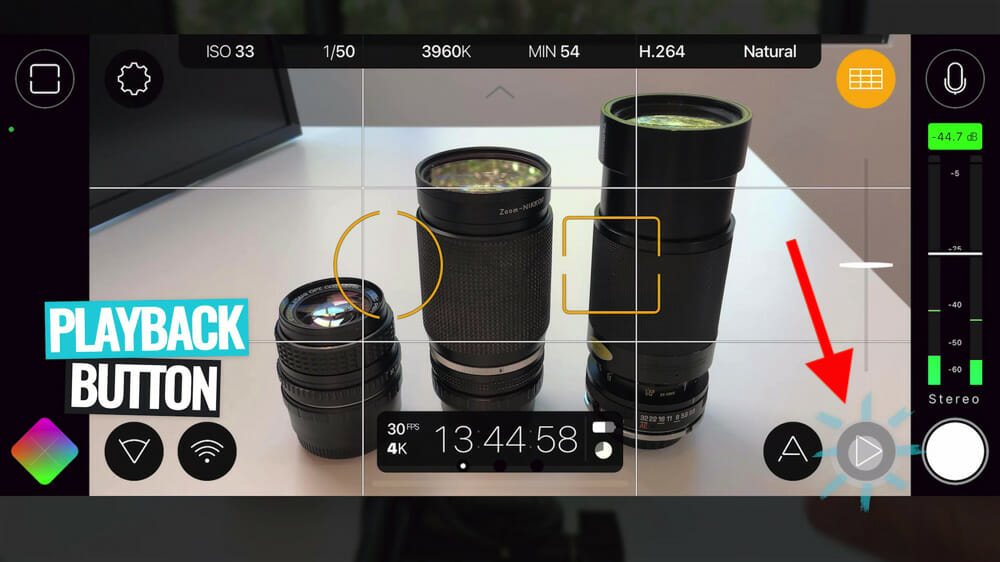
On the left of the Record button is the Playback button.
If you want to preview or playback any of your recordings, you can access them by tapping this button.
Video Overlays
The button with an A icon on the left side of the Playback button is where you can access all of your video overlays.
The overlays you can choose from here are:
- Focus peaking
- False color
- Zebras
- Reactive mode

Time Code Counter
The time code counter function at the bottom of the screen displays a bunch of great information, such as:
- Time code (obviously!)
- Battery level indicator
- Storage capacity
- Recording settings (e.g. 4K 30 FPS)
- Scopes (if you tap the box you’ll see a range of scopes quickly & easily)

Remote Options
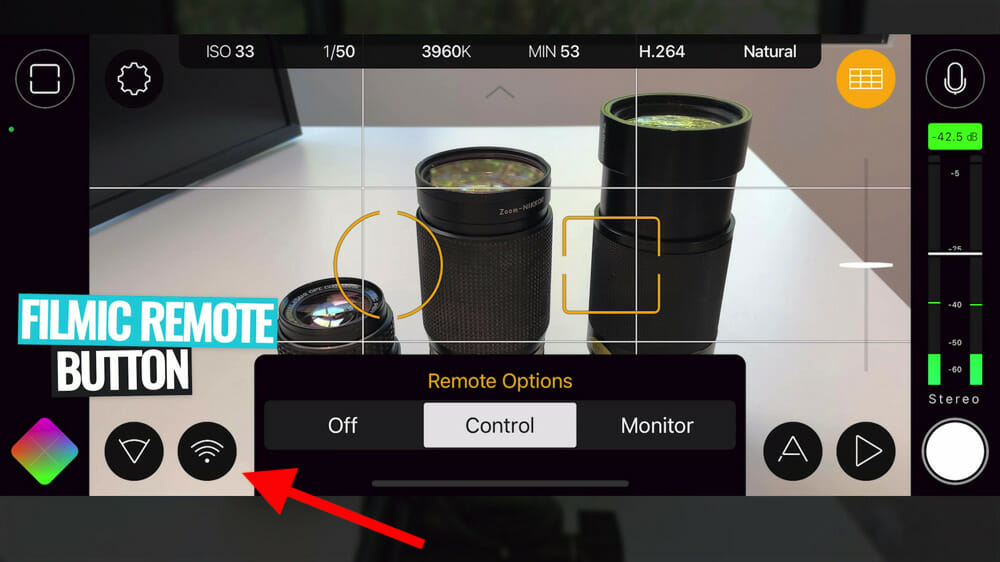
The Wifi icon in the bottom left is where you can enable remote control.
This allows you to remotely control and monitor your main device from a secondary device.
It’s a really powerful tool that can take your video creation to the next level!
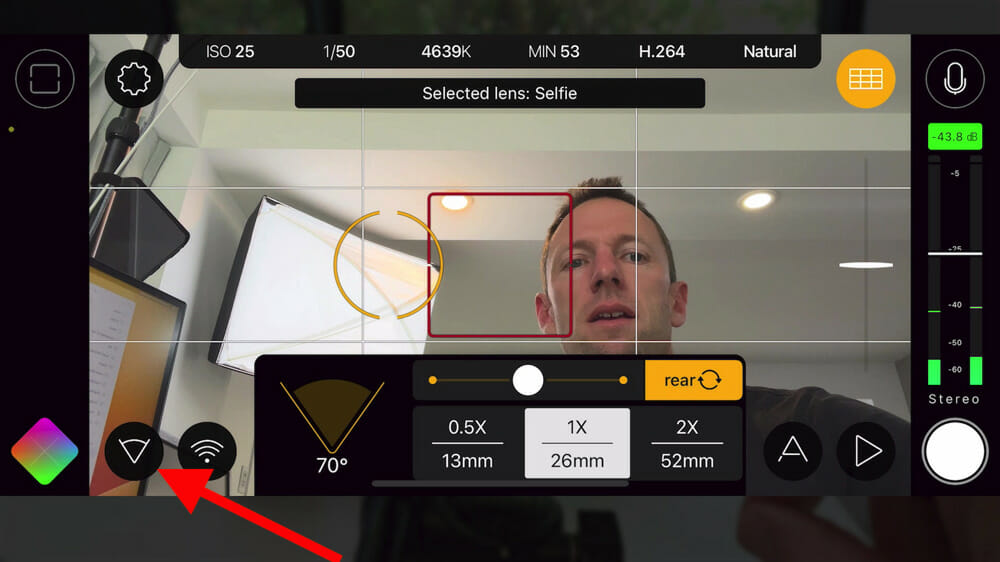
Camera Lens
To the left of the Remote Options button is the Camera Lens button.
You can switch between the front and rear camera. Plus if you’re using the rear camera you can select between three different zoom options:
- Ultra wide
- Wide
- Zoom
You can also adjust the slider to get really granular with the specific setting you want.
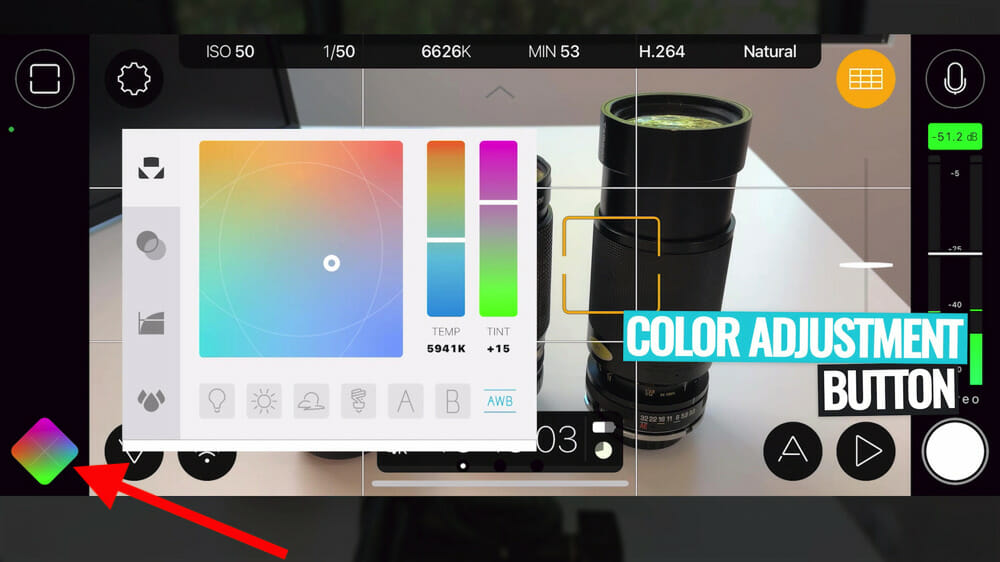
Color Adjustment
In the bottom left corner is where you can adjust all of the color settings.
We’ll go through this in more detail later.
Focus Adjustment
In the top left corner is the Focus Adjustment button. You can switch between:
- Reticle
- Center weight
- Manual
Don’t worry, we’ll run through how these work soon!

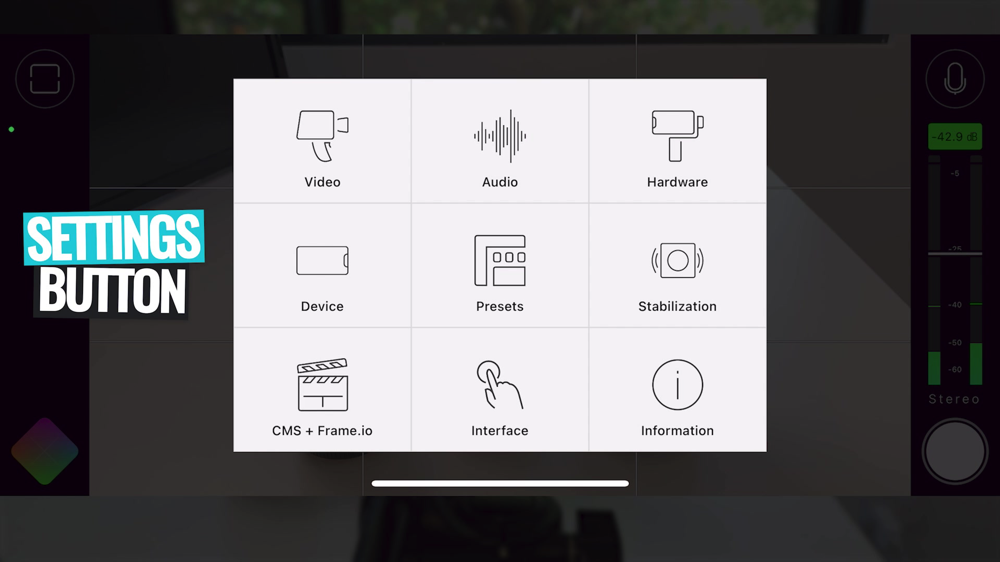
Settings
Just right of the Focus Adjustment button is the Settings button. This is where we recommend you start off first, so you can dial everything in before you get started with filming!
Having said that, now let’s dive into the different settings you might want to adjust in FiLMiC Pro.
Video Modes
One of the first settings you might want to adjust is the video setup.
Go into Settings and tap on Video. This is where you can adjust the video modes to lock in your video and image quality.
You have access to the following settings here:
- Resolution: Tap on 4K and you can see there are options for everything from 540p up to 4K for you to choose from
- Recording Bitrate: You can choose between 10-bit, 8-bit or you can enable Dolby Vision HDR
- Recording Quality: Here you can choose Economy, Apple Standard, Filmic Quality or Filmic Extreme
- Video Codec: There’s H.264 or HEVC available (for compatibility we generally leave this on H.264)
- Video HDR: You can enable this if you want to record in high dynamic range
- Frame Rate: Depending on the resolution, mode and the camera hardware you’re using, you can choose from 24 up to 240
- Time Lapse: If you want to record a time lapse this is where you can enable it
- Recording Frequency: If you’re getting flickering in your videos you can switch the settings here
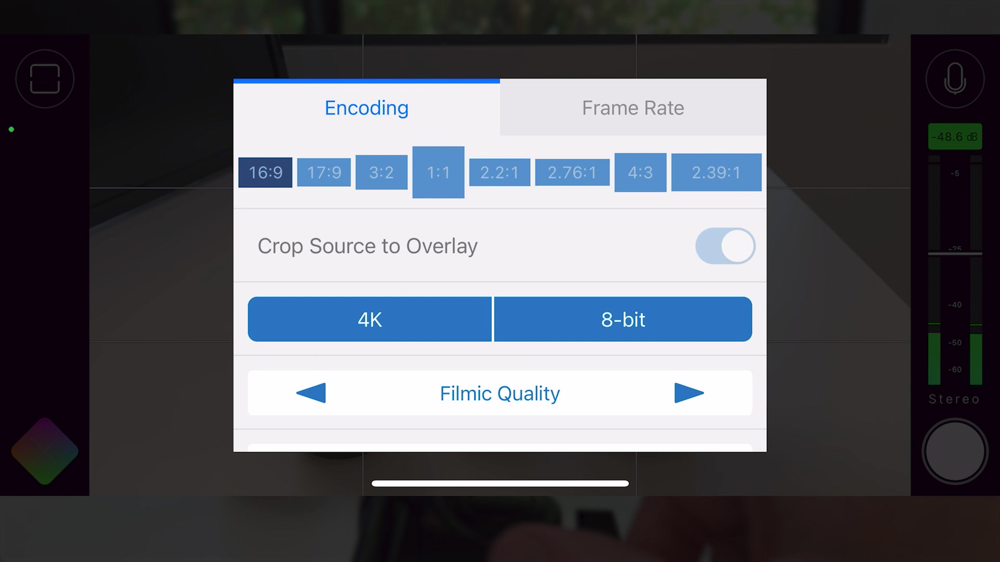
PRO TIP: In the Encoding section you can also add different overlays to show what your video will look like with different aspect ratios applied. Plus you can toggle on Crop Source To Overlay to actually film in that aspect ratio.
Don’t forget you can preview and adjust the key video settings mentioned here from the main screen as well.
Audio Settings
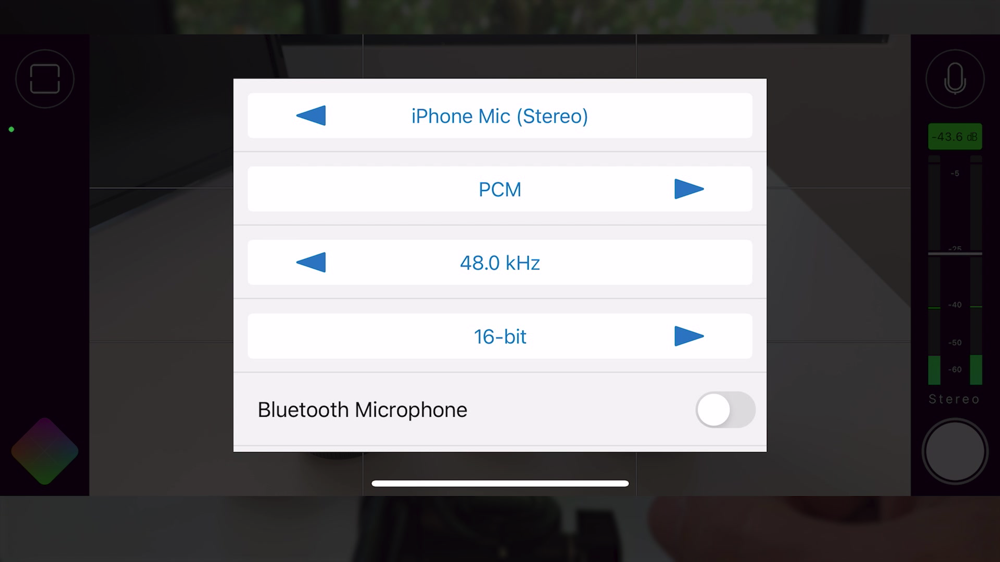
To make adjustments to your audio settings, go to Settings and select Audio.
In here you can adjust:
- Which microphone you’re using
- Audio recording type (you can choose between PCM, AIFF or AAC)
- Audio frequency
- Audio bit depth (the default is 16-but but you can go up to 24-bit as well)
- Bluetooth microphone (if you want to use AirPods or a bluetooth microphone, enable that here)
- Video only (this is for if you don’t want to record audio)
Hardware Settings
There’s also a range of hardware settings inside FiLMiC Pro. Go to the Settings menu and select Hardware.
You’ll find a bunch of different settings in here, such as Clean HDMI Out. This can be used for if you want to connect your phone or device to an external recorder, external screen or even a computer you can set that up here.
The next setting is Audio Over HDMI which is useful if you want to include audio output in that HDMI feed mentioned above.
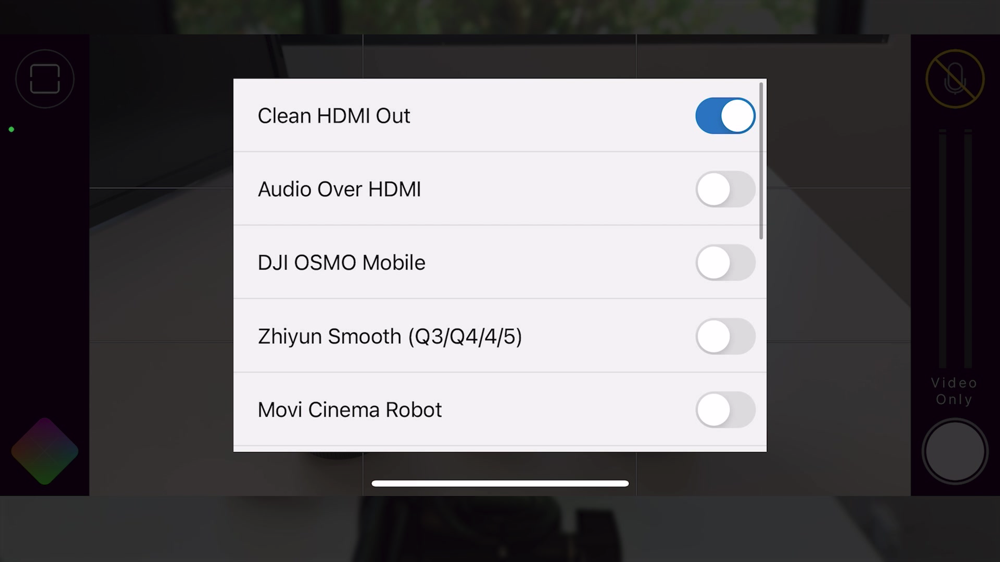
This area is also where you can enable different gimbal stabilizers within the camera app such as the DJI OSMO Mobile, Zhiyun Smooth or the Movi Cinema Robot.
There’s anamorphic adapter support in here as well, depending on which type of lens you’re using. Not only can you preview your anamorphic lens here but you can also set it to record desqueezed.
But if you just want to record as a normal anamorphic file, if you’re using an anamorphic lens, you can turn on Desqueeze in Preview Only.
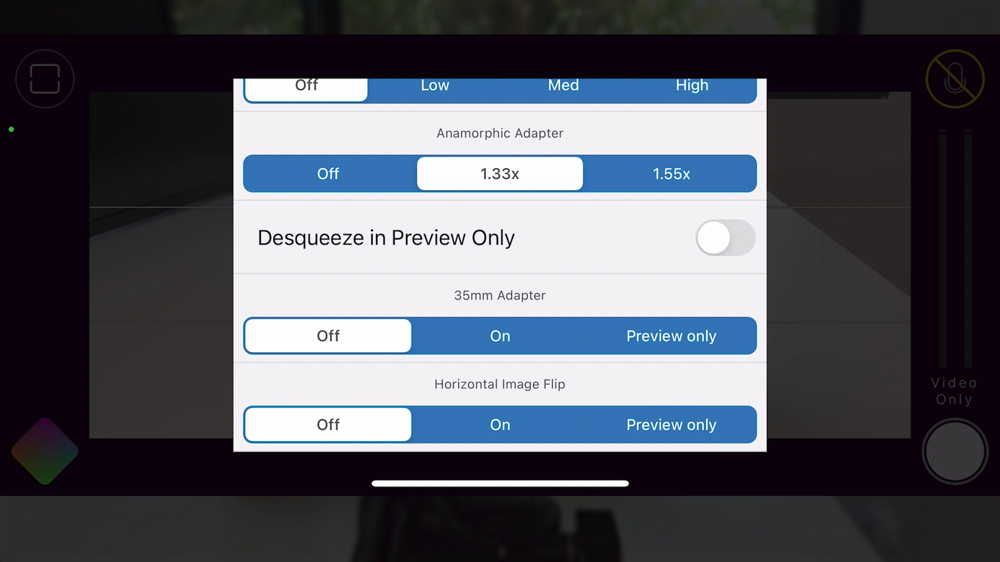
You can also enable your phone’s torch and select the strength.
There’s also the ability to flip your image or video and have that either as a preview only while you’re recording or to have that baked into your recorded video.
Device Settings
To adjust any device settings, select Device in the Settings menu.
As we mentioned earlier in this article, the default for FiLMiC Pro is to record all of your clips to its own video library (which you access by pressing the Play icon on the home screen).
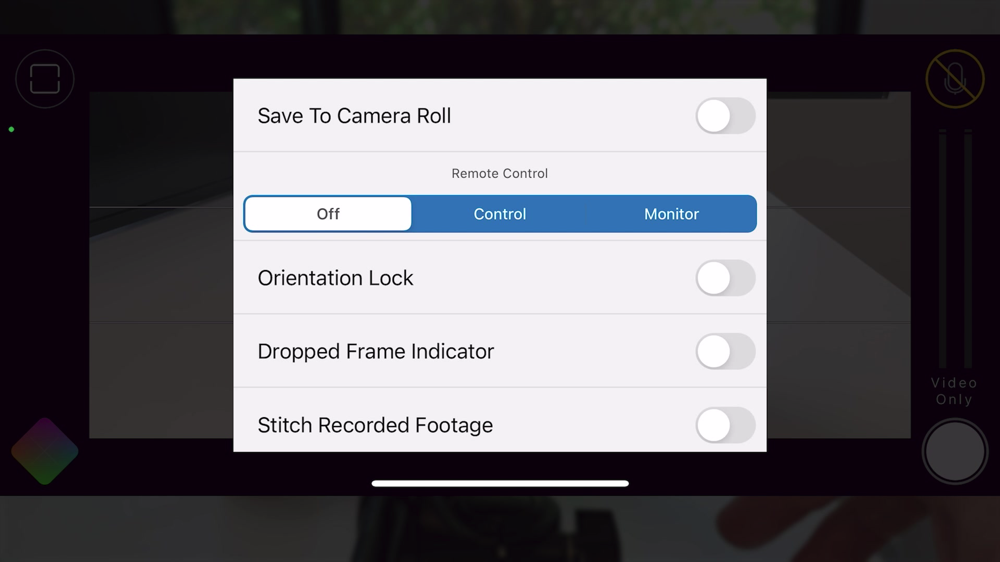
But there’s an option under the Device settings which allows you to save your video clips directly to your camera roll.
So if you’re going to be sharing things on social media, it might be quicker for you to save the videos to your camera roll for faster access.
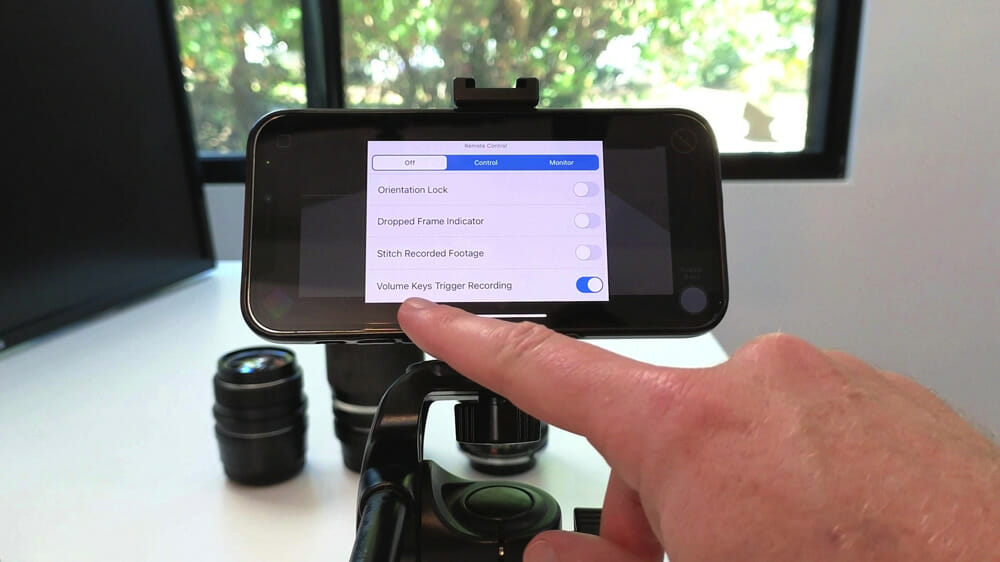
You can also customize these settings:
- Orientation lock (to stop your device from automatically changing orientation)
- Dropped frame indicator (this lets you know if there are any issues with your recording)
- Stitch recorded footage (this is great if you do a bunch of small clips but want one big file at the end)
- Volume keys trigger recording (you can use volume up and volume down to start and stop recording)
Stabilization Settings
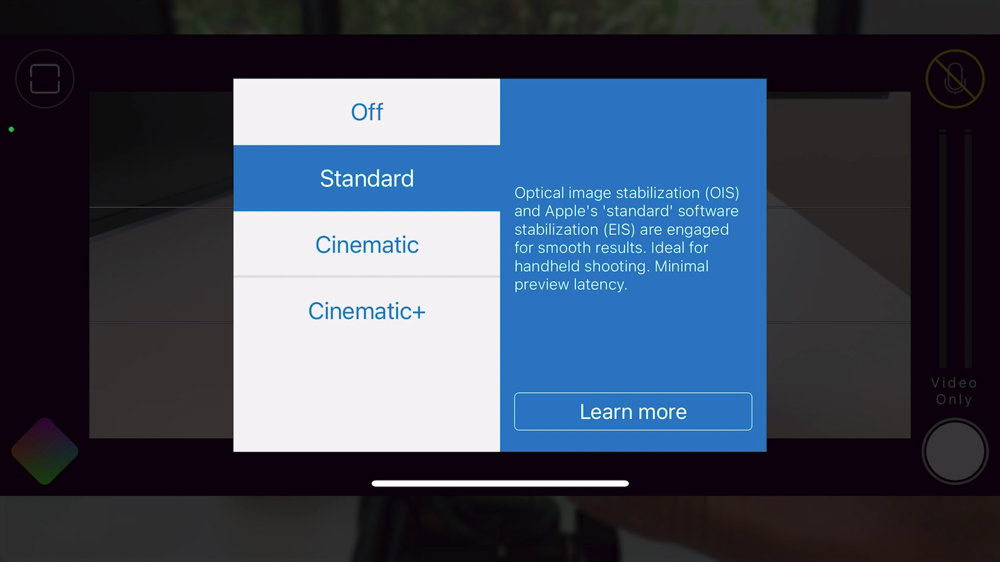
Another setting in FiLMiC Pro that you might find really useful is stabilization. Go to Settings and select Stabilization.
Here you can choose between Standard (this is the built in stabilization from Apple’s camera app), Cinematic and Cinematic Plus. The latter two will give you a greater level of stabilization which is great if you’re going to be moving around while filming.
Interface Settings
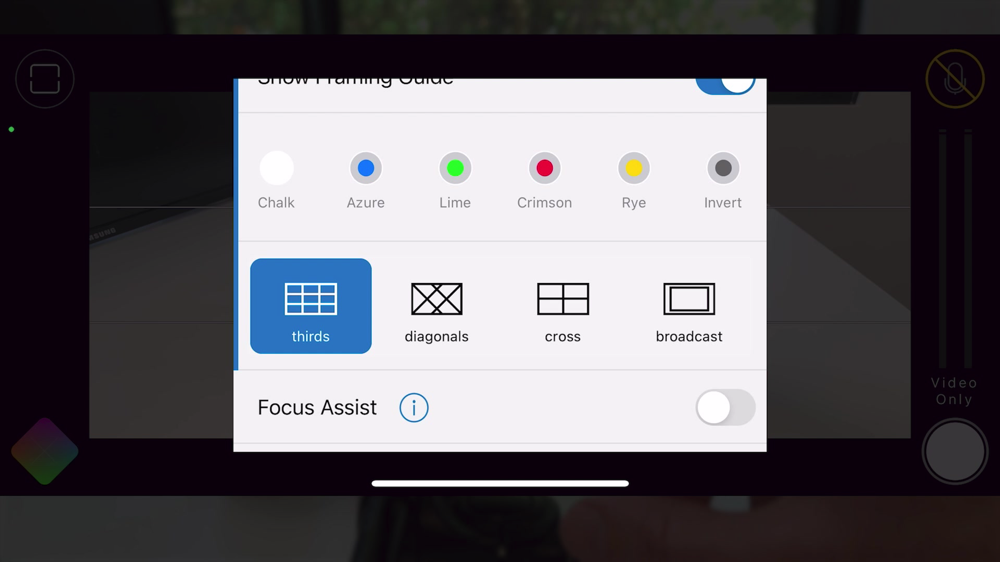
In the Settings section select Interface. This is an area where you can customize up your FiLMiC Pro experience.
Show Touches is a feature that shows a dot wherever you touch on screen. You can adjust the color and size of this dot as well.

You can enable or disable the framing guide and choose from a few different presets for the guide.
Focus Assist is a feature that helps you with your manual focusing. It will digitally zoom in on your video so you can make minor focus adjustments, then it will zoom back to your regular video once you’ve got that dialed in.
There’s also options to hide the interface and hide zoom rockers, allowing you to tailor up your specific user interface even further.
Focus & Exposure
Now let’s look at locking down your focus and exposure.
Currently we’re in Reticle mode (you can check this by tapping the Focus Adjustment button in the top left corner).
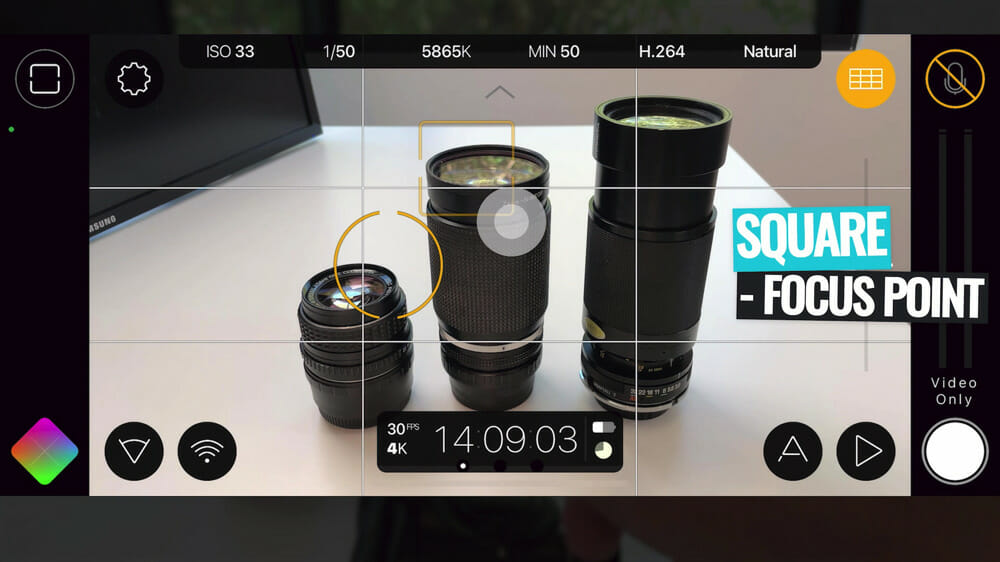
Essentially this gives you a circle and square on screen. The square is the focus point. You can pick it up and move it to wherever you want the shot to focus.
If you want to lock the focus, you can tap on the square and it will go red to signify that it’s now manually locked at that point.

The circle is for your exposure and it works exactly the same way as the square. Just move the circle to the area you want to set the exposure for and tap it to lock it at that point.
But as you know, there are other Focus Adjustment options.

If we tap the Focus Adjustment button again and select Centre Weight, the focus and exposure will be automatically set to the center of the screen.
Or if you select the Manual mode from that menu you’ll get some awesome manual controls that allow you to get really granular with focus and exposure, using slider bars to make really minor adjustments.

To adjust your ISO and shutter speed you can tap the values in the top menu and either manually change them or set them to one of the presets.

Color Settings
Next up, let’s set the color adjustments.
For quick access to the major settings go to the home screen and select the Kelvin reading in the top menu. This will bring up the color and white balance settings, such as:
- Color temperature
- Tint
- Presets
- Customizable presets (you can create your own presets here)
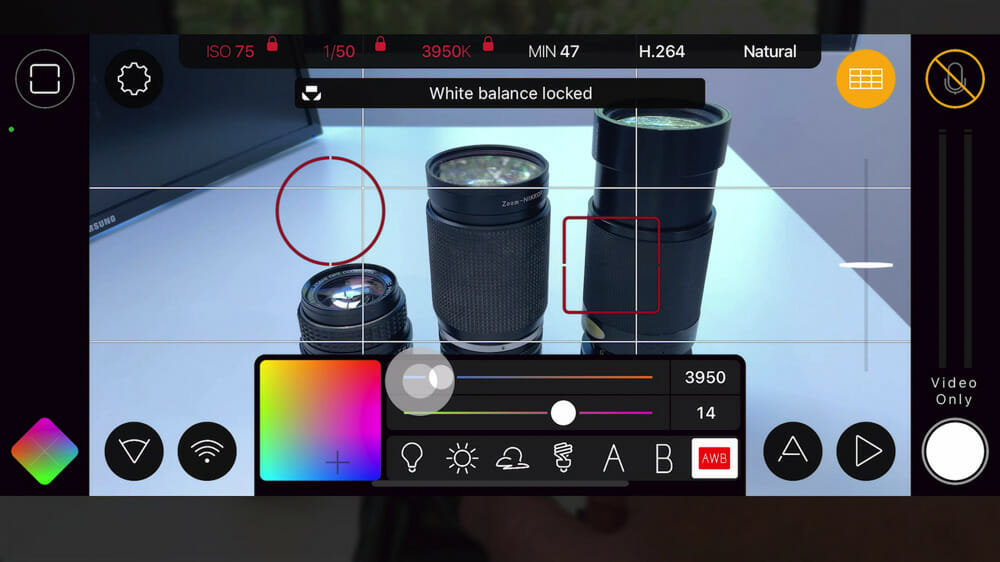
Alternatively, if you press the Color icon in the bottom left corner you get all of those exact same settings but also many more!
If you go to the second tab in the window, you’ll see a range of filters you can apply to your video. These are essentially like Instagram filters which will change up the look and feel of your shot.

In the third tab of that window you can access the picture profile – there’s options like Natural, Dynamic, Flat and Log V2. You can also make any shadow or highlight adjustments there as well.
The fourth tab is where you can adjust the Saturation, Vibrance and any other color adjustments.
Presets
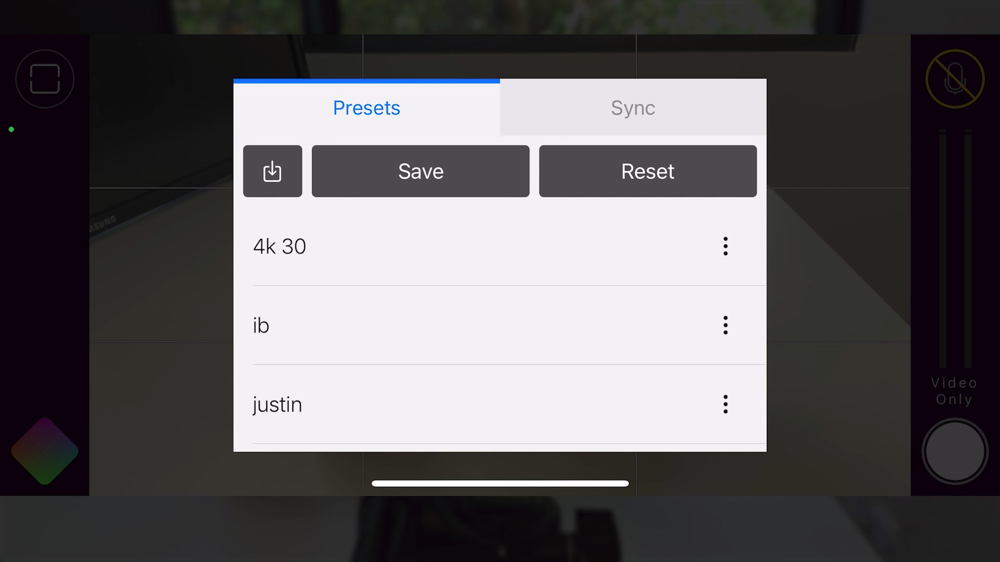
Once you’ve got everything set up the way you want it, it’s a great idea to save those settings as a preset. This way the next time you go to use the app, you don’t need to configure everything from scratch.

You can also configure different settings for different types of shots, then save them as presets for easy access next time.
To do this, go to Settings and select Presets. Tap Save and give the preset a name. Press Save again and it will be added to your list of presets.
Then you just need to tap on the preset to apply those camera settings.
Why We Love FiLMiC Pro
Overall, we absolutely love this new overhaul of the FiLMiC Pro app. The user interface is so easy to use and all the features and key functionality are accessible with the tap of a button. You don’t need to dive into menu upon menu to find what you need.
It’s awesome how much manual control you can unlock by downloading this app!
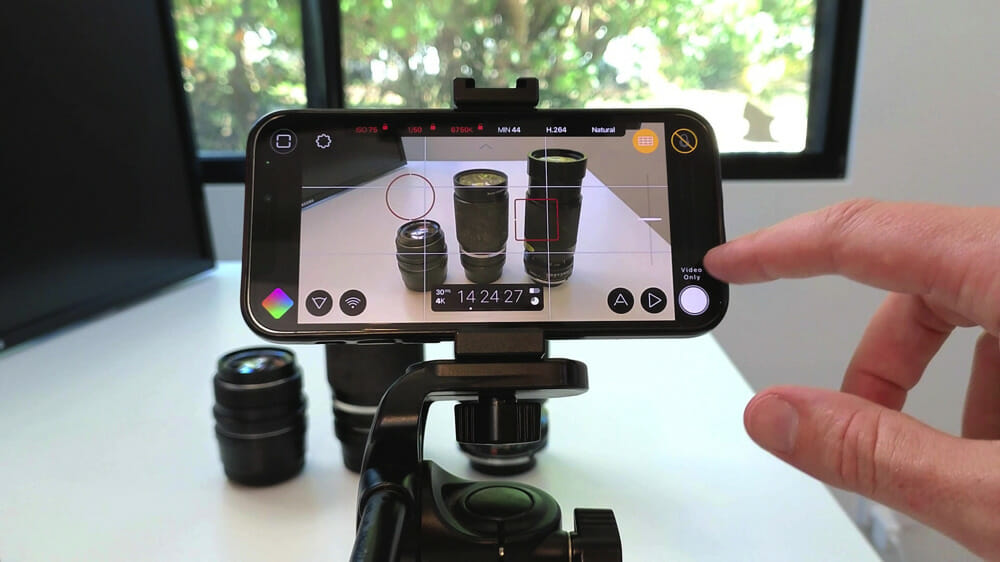
Plus all of these features are accessible while you’re recording, so if you need to make any changes while filming it’s super easy!
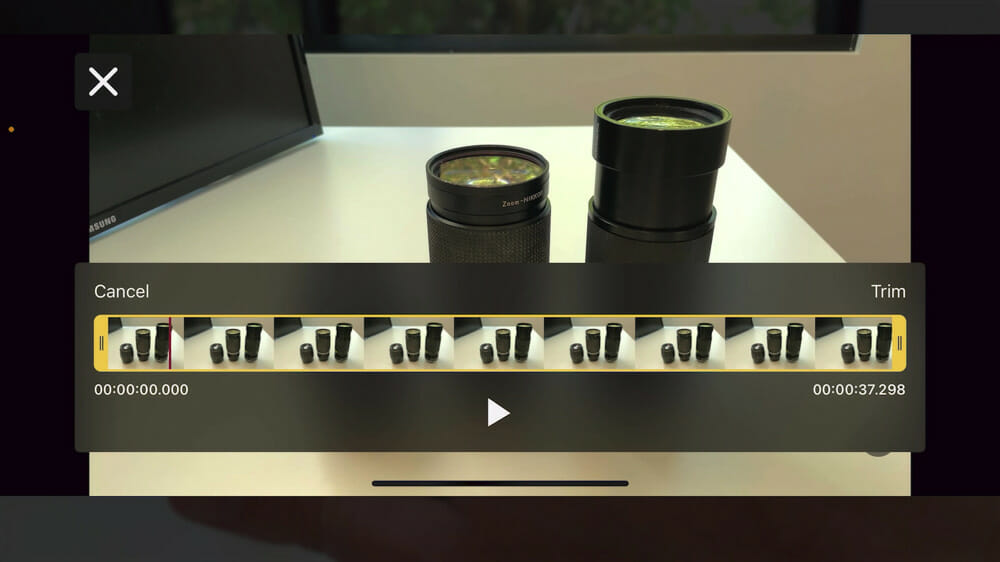
Once you’ve finished recording a clip, you can trim it to make any minor adjustments before saving it out.
So there you have it – our complete FiLMiC Pro Tutorial. Hopefully now you can see why we think FiLMiC Pro is one of the best camera apps right now.
Whether you’ve been using the iPhone built in camera app, the Google camera app or other stock camera apps, FiLMiC Pro can take your video content to the next level.
Don’t have it installed yet? You can download FiLMiC Pro by clicking the buttons below.
Now that you know how to use FiLMiC Pro, if you want to level up your overall smartphone filming – check out our complete Android Filming Guide or iPhone Filming Guide.
These guides will help you get the most out of your phone camera so you can create even better smartphone videos.
PRO TIP: Don’t think FiLMiC Pro is for you? Check out our roundups on Best Android Camera Apps and Best iPhone Camera Apps. If you’re looking for a free app, you’ll find some great options in those roundups.
FAQ
How do I get the most out of FiLMiC Pro?
With so many advanced tools and features, it can definitely feel a bit overwhelming to dive into FiLMiC Pro. Check out our step-by-step tutorial above to help you break it down so you can learn how to use FiLMiC Pro like a PRO!
Is FiLMiC Pro worth it?
What are the circle and square in FiLMiC Pro?
In FiLMiC Pro, the circle on screen controls the exposure while the square on screen controls the focus.
Recommended Gear & Resources
Check out an up-to-date list of all the gear, software & tools we use and recommend right now at Primal Video on our resources page here!
Related Content


