In this tutorial, we’ll share how to create a YouTube Channel with your PHONE, quickly & easily in 2023.
Our complete guide covers everything from how to make a YouTube account to the key YouTube settings you need to know on iPhone & Android!
If you’re new to YouTube, biting the bullet and starting a YouTube channel can be an intimidating task. But the good news is, the process is quick and straightforward once you know what to do.
All it takes is following this process on how to create a YouTube account, then you’ll be on your way to building out a library of content that shows up and ranks in YouTube & Google for years to come!
We’ll take you through how to start a YouTube channel with your phone the right way – including configuring your channel for upload & the hidden channel settings you can easily optimize to maximize your results.
Whether you’re on Android, iPhone or iPad you can follow along with this beginners guide!
How To Create A YouTube Channel With Your Phone
We’ll be focusing on 7 different tasks to help you create an awesome channel using just your phone, including:
- #1 Signing In Or Creating A New Account
- #2 How To Access Youtube Studio On Your Phone
- #3 How To Update Basic Info In Your Youtube Channel
- #4 How To Set Up Your Youtube Channel Branding
- #5 How To Change Youtube Channel Settings On Your Phone
- #6 How To Verify Your Youtube Channel On Your Phone
- #7 How To Upload A Video To Youtube From Your Phone
So if you’re ready to learn how to create a YouTube channel on mobile, let’s get started!
In order to set up your channel properly with complete access to all of the topics we’re about to cover, you must open YouTube in your phone’s browser on desktop mode. We’ll show you how to do this below on Safari and Chrome.
How to Use Desktop Mode In A Safari Browser
If you are on an iPhone, open the Safari Browser and go to ‘m.youtube.com’. On the left of the URL/text bar, click the ‘aA’ icon and select Request Desktop Website.

How to Use Desktop Mode In A Chrome Browser
In a Chrome browser, go to the YouTube website. Once you have YouTube open, press the 3 dots on the lower right corner of the screen. Then scroll down until you see Request desktop site and select that.

Now that you have the Desktop version of YouTube in your phone browser, you’ll need to sign into your account or create a new one. Pinch to zoom in and go to the top right corner of YouTube where the ‘Sign in’ button is.
#1 Sign In or Create a New Account
To sign in or create an account, here’s what to do:
- Click on the Sign in button at the top right-hand corner of your mobile browser and you’ll be redirected to Google’s sign-in page. Google owns YouTube, so in order to have a channel, you need to sign in to your Google account or create one from scratch.
- If you already have a Google account, input your account details. If you don’t, click Create account and follow the steps provided.

Once you’ve signed in to your existing account or created a new one, click on the Profile icon again and select Create a channel.
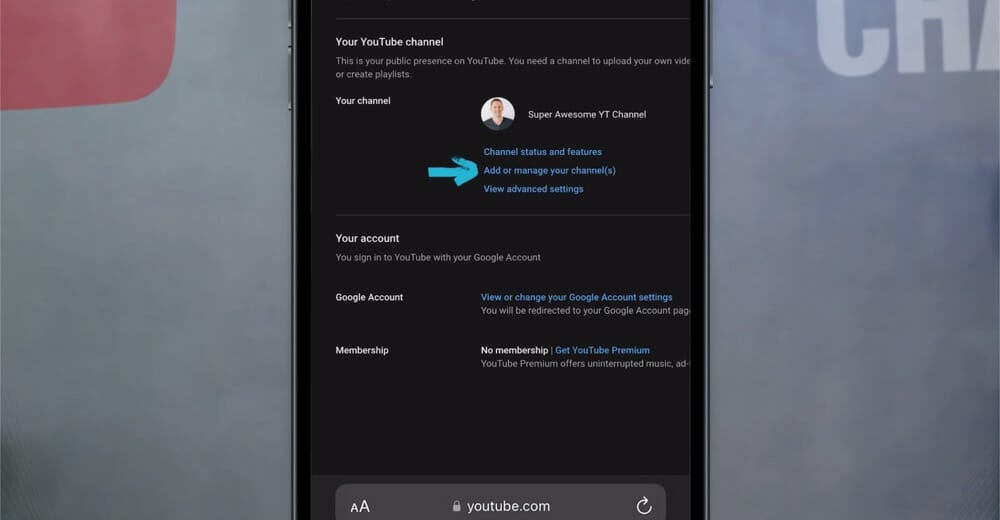
If your account already has a YouTube channel associated with it, you will need to scroll down to Settings. Then select Add or manage your channel(s) and you should see an option to create a new channel there.
After this is where you can add your YouTube channel name.
PRO TIP: Don’t worry if you’re not set with your channel name yet, you will be able to change this later! (Check out this tutorial to learn how).
#2 How to Access YouTube Studio on Your Phone
Now that your YouTube channel has officially been created and named, it’s time to customize it even more. To do this, you will need to open the YouTube Studio through your browser, which is also called Creator Studio.
On the top right corner, under your Profile icon, click Customize channel. This will prompt you to download the YouTube Studio app but you will want to click Continue To Studio instead.

Inside the YouTube Studio, go to the Customization tab in the left menu. Alternatively, if you are somewhere else in your channel and want to access the channel customization info, just click on your profile picture and hit Creator Studio.

#3 How to Update Basic Info in Your YouTube Channel
The next step is to add some basic information about your channel to let viewers know what you’re all about. To do this, go to the Basic Info section inside the Customization tab.
Here you can add or update the following:
- Channel Name – This is where you can change your channel name
- YouTube Handle – This is where you can set up your channel’s unique URL handle
- Channel Description – This is a section that will appear in the About section of your channel
- Links – This is where you can add links to your website, free guides, social media profiles, etc.
- Email Address – This is where you can add an email address so that companies/brands can connect with you
PRO TIP: In the Channel Description, it is a great idea to add a couple of different sentences describing what your channel is about, why people should consider subscribing and the types of content they can expect.

#4 How to Set Up Your YouTube Channel Branding
Once you have your basic information all set up, the next step is to update your channel branding.
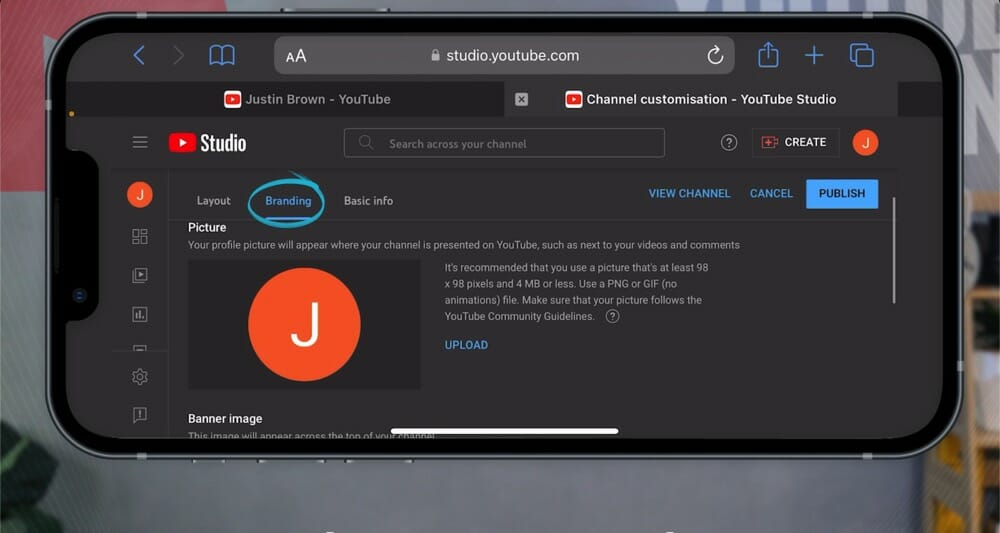
Under the Customization tab, go to Branding. Here you can adjust the following things:
- Picture: Upload a profile picture that suits your brand
- Banner Image / Channel Art: This is where you can upload the banner that shows at the top of your page
- Video watermark: This is a great way for viewers to subscribe during your videos (learn more here!)
Adding a banner image is one of the best ways to brand your channel and make it stand out from the 30 million+ other channels on YouTube! It’s displayed across the top of your channel page, and it shows up whether a viewer is watching from a smartphone, TV, desktop, or tablet.
If you’re interested in creating a high quality banner image, check out our complete tutorial on How to Make a YouTube Banner.
Once you have all your basic information and channel banner added, click Publish in the top right corner to apply all the changes you have made.
To see these new changes on your channel, just click View Channel up at the top next to Publish.
#5 How to Change YouTube Channel Settings on Your Phone
Next, it’s time to make some changes to your channel settings. Start by clicking the Settings button all the way at the bottom of the channel dashboard.
The Settings box will pop up, giving you options to adjust general settings, channel settings, upload defaults, permissions, community settings, and agreements. Under General settings, select the currency your channel utilizes.

The Channel settings is where you can edit and add more info about your channel, including:
- Country of residence
- Keywords relating to your channel (only add the relevant keywords here)
- Whether your channel’s content is suitable for kids (this is a requirement!)
- Whether or not you’d like to link a Google Ads account
One of the points on this list that people struggle with is inputting keywords relating to the channel. There are a lot of keyword tools that can help you with this, but you can start by focusing on the general words and phrases that best describe your channel.
#6 How to Verify Your YouTube Channel on Your Phone
Once you’ve adjusted all of the basic default settings, move on to the tab labeled Feature eligibility to enable even more channel features.
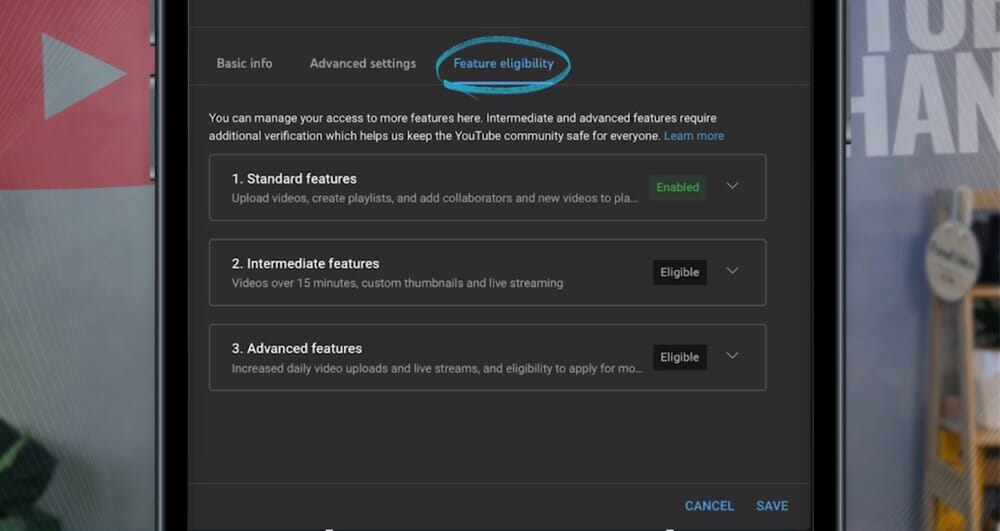
Start by checking that all of the Standard Features have been enabled. In most cases, these will already be enabled and you won’t have to make any changes. You will, however, need to verify your YouTube account in 2 more levels to enable some extra features, including:
- Uploading videos over 15 minutes
- Using custom thumbnails
- Live streaming capabilities
- Appealing for Content IDs/copyright claims
- Eligibility to apply for monetization
To enable these features, click on the dropdown arrow then Verify Phone Number, select your country code, and decide whether you want to verify via an automated voice message or text message.
It is also worth noting that a phone number can only verify up to 2 channels per year.
If you’d prefer to go straight to the verification process, you can check out YouTube’s page here on how to verify your YouTube account.
#7 How to Upload a Video to YouTube from Your Phone
We’re on the home stretch of this tutorial about how to start a YouTube channel on your phone, so give yourself a pat on the back! You’ve made it this far, and it’s finally time to upload your first video.
You can go ahead and install the YouTube App which allows you to create and upload content, and even go live. For the full tutorial on how to upload youtube videos from your phone, check out this link.
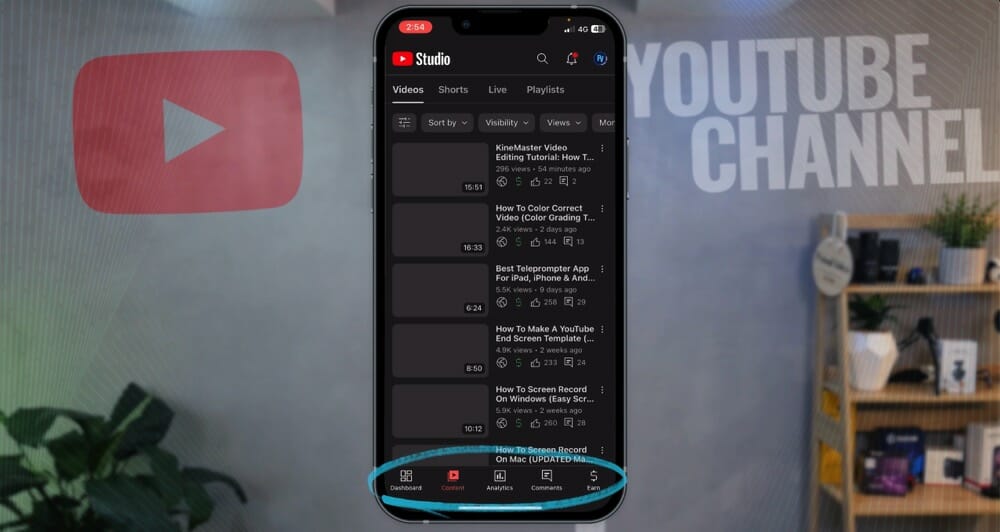
You can also install the YT Studio app, which is going to give you access to a lot of the settings available on desktop (but not all of them) and help you run and manage your channel. This app gives users complete access to channel analytics, videos, and even YouTube comments.
Now You Know How to Create a YouTube Channel – Using Only Your Phone!
We covered A LOT in this guide on how to make a YouTube channel from your phone. Although it can seem daunting at first, you now know the exact steps to create your very own channel from start to finish.
So whether you’re starting from scratch on an Android or you need some insight on how to optimize your channel settings on an iPhone, use this guide as a resource.
For more info on how to improve your channel, check out our FREE YouTube Ranking Guide. In this guide, we cover the 3 most powerful tools and ranking strategies to increase your YouTube traffic by 10x!
FAQ
How can I create a YouTube channel in mobile?
To create a YouTube channel on mobile, you need to open YouTube in your phone’s browser using desktop mode. You can follow the step-by-step process above to learn how to do this.
Can I create a second YouTube channel on my phone?
Definitely! You can have multiple channels under the same email address. To learn how to do this from your phone, check out our complete tutorial.
Can I be a YouTube with just my phone?
You sure can. You can do everything YouTube-related directly from your mobile device. This includes creating your YouTube channel, filming content, editing your videos, uploading videos to YouTube and even managing your YouTube comments!
Recommended Gear & Resources
Check out an up-to-date list of all the gear, software & tools we use and recommend right now at Primal Video on our resources page here!
Related Content


![How to Add Captions to Videos [UPDATED] - Hardcode Subtitles in Instagram Videos!](https://primalvideo.com/wp-content/uploads/2019/04/How-to-Add-Captions-to-Videos-UPDATED-Hardcode-Subtitles-in-Instagram-Videos-1024x576.jpg)