Your built-in iPhone camera app is super powerful out-of-the-box. But by changing a few key iPhone camera settings, you can majorly improve your video quality and level up your video creation, quickly and easily!
There’s iPhone camera features like cinematic mode, Apple ProRes, slow motion, plus a ton of other iPhone camera tricks and tips you need to know about.
In this guide, we’ll share the absolute best iPhone camera settings that will help you achieve super high quality video using just your iPhone camera. You’ll learn how to make your iPhone video look like pro camera footage!
Here’s exactly what we’ll cover:
We’ll be running through this guide using the iPhone 14 which is currently the latest iPhone. If you’re not on the iPhone 14, you can still follow along as most of these settings will still apply to earlier models!
Let’s get started.
iPhone Settings
To access your camera settings open your iPhone Settings app and scroll down to Camera. This is where you can access the video modes. You can adjust some of the following settings in the iPhone camera app itself, but you’ll find additional settings if you access them via the Settings menu.
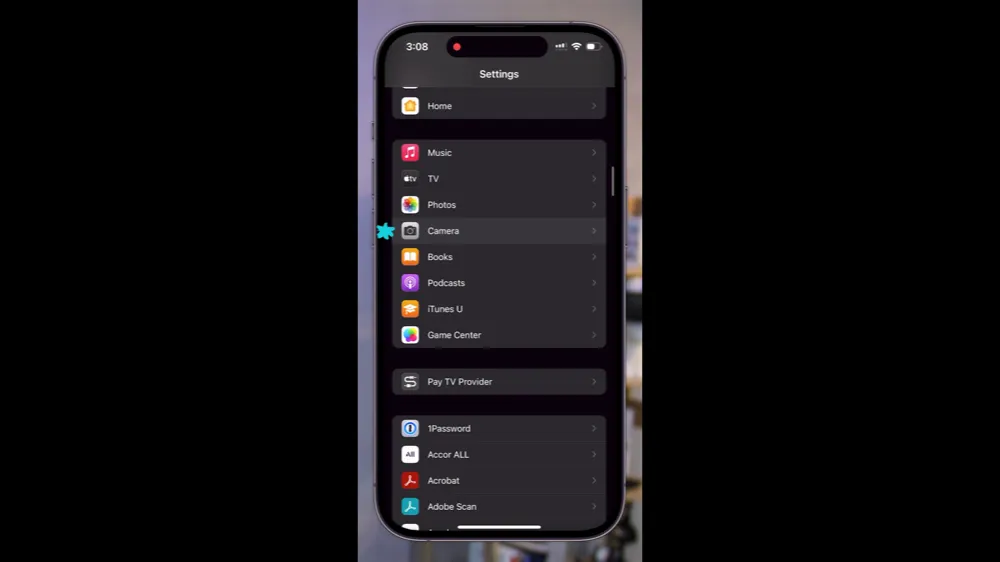
So it’s good to set them here, but know that you can make adjustments while you’re shooting and change them up quickly inside the camera app too.
iPhone Video Recording Format
This is the first thing you want to set. It’s also the first big decision you’ll need to make!
Go to Formats and you’ll see two options under Camera Capture:
- High Efficiency
- Most Compatible
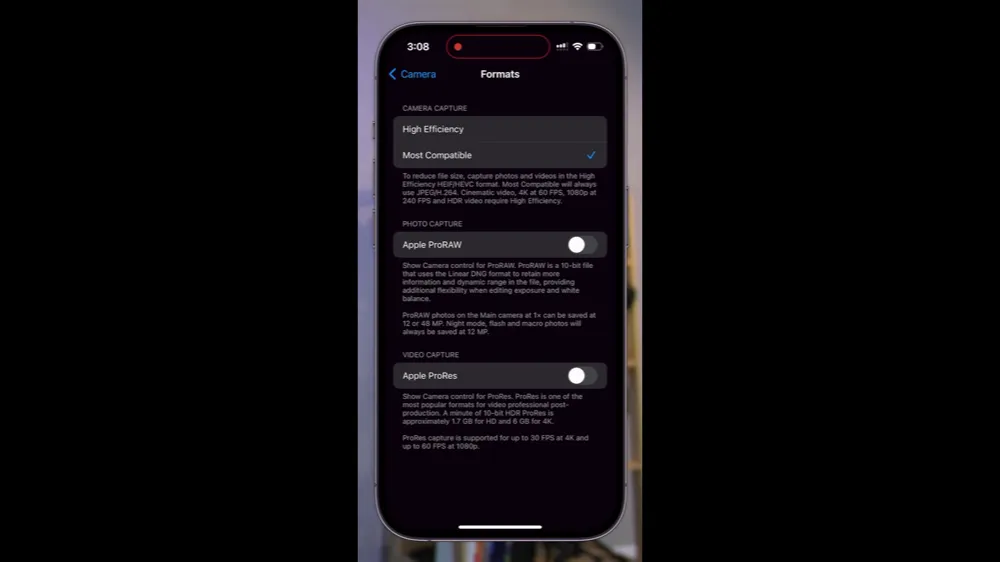
We like to stick with ‘Most Compatible’ as this will give you a video file that’s compatible across most different video editing tools and apps.
PRO TIP: If your video files aren’t working in your video editing platform, it’s a good idea to check this setting as having ‘High Efficiency’ could be causing the issue.
But, there are times when you will want to use the ‘High Efficiency’ codec, such as:
- If you don’t have much storage available on your iPhone (the High Efficiency codec gives you a smaller file size because it is more compressed)
- If you want to use Cinematic Mode
- If you want to shoot in 4K 60 frames per second
- If you want to shoot in HDR (high dynamic range)
- If you want to shoot in super slow mode (240 frames per second at 1080p)
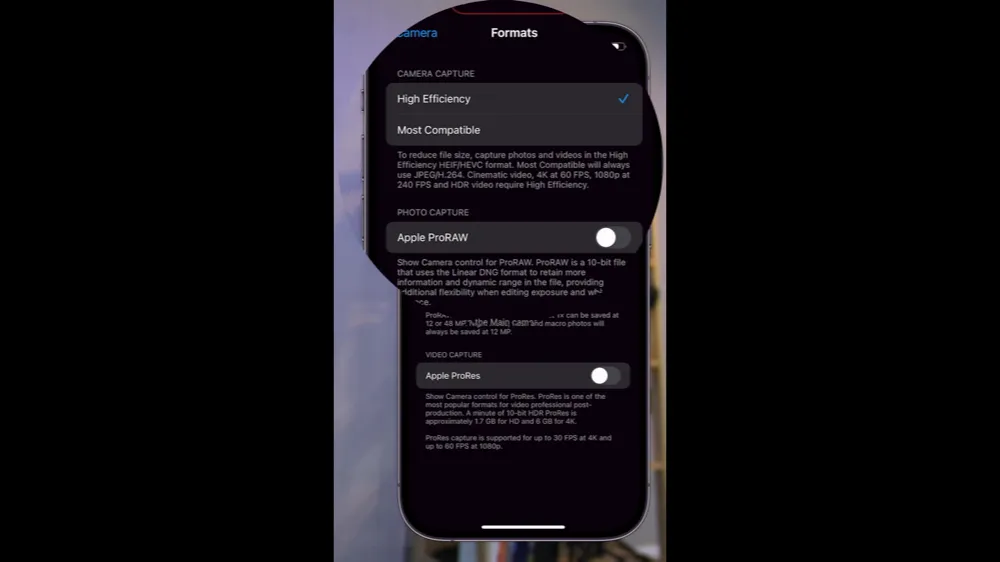
So if you want to use any of those settings, you’ll need to make sure ‘High Efficiency’ is enabled. Outside of those times, we recommend leaving it turned off.
Apple ProRes
If you want to get the most professional grade footage out of your iPhone camera, then you’ll definitely want to have this enabled!
But, most people will want to leave it off. Why? Because the file sizes are ridiculously huge!
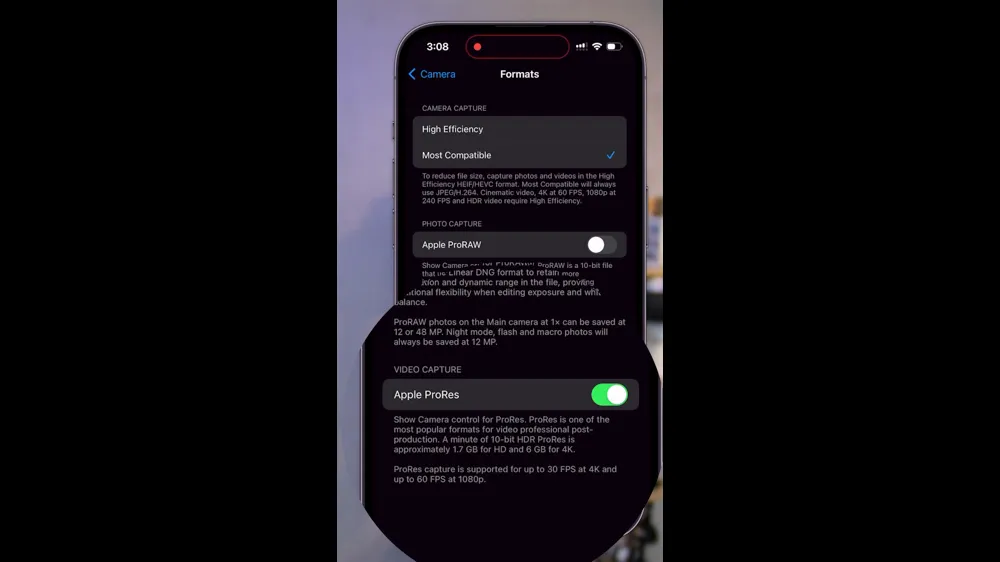
It says that for one minute of HD footage in the ProRes format, it’s gonna take up 1.7GB of storage space.
If you have a phone with 128GB or even 256GB, you’re going to burn through your storage really quickly with that enabled.
So this is something that we leave disabled. BUT that doesn’t mean you can’t create incredible looking videos without Apple ProRes. With the following settings that we set, you’ll be able to shoot amazing iPhone video.
This is especially true if you’re going to be uploading your videos to platforms like YouTube.
But if you’re going to be creating a documentary or a film using your iPhone video camera, that’s when we’d recommend having this feature enabled.
Recording Format
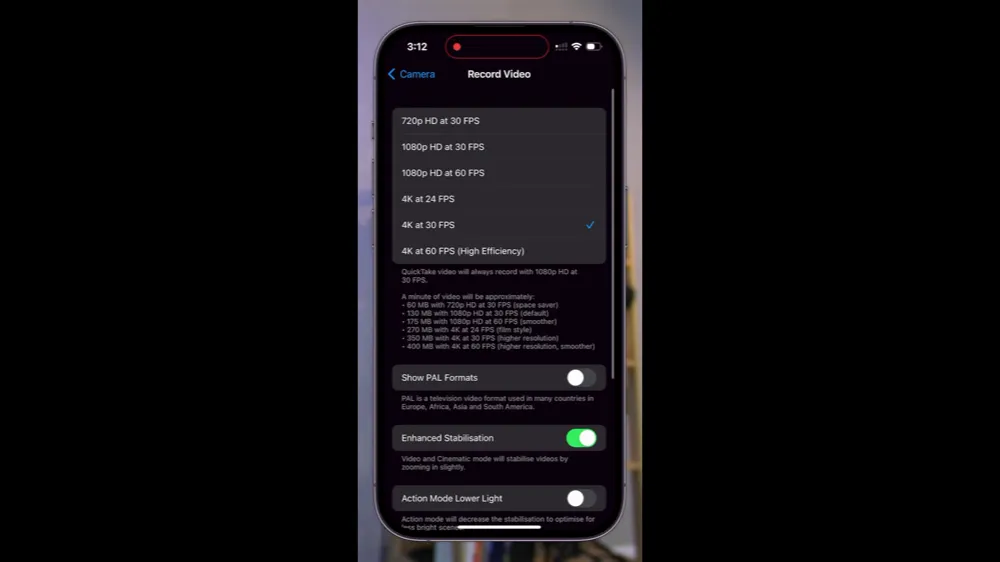
In the Camera Settings menu, select Record Video. Here you can choose from a number of different recording formats:
- 720p HD at 30 FPS
- 1080p HD at 30 FPS
- 1080p HD at 60 FPS
- 4K at 24 FPS
- 4K at 30 FPS
- 4K at 60 FPS (High Efficiency)
We always recommend shooting in 4K wherever possible. That way you still have the ability to release a 1080p video, but you’ve got the higher resolution and higher quality available.
Having the higher resolution video means you can do things like zoom in on your footage without losing quality. Plus it also means you can release the video in 4K.
So the default for most people will be to have this set at 4K 30 FPS.
If you’re in a PAL region (Japan, Australia, some European countries, etc.) you can enable PAL frame rates. This includes formats like 25 FPS or 50 FPS.
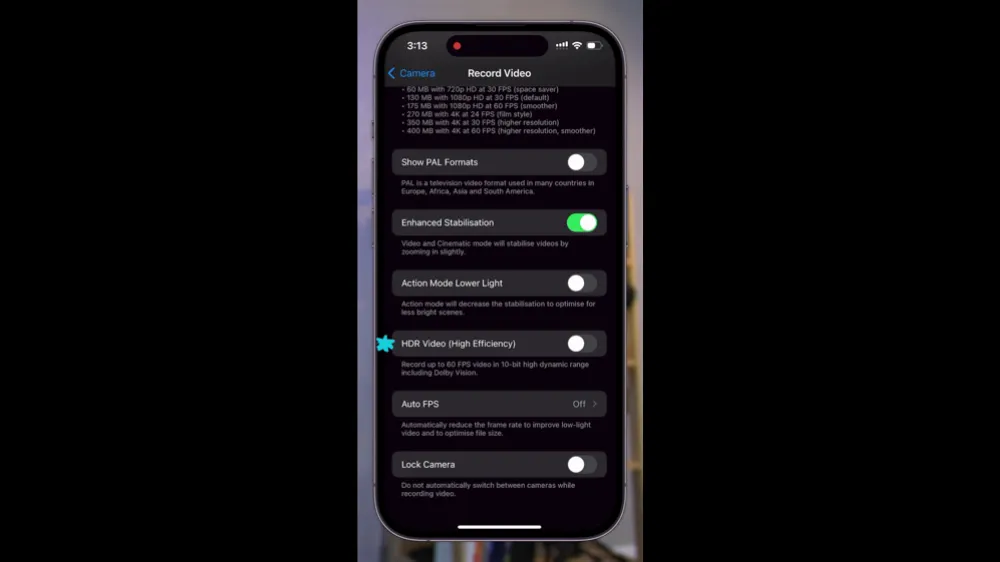
Enhanced Stabilization
While still in the Record Video settings, you can enable Enhanced Stabilization.
This is awesome for when you’re creating footage while you’ll be walking around. It gives you an extra smooth level of stabilization.

HDR Video (High Efficiency)
HDR (high dynamic range) Video will only work when the High Efficiency video setting is enabled (as mentioned above).
This is also something that catches a lot of people out when they’re recording…
Filming with this setting turned on looks fine when you’re playing it back on your phone or another device, but if you drop it into your video editing software it may not be recognised as being HDR footage.
This can make your footage look really washed out and there are extra steps you need to take to fix it.
So again, unless you specifically need to be filming in HDR, we would recommend leaving this setting switched off.
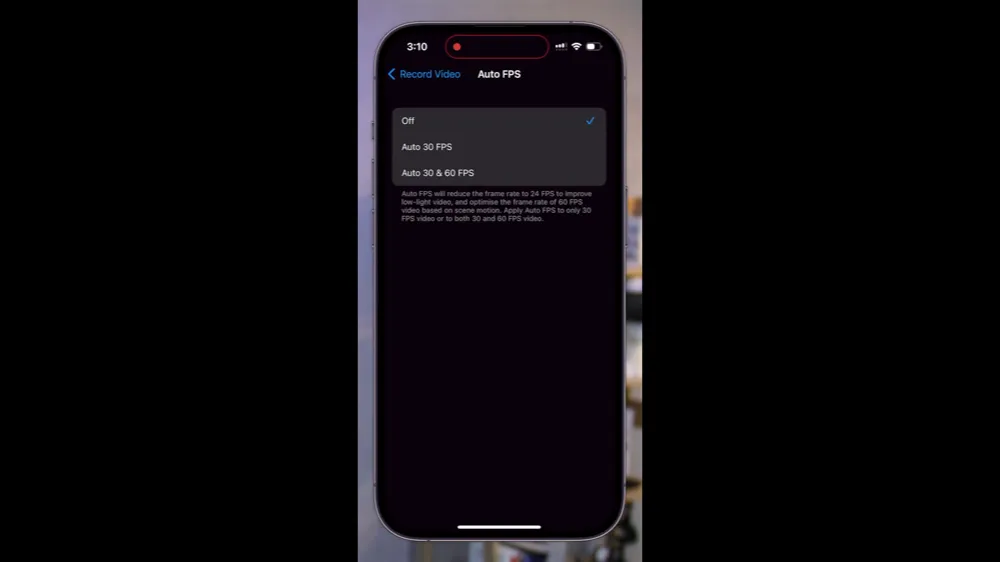
Auto FPS (frames per second)
This is one we strongly recommend turning off!
If you’re in a low lighting situation, it’s going to drop your frame rate to below what you’ve set it at to add more light into your shot.
But this can add a ton of motion blur and make your video look really bad.
Record Slo-mo
Go back to the Camera Settings menu and select Record Slo-mo. This is where you can set your recording speed for slow motion videos.
There are three options to choose from:
- 1080p HD at 120 FPS
- 720p HD at 240 FPS
- 1080p HD at 240 FPS (High Efficiency)
The default is 720p but you can adjust this.
Record Stereo Sound
We recommend leaving this one enabled for high quality sound recording.
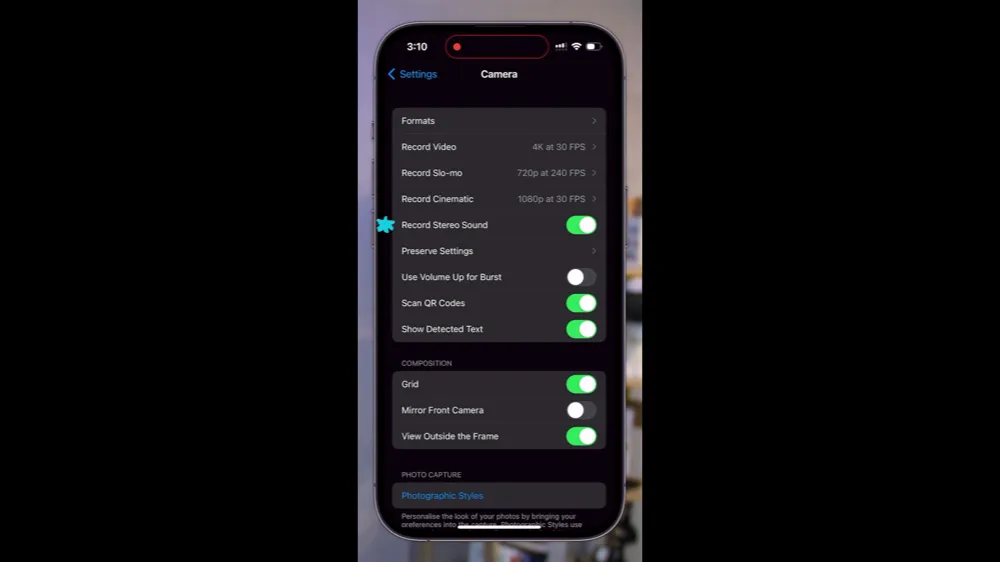
Preserve Settings
Enabling this setting will preserve the last mode that you used in your camera app, so the exact settings will be remembered the next time you use the camera app.
This means the default settings will be overwritten.
You can select exactly what settings you want to be preserved including:
- Camera mode
- Creative controls
- Exposure Adjustment
- Night Mode
- Portrait Zoom
- Action Mode
- Live Photo
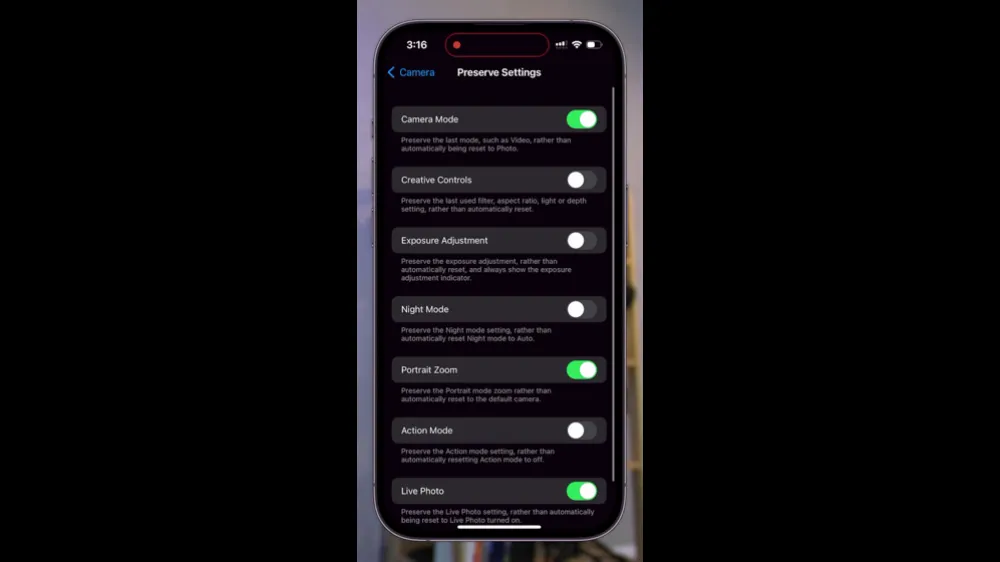
Which ones you enable here will come down to personal preference. The only one that we leave enabled is Camera Mode. This way, if you close the camera app while in video mode, when you next open it, it will automatically open in video mode again.
Composition
If you scroll down to Composition you’ll see a few different settings you can enable, such as:
- Grid: This overlays a grid on the camera screen which allows you to line up shots easier - we like to leave this enabled
- Mirror Front Camera: This mirrors the front camera so that if you’re using the front selfie camera and it’s backwards for you, you can switch it the other way around here
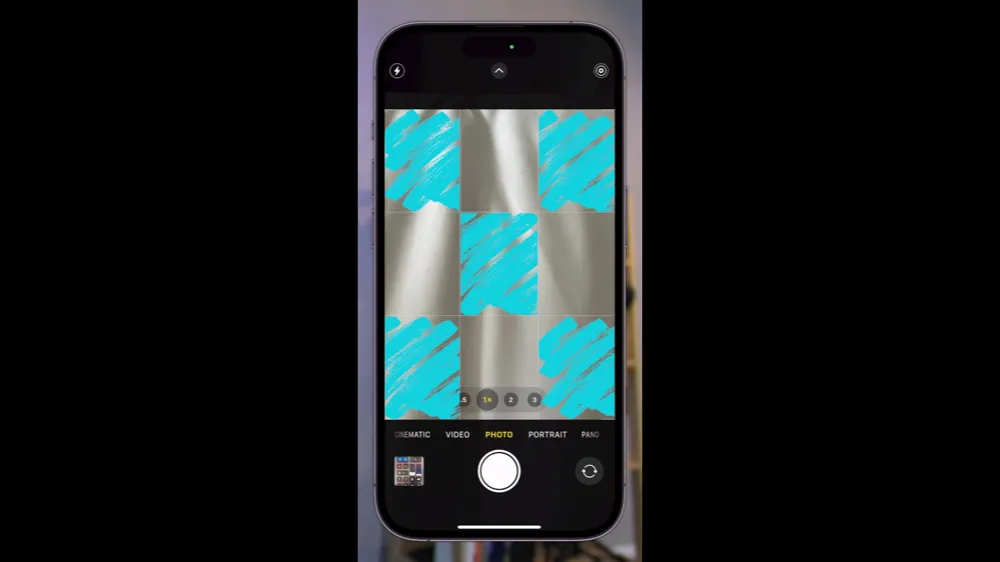
Now let’s take a look at the settings inside the camera app.
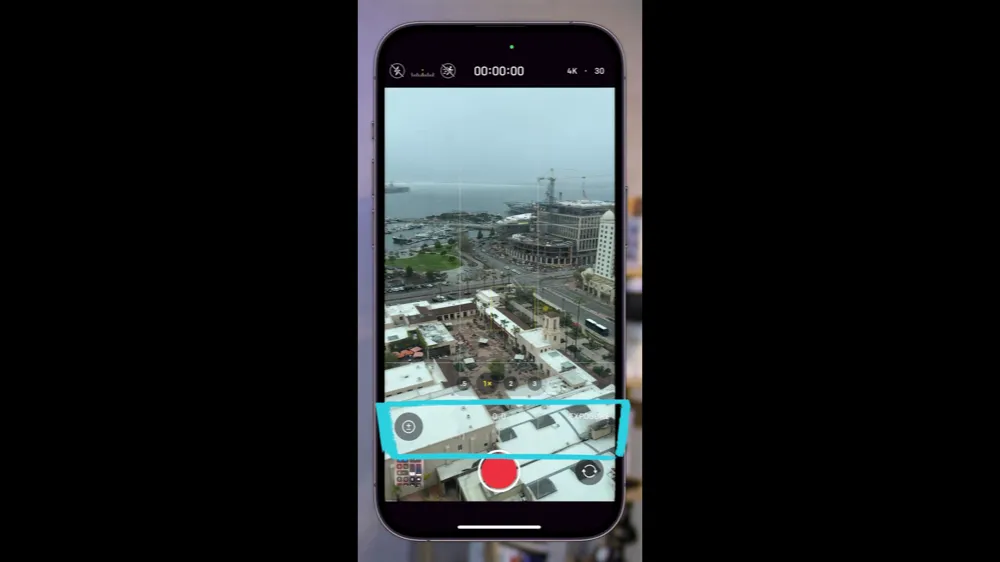
Camera App Settings
Open the camera app and switch it over to video mode. There are a couple of extra settings you should know about in here.
Adjust Recording Format & Frame Rate
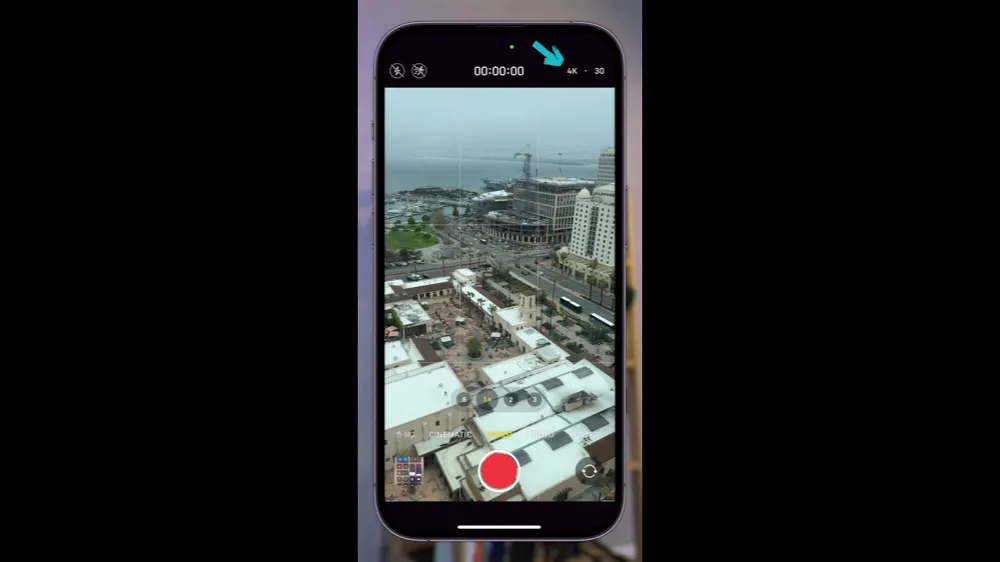
At the top of the screen in the right corner, you can tap the 4K or HD button to switch between the two.
You can also tap 30 or 60 to change the frames per second.
Auto Focus
At any time you can tap on the screen to adjust the focus point. It will take a focus reading and auto focus on whatever you just tapped on.
It will also do a brightness adjustment at that point too, to set the exposure level for the section you just tapped on.
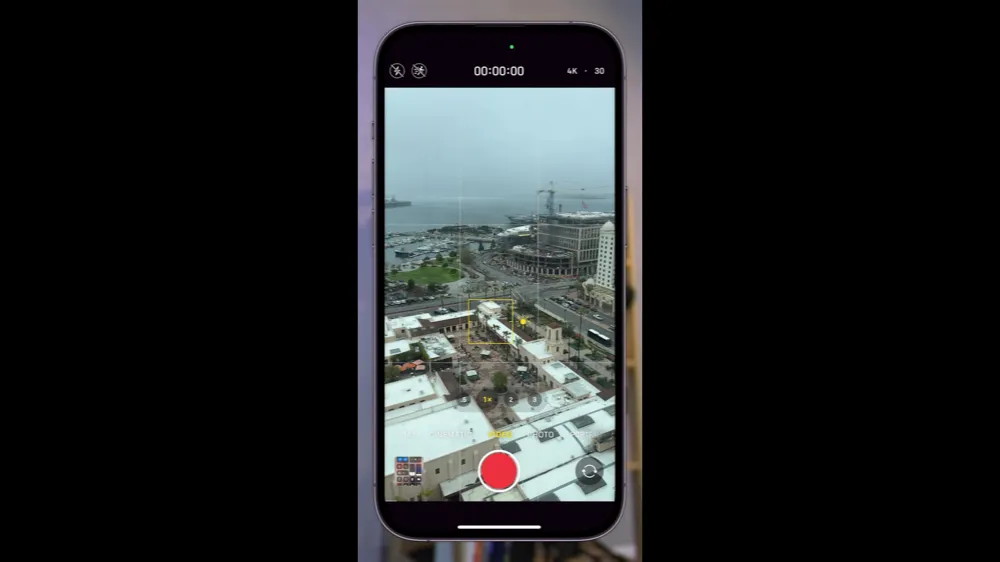
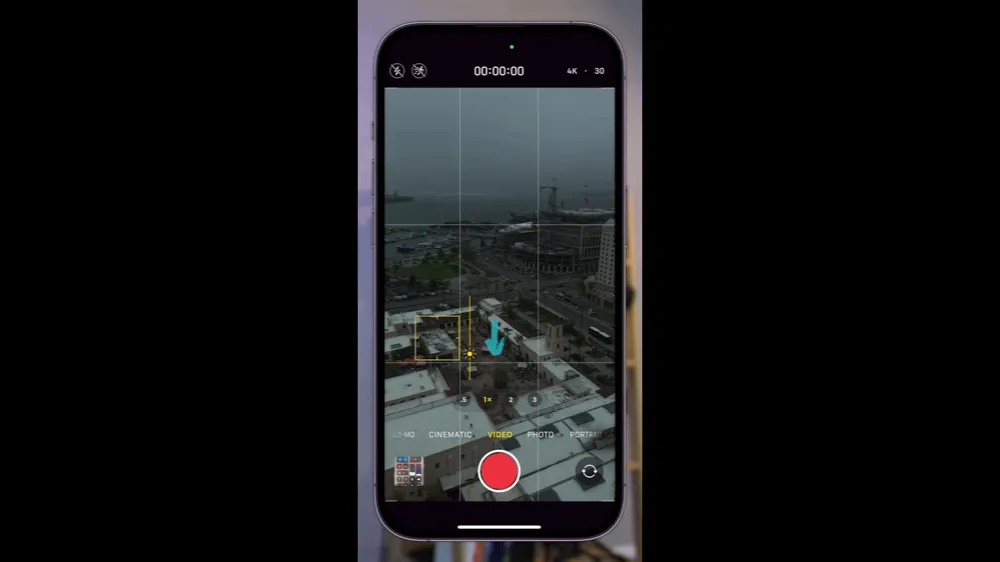
Brightness
After you’ve tapped on the screen, you can override the brightness that it automatically sets by swiping up to increase the brightness or swiping down to decrease the brightness.
Just keep in mind that doing this won’t lock the brightness at that point.
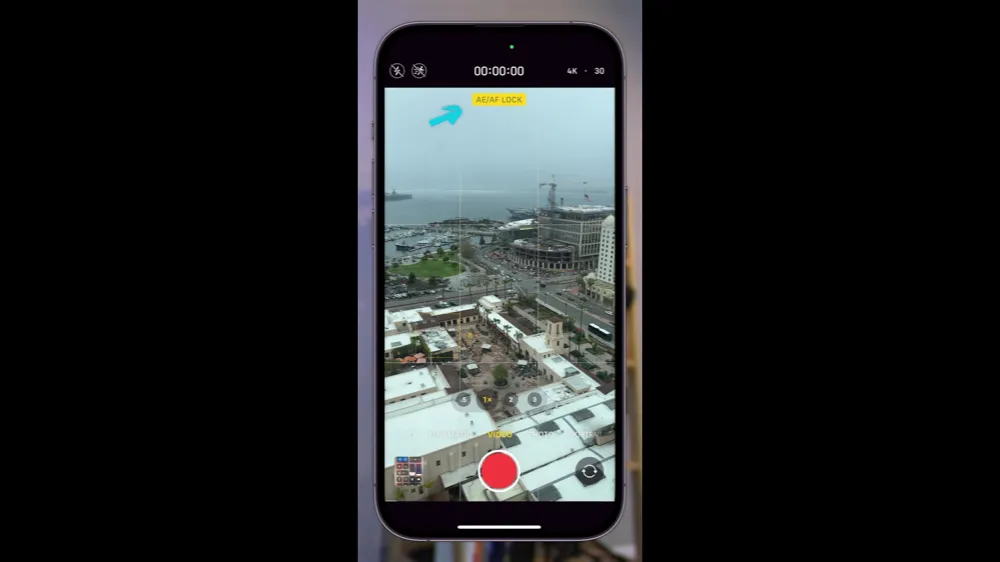
Locking Focus and Exposure
Tap and hold on the screen until you see AE/AF LOCK. This means Auto Exposure and Auto Focus lock.
Then you can adjust the brightness by swiping up and down, and the brightness will stay at wherever you set it while you’re recording video.
Exposure Override
In the top left corner you can access the Exposure Override button. Then a slider bar will appear at the bottom of your screen.
You can then slide this left or right to darken or lighten your shot.
PRO TIP: If you’re not seeing this setting in your iPhone camera app, you can swipe up on the camera app and press the +- icon to enable it.
This will now be saved as a default adjustment to whatever the camera is automatically detecting. So every video that you shoot will have that exposure point.
Let’s say you set the exposure point to -0.7. Your shot will be a little bit darker. Then every time you use the video camera app, the auto adjustment from the phone will be a little darker than it was originally.
This is useful if you find there’s shots you’re taking, especially in low light situations, where some things are too bright and other things too dark. You can just manually override that as a default setting now.
Just remember to put this setting back to zero or you’ll find that all your shots will be lighter or darker.
Now you know the best iPhone camera settings to record videos!
As you can see, there are a LOT of iPhone camera features you can adjust. You can open the camera app and make adjustments there or you can dive deep into the iPhone Settings app to get the exact look you’re going for.
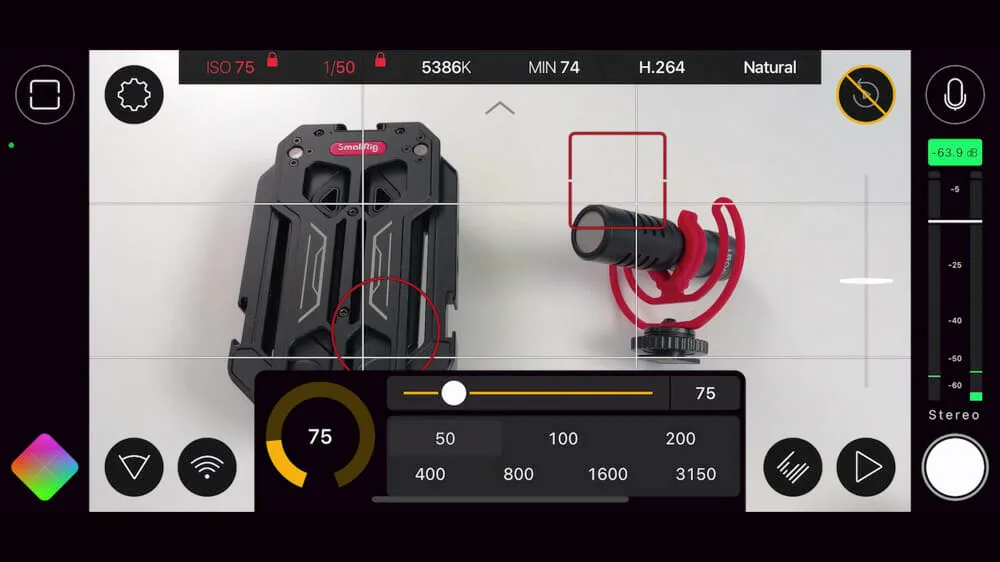
If you’re looking for even more advanced features, more pro-level settings and DSLR-like camera settings using your iPhone’s camera - that’s where a third party camera app could be the right option for you.
A lot of the alternative iPhone camera apps will even let you record at higher quality formats too!
If that’s something you want to learn more about, check out our complete guide on the Best iPhone Camera Apps in 2023.
FAQ
What is the best setting for video on iPhone?
There are tons of different settings you can adjust to fine tune your iPhone video camera quality, depending on the type of content you’re creating. We recommend following the above steps to find the best settings for you.
How can I improve the quality of my iPhone camera?
Adjusting your iPhone camera settings is a quick and easy way to improve your iPhone camera quality. If you want to take things a step further, that’s where a third party camera app comes in. Check out our roundup of the Best iPhone Camera Apps in 2023 to learn more.