These days, Androids are useful for more than just making calls, sending texts, and trolling social media. Thanks to the massive improvements in camera performance as well as Android software updates, an Android smartphone is the perfect tool for creating high-quality videos to attract an audience and build revenue.
While all the updates made to Androids over the past few years are nothing short of amazing, they can also be tricky to get the hang of and even quite daunting if you’re brand new to filming with Android phones.
Important: When available, we use affiliate links and may earn a commission!
In other words, getting the most out of your smartphone camera isn’t always easy. Without the right tools and knowledge, your video lighting could be off, audio could be scratchy, the resolution could be low, the footage could be shaky, distractions could be getting in the way… you get it, there’s a lot that can go wrong!
That’s why we’ve created this guide on how to film professional videos with Android. Here you’ll learn how to film with Android devices the right way. On top of that, we’ll cover a few pieces of video gear that can help you to create pro-level videos to grow your following and scale your revenue.
Steps for Creating Pro Videos with Android Smartphones
If your end game is to create a professional Android video, jumping into things without proper preparation isn’t the way to go. Before hitting that red record button, there are some important steps to go through – 12 to be exact.
Here’s a quick breakdown of each step for how to film professional videos with Android smartphones:
- Step 1: Prepare Your Content for Filming
- Step 2: Select a Suitable Filming Location
- Step 3: Choose the Front or Rear Camera
- Step 4: Clean Your Camera Lens
- Step 5: Position Your Camera for Filming
- Step 6: Set Up Your Lighting
- Step 7: Connect Your Microphone
- Step 8: Check Phone Settings
- Step 9: Switch to Flight Mode or Do Not Disturb Mode
- Step 10: Lock Down Camera Settings
- Step 11: Record a Test Video
- Step 12: Record Your Video
Step 1: Prepare Your Content for Filming on Android
The planning and preparation of your content should always be the first step when it comes to creating any kind of video. Even if you’re the type of person who likes to jump in headfirst and you don’t feel too much need for preparation, it’s highly recommended that you at least create a basic outline of your video content. Some people prefer to use simple bullet points that cover the key topics, while others prefer writing down the entire word-for-word script.
Regardless of how intense you get with preparing your content, the key here is that some level of preparation is necessary. With the right preparation, you’ll not only be able to shoot videos on Android devices faster, but there’s a very good chance that the content will be more engaging for your audience too.

Step 2: Select a Suitable Filming Location
After preparing the content, the next step is to decide on a shooting location. Some of us are more limited on video shooting venues than others, and that’s OK. The main thing to remember is to find a filming location with the least amount of distractions possible.
There are a lot of things that can get in the way of your video as well as your train of thought, like your neighbor mowing the lawn, airplanes flying overhead, or kids playing outside. These things can and probably will be distracting for the viewers, and they can also be distracting for you. So just try to find a quiet space with minimal background noise.
Another important factor in deciding on where to film is the overall vibe. By that, we mean the vibe of the location should match the vibe of the video content you’re about to produce. No Food Network videos are shot in commercial gym settings – they’re produced in the kitchen, and there’s a reason for that.

One more quick note on the filming location is that you can make it a lot easier on yourself by choosing a venue that you can use repeatedly. If you have to change the location every time, there will be a lot more effort involved with setting up, breaking down, packing up, and getting your head in the game.
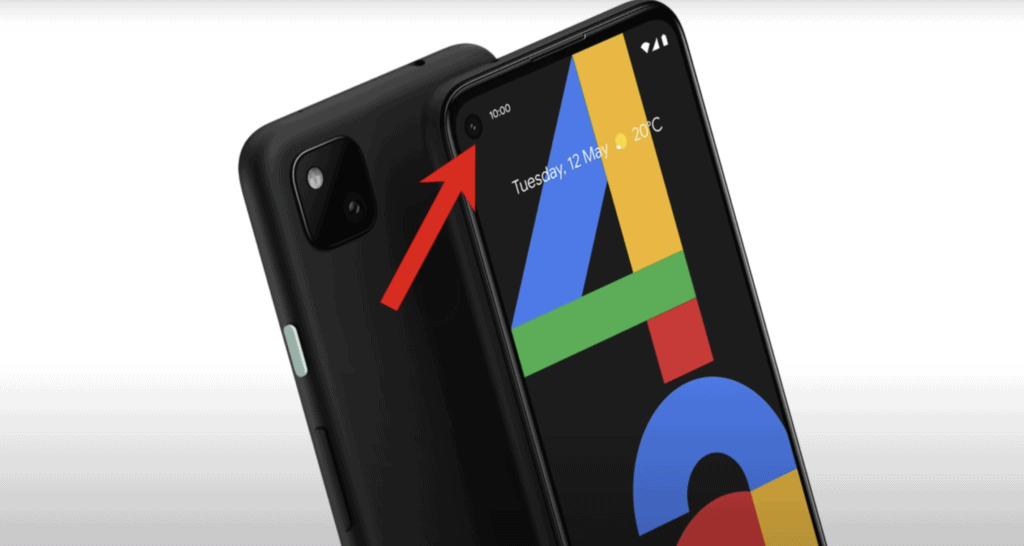
Step 3: Choose the Front or Rear Camera
After locking down your filming location, it’s finally time to start playing around with your camera. That brings us to Step #3, which is to decide on your camera’s orientation. There are 2 options for this: the front-facing lens (AKA the selfie camera) or the phone’s primary camera.
Each one has its own set of pros and cons, so let’s take a closer look:
Using the Primary Camera
The primary camera on an Android smartphone is the main camera lens located on the back of the device. Using this lens typically results in the highest quality videos, so you might think it’s a no-brainer to go with this one. However, using the primary camera does have its drawbacks.
The biggest one is that it can be difficult to shoot videos alone since the screen will be facing away. That means you won’t be able to quickly glance at the screen for updates on video quality and recording progress. The good news, though, is that there are some helpful tools that make filming with smartphone devices on the primary camera easier, like using a mirror.

Using the Selfie Camera (Front-Facing Camera)
The other option is to use the phone’s front-facing camera, which you might know better as the “Selfie” camera. This is the easier filming choice since you’ll be able to quickly glance at yourself while filming to make sure all is good. And with Android camera updates, even the front-facing lens is perfectly capable of delivering high-quality footage.
An important thing to remember while using the selfie camera is to always make eye contact with the lens. It’s a common mistake for the video maker to stare at himself/herself rather than the lens when filming in Selfie mode. When that happens, there’s no eye contact being made with the viewers. This looks unnatural, not to mention it’s unengaging, so always keep your eyes on the lens and not on yourself!
Step 4: Clean Your Camera Lens
This next step may seem like common sense to most, but you’d be surprised by how many people record Android videos through a dirty lens. Fingerprints, dirt, makeup, and facial oils can greatly hinder filming quality, so make it a habit to wipe off the camera lens before you start recording.
Even if it looks clean, just spend 5 seconds to ensure that it actually is. To avoid scratching the lens, it’s best to use a microfiber cloth or lens cloth that you’d use to clean a pair of glasses.
Step 5: Position Your Camera for Filming
There’s nothing professional about an online video that’s shaky and unstable. Even if you think you’ve got steady hands, you’ll realize those hands aren’t as steady as you once thought after you playback the footage.
There are plenty of different options for stabilization when filming with Android phones. It can be as simple as propping the device up against a bookcase, and even a selfie stick can reduce shakiness significantly. If you plan on moving around in your video, a gimbal stabilizer like the Osmo Mobile definitely come in handy.
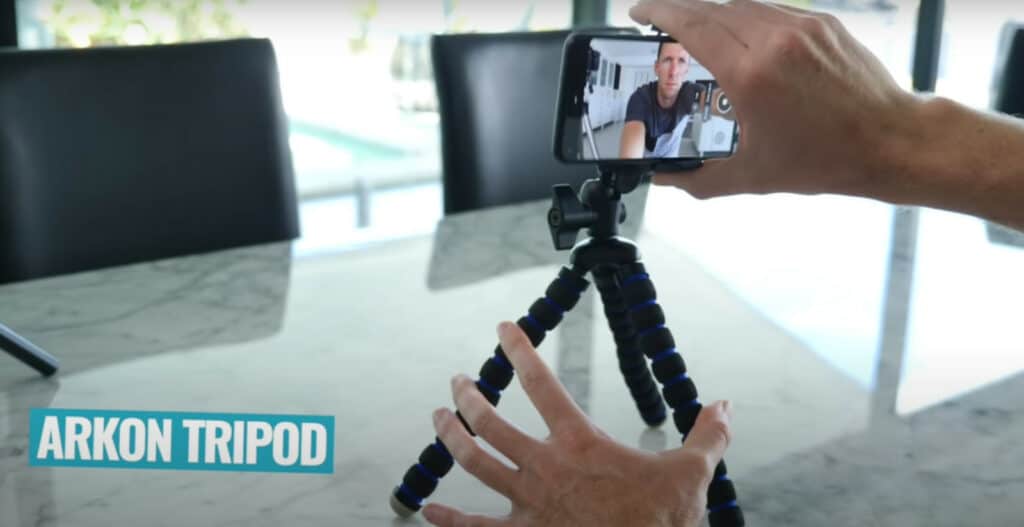
For video creators who plan on staying in one position with no movement at all, there are plenty of other options for stabilization. Just make sure to secure the phone at the right height, ideally so that the lens is located ever so slightly below eye level. An Arkon Tripod + Phone Mount can help with that. This tool doesn’t break the bank – it’s in the $20 price range – and it gives users the option of filming in either landscape or portrait mode while holding a smartphone securely in place.
Step 6: Set Up Your Lighting
When it comes to good lighting, the subject of your video (what you want your viewers to focus on), should be your main priority and what you light first. From there, you can then use additional lights to brighten up the background and other areas of your shot.
It’s possible to utilize natural light, but for some, there’s not enough natural light to make a pro YouTube video on your Android phone. In that case, you can use just about any kind of light that you have around the house to brighten things up, like a lamp from your bedside table.
There are a few affordable LED lights out there that can make a world of difference, like the YONGNUO YN300 Air. This is a great choice for filling in shadows and allowing the subject video to stand out against the background.
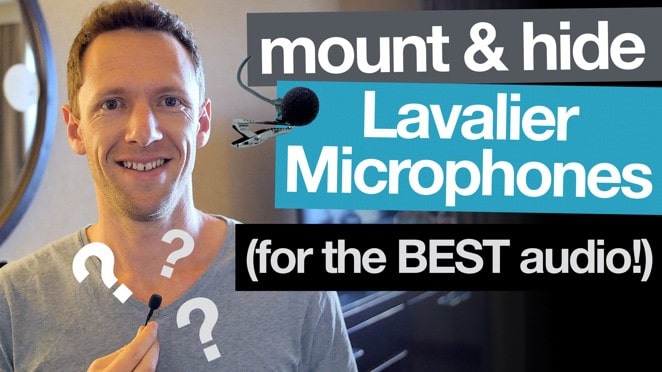
Step 7: Connect Your Microphone
So far we’ve talked mostly about the visual aspects of filming on your Android phone, so now let’s focus on the audio.
It’s easy to argue that high audio quality is the most important aspect of your video, possibly even more important than the picture itself.
If the viewers can’t hear you clearly because of scratchy distorted audio, it can be distracting. Not only that, but your message might not even be getting across to them through lack of engagement. Plus, as long as you’ve captured good audio footage, you can use that with B-roll stock footage, photos, text, graphics, etc. even if the video isn’t usable.
Try not to rely solely on the Android mic when it comes to audio. For crisp, clear sound, it’s recommended that you use an external mic, like the Boya BY-M1 Microphone. It will only set you back about $20 and it works with a variety of devices, including smartphones.
Just keep in mind that if your phone doesn’t have a headphone jack, you’ll need to use an adapter from USB-C to the headphone jack plug to connect to external microphones. The RODE VideoMicro is another great mic that requires an adapter for use with an Android device.
You can check out all our recommended gear for filming here.
Step 8: Check Phone Settings
The first aspect of checking a phone’s settings when preparing to film is to confirm that there’s enough storage to actually hold the videos that are about to be created. You might have to make room on your device by performing a backup or transferring data to another device altogether.
Battery life is the next phone setting to check. It’s a good idea to have a fully-charged phone before starting so that you don’t get that frustrating “Low Battery” notification halfway through filming.
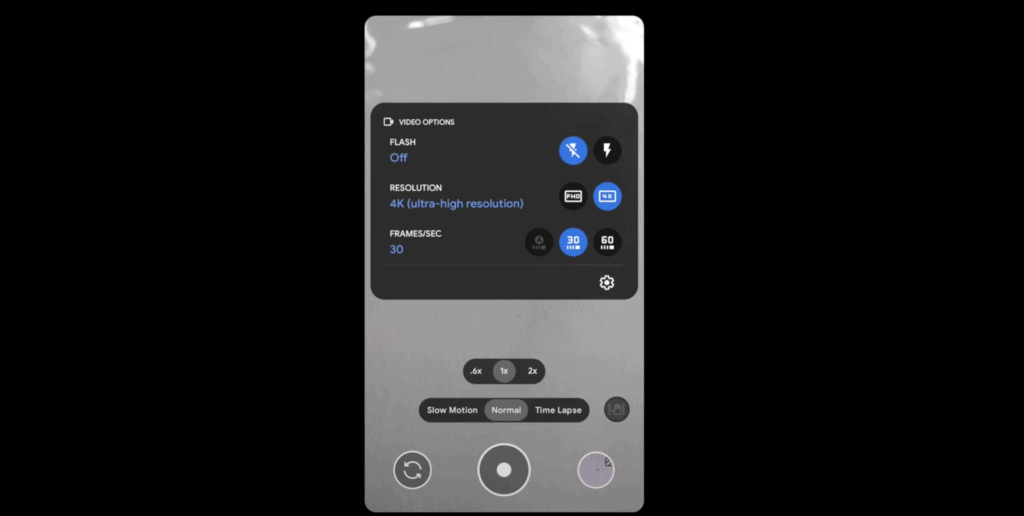
Next up are the camera recording quality settings, specifically resolution. The key thing to keep in mind is that the higher the res, the better. Some Androids are capable of shooting at 1080 pixels, while others are able to create videos in 4K. 4K is ideal, but 1080p (and even 720p if that’s your only option) is usually good enough.
The reason you want to start with the highest possible resolution is that it’s possible to lower the quality later on if needed. It doesn’t work that way for going from lower to higher pixel counts.
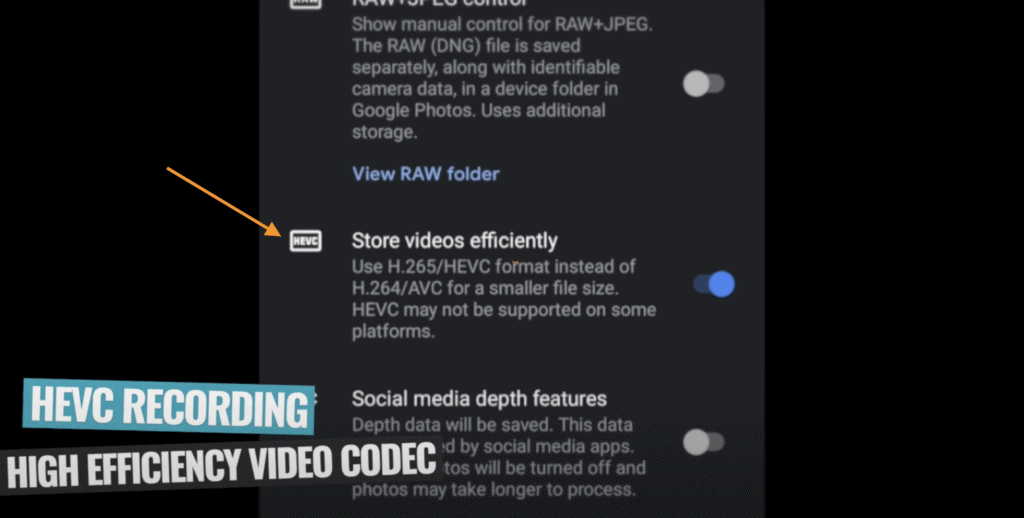
A Quick Note on HEVC Recording
HEVC, short for High Efficiency Video Coding, is something that Android users can turn on or off. Enabling HEVC will allow you to create smaller video files, but the downside is that some video editing software is unable to read files that are captured in HEVC.
For that reason, it’s recommended to disable the HEVC setting, which will give you the ability to use any program or app for video editing.
Step 9: Switch to Flight Mode or Do Not Disturb Mode
An Android device should always be set to Flight mode or Do Not Disturb mode while filming to prevent all notifications, texts, and phone calls from coming through.
Chances are, this smartphone is your main line of communication, so there’s no telling how many texts, emails, or calls you’ll get while you film a YouTube video with Android. These could potentially distract you, or even worse, delete what you’ve already filmed. So make sure not to skip the easy Step #9 of switching to Flight mode or Do Not Disturb mode.
Step 10: Lock Down Camera Settings
After checking your phone settings, next up comes Step #10 which is to lock down your camera settings.
It’s really cool that modern-day smartphones are capable of making adjustments based on things like exposure and brightness, but while shooting a video, it’s best to pre-set your ideal settings so that you (or whatever the video’s subject may be) remain the focus while filming.
A lot of Android devices simply require users to tap and hold a spot on the screen, which brings up a yellow box saying that “auto exposure and autofocus are now locked” on that specific point. This is also where you’ll be able to make adjustments to the brightness of your shot, which you can also lock down so that your phone won’t make any auto adjustments.

Some Androids are so advanced that they have a professional mode to adjust features like shutter speed, ISO, and white balance. Even if yours doesn’t, there are some great apps available for download on Android, like FiLMiC Pro.
This is our top pick for the best camera app for Android (and iPhone) filmmaking since it lets users take their video creation to the next level with DSLR-like settings to use directly on the phone. You can check out our complete tutorial to learn exactly how to use FiLMiC Pro.

There’s also the Open Camera app, which is a great, free alternative that’s similar to FiLMiC Pro. We also have a full tutorial on how to get the most out of the Open Camera app, but downloading either will give you a lot more options and features for making your video.
Step 11: Record a Test Video
You’ve already made it this far, so do yourself a favor by recording a test video before you move on to the real deal. This will give you a chance to check out the lighting, audio, and fix any flaws that need fixing.
For the test, set everything up as if it’s the real thing, sit exactly as you plan on sitting in the video, press record, and present for 10 to 20 seconds to see how everything is reading. This is a real time-saver, and the best part is that it will only take a few minutes of your time.
When you playback your video to make sure everything is ready for shooting, you might have to unplug your microphone to hear the audio. If that’s the case, just be sure to plug everything back in once your test is complete so that you don’t end up creating a video with no audio.
Step 12: Record Your Video
Now that you’ve done the preparation, it’s finally time to shoot video with your Android device!
While recording, there are 2 important things to keep in mind:
- Keep your eyes on the camera lens (not on yourself)
- Be mindful of distractions and remove them, move location, or wait for the distraction to pass
If you remember these tips while shooting and have gone through the previous 11 steps, all that’s left to do is focus on creating an epic Android video!
Now you’re Ready to Film Pro Videos on Android!
There you have it – the complete guide to shooting quality videos on your Android device.
Our 12 step process shows you everything you need to know to get the most out of your smartphone. Now you can create quality videos that you’ll be proud of and your audience will love too.
If you’d like a summarized version of these 12 steps, grab a copy of our checklist that you can use next time you’re filming on your Android device: Quick Reference Guide for Filming with Android! If you’d also like to learn how to film on iPhone, check out our full guide here!
Low Cost Tools for Android Filmmaking
While it’s not 100% necessary to invest in any additional gear, especially if you’re just starting out, there are a few tools that can take your smartphone videography to the next level.
We’ve already mentioned some helpful gear in the steps above on how to film professional videos with an Android, but here’s the complete list:
- Arkon Tripod + Phone Mount for stable, steady footage
- YONGNUO YN300 Air for high-quality lighting
- Boya BY-M1 Microphone for clear audio
- RODE VideoMicro for clear audio
- Osmo Mobile for better stability
- FiLMiC Pro for help with creating Android videos
- Open Camera (free app) for help with creating Android videos
Once again, it’s definitely not necessary to invest in all these tools, but a tripod mount or external mic could be what separates your professional-looking video from an amateur one.
Links
When available, we use affiliate links and may earn a commission!
Recommended Lighting Gear:
- YONGNUO YN300 Air (Amazon)
Recommended Microphones:
- Boya BY-M1 Microphone (Amazon)
- RODE VideoMicro (Amazon)
Recommended Filming Gear:
- Arkon Tripod + Phone Mount (Amazon)
- Osmo Mobile Stabilizer (Amazon)
Recommended Software/Apps:
Recommended Tutorials:
Recommended Gear & Resources
Check out an up-to-date list of all the gear, software & tools we use and recommend right now at Primal Video on our resources page here!
Related Content