Here’s how to remove background noise in video, quickly & easily!
There are lots of great apps & tools out there to help you remove noise in video. In this article, we’ll share the best tools for background noise reduction including free & paid options AND the best AI background noise removal tools.
Important: When available, we use affiliate links and may earn a commission!
Our top recommendation used to be to remove background noise in Audacity – an awesome free tool to remove background noise.
But now there are some amazing NEW options as well, including some really cool AI noise reduction tools! There are even some great audio editing tools built-in to video editing software which are really effective at removing background noise super easily.
You’ll learn how to remove background noise in your videos, step-by-step. We’ll also mention a few audio editing tips & tricks along the way to help you level up your video creation!
Now, to test these different background noise remover tools, Justin recorded two short videos in very noisy locations – one at the beach and one beside a busy road.
If you’d like to hear the difference these tools make, check out the video linked above. If not, read on!
Remove Background Noise Tool #1: Adobe Podcast
The first AI-powered tool to remove noise from a video is Adobe Podcast.

Adobe Podcast is an amazing free tool that has really powerful noise reduction and allows you to remove background noise from video online.
The first thing to know is when using this tool, you only need the audio track from your video file.
You can use any video editing software to save out an audio file from your video footage (Final Cut Pro, CapCut, VN Video Editor, etc.).

To do this, upload your video footage to your video editor and drag it onto the timeline.
Then you just want to export the audio in your video project. This will change slightly depending on the software you’re using.
In Final Cut Pro (as an example), you need to go to File → Share → Export File. Go to Settings, select Audio Only and adjust the Audio Format to MP3. Hit Next, name the project and press Save.

Now that you’ve got the audio recording, go to Adobe Podcast.
In the top menu press Quick Tools and go to Enhance Speech.
If you don’t already have an Adobe account, you’ll need to quickly create a free account and log in.

Then you can click Upload, select your audio file and then Open.
Adobe Podcast will then automatically remove background noise from your audio files. In our experience this works really quickly but it does say that some files can take up to 10 minutes.
After it’s processed, you can preview the audio by hitting Play. You can also turn toggle Enhance Speech on and off to see the difference it makes straight away.
Press Download to save the enhanced audio files to your computer and drop it back into your video editing tool.

Then drag it onto your timeline below your primary footage so it will line up perfectly. You can mute the audio on your primary video clip so you will only hear the new, enhanced audio.
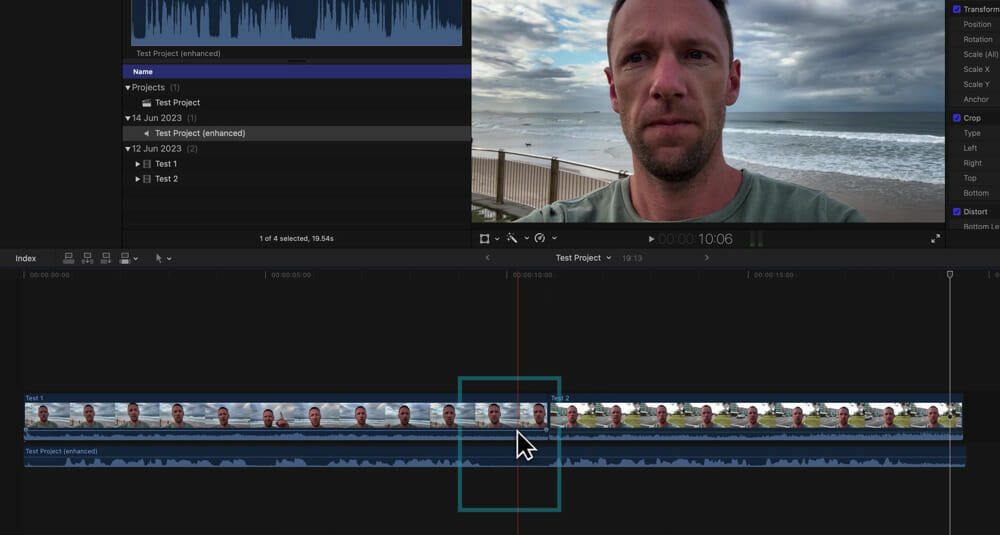
If we zoom in on our video editing timeline to look at the audio waveforms, you can see the huge difference Adobe Podcast’s feature has made.
In the original audio, there’s noise throughout the entire clip. In the enhanced audio, there are silences when Justin isn’t speaking. Not only has it done a great job of removing background noise, it’s also made Justin’s speech sound a lot clearer as well.
In this case, the results were actually much better with the second clip. The first example we tried sounded a little bit robotic. But overall it’s still a huge improvement.
Remove Background Noise Tool #2: Descript
The second tool we recommend is Descript.

Descript is SO much more than noise removal – it’s a full audio and video editing tool that also has some amazing AI functionality.
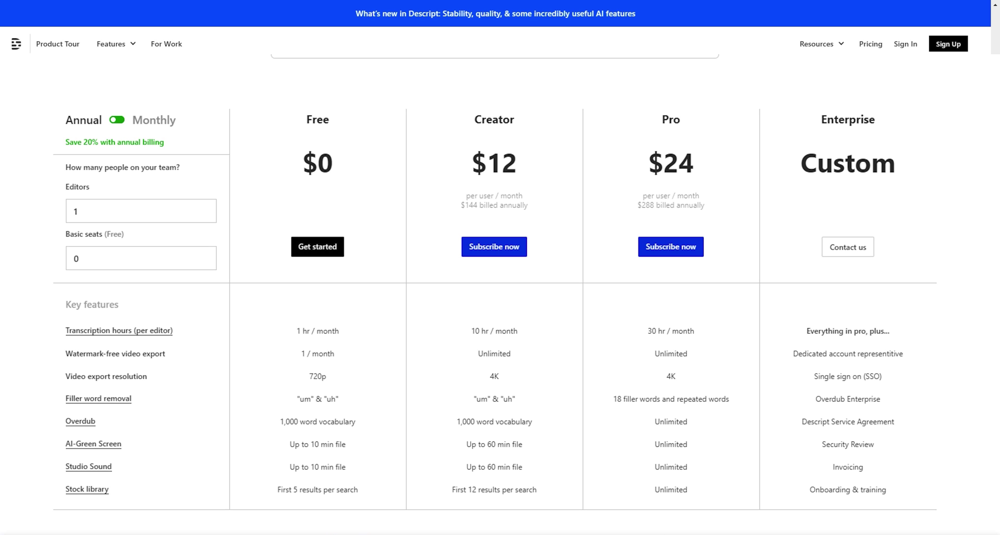
You only need the free version to access the tools we’ll be covering today, but if you jump on the paid version you’ll unlock a bunch of other great features.
Just note that on the free plan you’re limited to a 10 minute file when it comes to noise removal. And if you’re going to be exporting videos you’re limited to 720p.
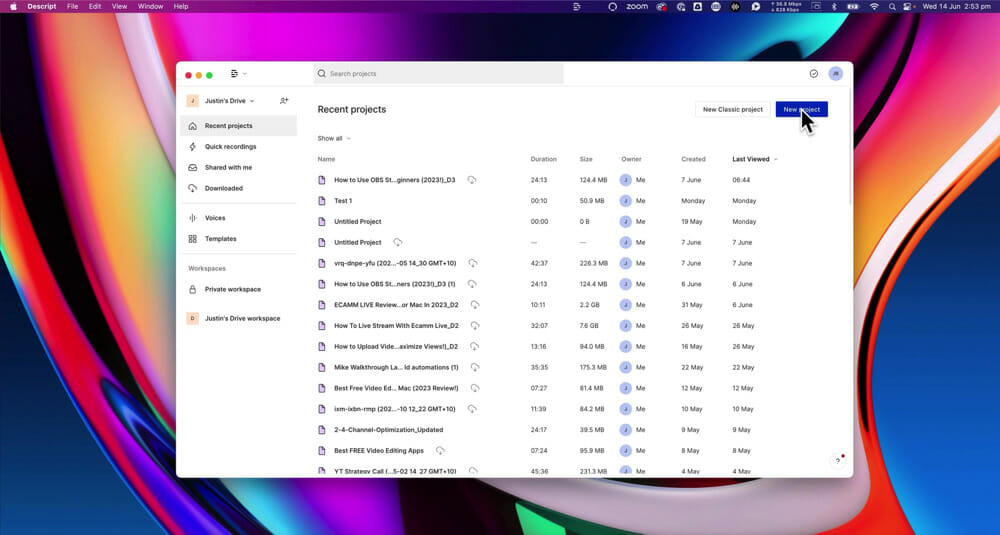
Start by creating a free account and then download the Descript app onto your computer.
Then go to New Project and select Choose a file to transcribe.
Because this is a complete video tool, you can import entire video files and even edit them down in Descript OR you can just import the audio tracks. So select your video file or MP3 file and select Open.
Descript will then automatically transcribe your video, which it does really quickly!
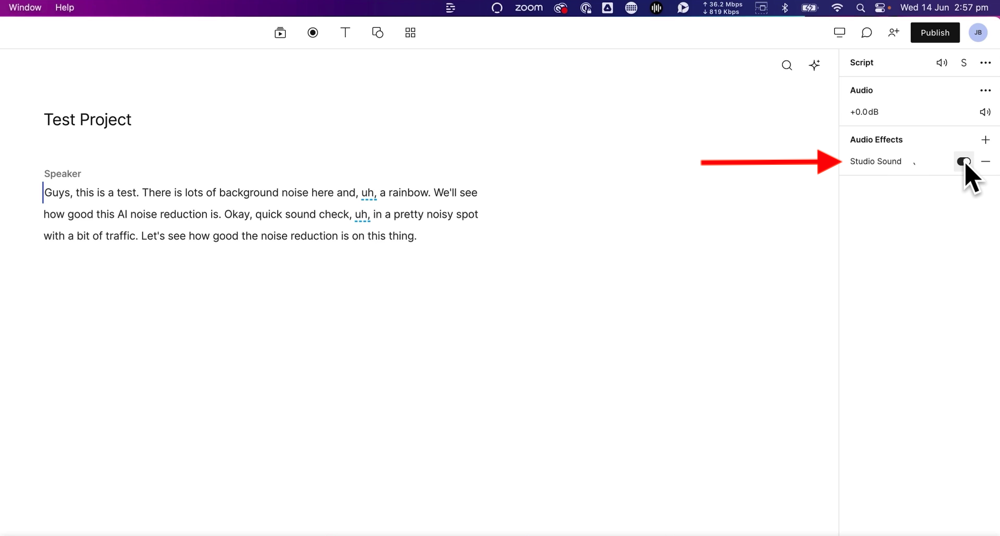
Once the file is imported, you can remove the background noise by toggling on Studio Sound in the right menu.
You’ll see a little notification that it has applied Studio Sound to your file, which means it’s done a bunch of audio adjustments including noise reduction and background noise removal.
Once again, you can press Play to hear the enhanced audio.
To save this out, go to Publish and then choose Export. Select your audio format – AAC, WAC or MP3 file. We’ll be choosing MP3 and then you can press Export.
The file will then be saved to your computer. You can go ahead and import that file to your video editing software. Then drag and drop it down onto the timeline.

How To Remove Background Noise In Video: Best Noise Removal Tool?
We’ve imported the audio files from Adobe Podcast and Descript into the same video editing timeline so we can compare the results.
You can see that the file from Adobe Podcast still has some noise in the quiet areas, whereas the file from Descript flatlines when Justin isn’t speaking.
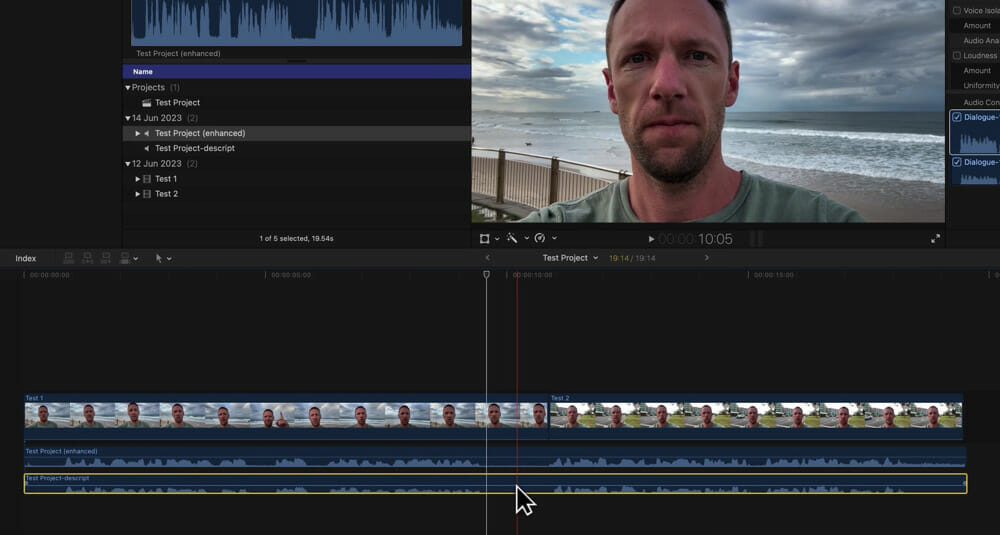
But that doesn’t necessarily mean that Descript it better, you might not want to totally wipe out the background noise. You might just want to enhance the speech so you can hear the person speaking more clearly.
Overall, both of these tools are great options when it comes to helping you clean unwanted background noise from your video footage.
The right tool to remove unwanted background noise will depend on your particular situation and use case. Try testing out both of these free tools to see which one works better for you!
So those are the best tools to remove background audio noise, leaving you with clean audio in your YouTube video or other video projects.
Now that you know how to remove background noise from video, level up your audio even further by adding some awesome background music and sound effects. Check out our complete guide on the Best Royalty Free Music Sites In 2023.
FAQ
How do I remove background noise from a video?
There are two awesome tools we recommend for removing background noise from videos – Adobe Podcast and Descript. Read the article above to find out how to use them.
Is there an app to remove background noise from a video?
There certainly is! Our top recommended app is Descript but you can also use an online tool called Adobe Podcast.
How do I remove background noise from a video for free?
Our top recommended tools to remove background noise are Adobe Podcast and Descript. They both allow you to remove background noise completely free of charge!
Recommended Gear & Resources
Check out an up-to-date list of all the gear, software & tools we use and recommend right now at Primal Video on our resources page here!


